The proliferation of desktop 3D printing and powerful single-board computers like the Raspberry Pi has given rise to an absolute explosion of small bespoke computing devices. Whether or not you think these cobbled together devices are close enough to Gibson’s original vision to call them cyberdecks, it’s a remarkable shift from the norm that brings us closer to the “High Tech, Low Life” philosophy so prevalent in cyberpunk literature and films.
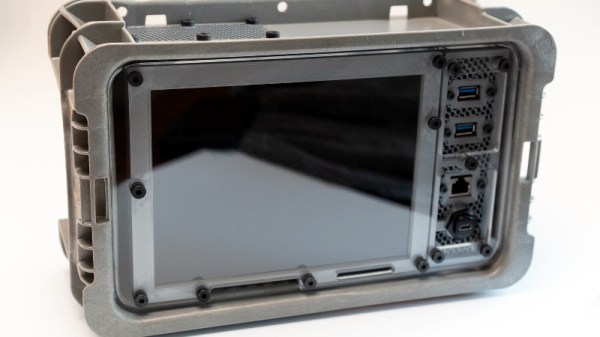
 [Jay Doscher] has been on the front lines of this movement for some time now, producing several very popular designs. His latest creation leans hard into the more utilitarian aspects of the cyberpunk ethos, inspired more by the grit of The Expanse than the lusciously upholstered interiors of Star Trek’s Enterprise-D. The culmination of lessons learned over the last several years, the new Kuiper Deck is cheaper and easier to build than his previous designs, thanks at least in part to the fact that you no longer need to go out and get an expensive Pelican case.
Like his previous designs, the Kuiper Deck makes extensive use of 3D printed components. But this time around, [Jay] is using an array of smaller pieces that are bolted together on an acrylic front panel. This not only means the project is compatible with a wider array of machines, such as the Prusa Mini, but it’s also easier to print as larger parts have an annoying tendency to warp. The downside is that you’ll need some way to get the acrylic panel cut to shape, though you can buy one through him if you don’t have any way to get it made locally.
In place of the Pelican case his previous designs used as an enclosure, [Jay] has found a heavy-duty stackable plastic tote available from McMaster Carr for $12 USD. It’s not particularly nice looking, nor is it waterproof. But that’s also sort of the point. If you’re just trying to put together a small computer that you can toss around the shop and not have to worry about breaking, the Pelican case was always a bit overkill.
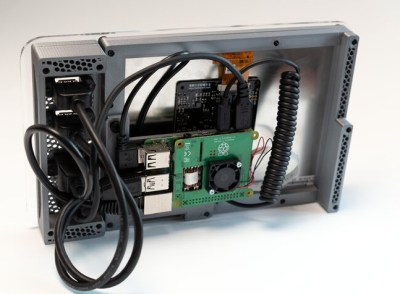
The electronics bill of materials is similarly sparse, comprising mainly of the Raspberry Pi 4, a cooling fan, and a 10 inch LCD from Pimoroni. Everything gets screwed to the rear of the panel and connected with pre-made cables, making assembly very simple. That said, there’s still plenty of room inside the case for custom hardware should you want to put something custom together such as a mobile software defined radio rig.
[Jay] created the original Raspberry Pi Field Unit in 2015, but it wasn’t until he unveiled the revised Raspberry Pi Recovery Kit in 2019 that the idea of sticking a Raspberry Pi into a Pelican case became something of hacker meme. It sounds like the Kuiper Deck is going to be his final word on the subject for now, but it’s a safe bet we’ll be seeing folks putting together similar builds for years to come.
