The Soviet RBMK Reactor: 35 Years After The Chernobyl Disaster

Thirty-five years ago, radiation alarms went off at the Forsmark nuclear power plant in Sweden. After an investigation, it was determined that the radiation did not come from inside the plant, but from somewhere else. Based on the prevailing winds at that time, it was ultimately determined that the radiation came from inside Soviet territory. After some political wrangling, the Soviet government ultimately admitted that the Chernobyl nuclear plant was the source, due to an accident that had taken place there.

Following the disaster, the causes have been investigated in depth so that we now have a fairly good idea of what went wrong. Perhaps the most important lesson taught by the Chernobyl nuclear plant disaster is that it wasn’t about one nuclear reactor design, one control room crew, or one totalitarian regime, but rather the chain of events which enabled the disaster of this scale.

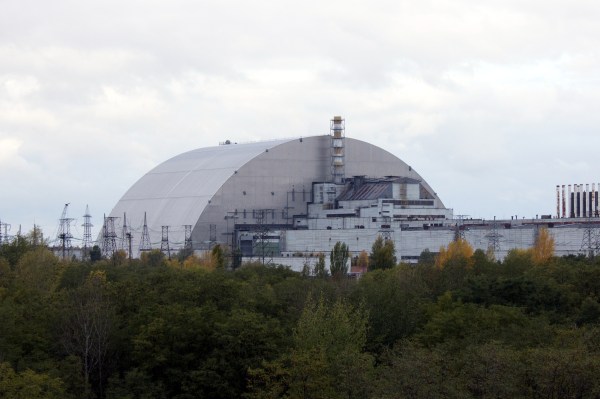
To illustrate this, the remaining RBMK-style reactors — including three at the Chernobyl plant — have operated without noticeable issues since 1986, with nine of these reactors still active today. During the international investigation of the Chernobyl plant disaster, the INSAG reports repeatedly referred to the lack of a ‘safety culture’.

Looking at the circumstances which led to the development and subsequent unsafe usage of the Chernobyl #4 reactor can teach us a lot about disaster prevention. It’s a story of the essential role that a safety culture plays in industries where the cost of accidents is measured in human life.

Continue reading “The Soviet RBMK Reactor: 35 Years After The Chernobyl Disaster”

Modified Microwave Cures Resin Parts With Style

Once you make the leap to resin-based 3D printing, you’ll quickly find that putting parts out in the sun to cure isn’t always a viable solution. The best way to get consistent results is with a dedicated curing chamber that not only rotates the parts so they’re evenly exposed to the light, but allows you to dial in a specific curing time. A beeper that goes off when the part is done would be handy as well. Wait, this is starting to sound kind of familiar…

As you might expect, [Stynus] isn’t the first person to notice the similarities between an ideal UV curing machine and the lowly microwave oven. But his conversion is certainly one of the slickest we’ve ever seen. The final product doesn’t look like a hacked microwave so much as a purpose-built curing machine, thanks in large part to the fact that all of the original controls are still functional.

The big break there came when [Stynus] noticed that the control panel was powered by a one-time programmable PIC16C65B microcontroller. Swapping that out for the pin-compatible PIC16F877A opened up the possibility of writing custom firmware to interface with all the microwave’s original hardware, he just needed to reverse engineer how it was all wired up. It took some time to figure out how the limited pins on the microcontroller ran the LED display and read the buttons and switches at the same time, but we’d say the final result is more than worth the work.

With full control over the microwave’s hardware, all [Stynus] had to do was strip out all the scary high voltage bits (which were no longer functional to begin with) and install an array of UV LEDs. Now he can just toss a part on the plate, spin the dial to the desired curing time, and press a button. In the video below, you can see he’s even repurposed some of the buttons on the control panel to let him do things like set a new default “cook” time to EEPROM.

Compared to the more traditional fused deposition modeling (FDM) 3D printers, resin printing requires a lot of additional post-processing and equipment. You don’t necessarily have to gut your microwave just to cure your prints, but you’d be wise to fully consider your workflow will look like before pulling the trigger on that shiny new printer.

Continue reading “Modified Microwave Cures Resin Parts With Style”

RCA Plug Plays Sixteen-Minute Chiptune Piece, All By Itself

Frequenters of arcades back in the golden age of video games will likely recall the mix of sounds coming from a properly full arcade, the kind where you stacked your quarters on a machine to stake your claim on being next in line to play. They were raucous places, filled with the simple but compelling sounds that accompanied the phosphor and silicon magic unfolding all around.

The days of such simple soundtracks may be gone, but they’re certainly not forgotten, with this chiptunes generator built into an RCA plug being both an homage to the genre and a wonderful example of optimization and miniaturization. It’s the work of [girst] and it came to life as an attempt to implement [Rob Miles]’ Bitshift Variations in C Minor algorithmically generated chiptunes composition in hardware. For the first attempt, [girst] chose an ATtiny4 as the microcontroller, put it and the SMD components needed for a low-pass filter on a flex PCB, and wrapped the whole thing around a button cell battery. Stuffed into the shell of an RCA plug, the generator detects when it has been inserted into an audio input jack and starts the 16-minute piece. [girst] built a second version, too, using the Padauk PSM150c “Three-Cent Microcontroller” chip.

This is quite an achievement in chiptunes minimization. We’ve seen chiptunes in 32 bytes, Altoids tin chiptunes, and an EP on a postage-stamp-sized PCB, but this one might beat them all on size alone.

Continue reading “RCA Plug Plays Sixteen-Minute Chiptune Piece, All By Itself”