Know Audio: It All Depends On The DAC

Our trip through the world of audio technology has taken us step-by step from your ears into a typical home Hi-Fi system. We’ve seen the speakers and the amplifier, now it’s time to take a look at what feeds that amplifier.

Here, we encounter the first digital component in our journey outwards from the ear, the Digital to Analogue Converter, or DAC. This circuit, which you’ll find as an integrated circuit, takes the digital information and turns it into the analogue voltage required by the amplifier.

There are many standards for digital audio, but in this context that used by the CD is most common. CDs sample audio at 44.1 kHz 16 bit, which is to say they express the level as a 16-bit number 44100 times per second for each of the stereo channels. There’s an electrical standard called i2s for communicating this data, consisting of a serial data line, a clock line, and an LRclock line that indicates whether the current data is for the left or the right channel. We covered i2s in detail back in 2019, and should you peer into almost any consumer digital audio product you’ll find it somewhere. Continue reading “Know Audio: It All Depends On The DAC”

an image of kicad's homepage

KiCad Team Releases Warning Regarding Domain Name

On October 19th, [Seth_h] from the KiCad Project posted on the KiCad forums that the project’s original domain name kicad-pcb.org has been unexpectedly sold to a third party, and urged members of the community to avoid any links to this old website.

KiCad has used the domain kicad-pcb.org since 2012 as the official source for information on and downloads of their popular open-source electronics design software. Unfortunately, the original domain name was purchased before KiCad was formalized as an organization, so it was not directly under their control. This all came to head when the old domain name was unexpectedly sold to an unnamed third party that was not affiliated with the project. Currently, the old domain is just a website covered in ads, but the KiCad team fears that it may be used maliciously in the future.

With KiCad’s popularity, thousands of tutorials, articles, and project guides over the years have included links to the old KiCad domain. A Google search in October 2021 found more than 19,000 instances of the old domain spread across the internet. [Seth_h] has called upon the community to make every effort possible to update old links, reducing the chance that people stumble across the wrong website.

[Editor’s Note: We think we got ’em all, let us know if we missed any.]

Luckily, Digikey has swooped in to help save the day. They purchased a new domain, kicad.org, from squatters and donated it to the KiCad Project. (Update: Digi-key donated the KiCad.org domain back in October of 2020 after noticing fishy squatters going back to at least 2016) [Seth_h] explains in his post that a number of safeguards have been put in place to prevent this from happening in the future, including not having the domain name owned by a single person, and having all KiCad trademarks registered to the Linux Foundation.

There’s a good reason why KiCad has gotten so popular, it is packed full of great features for PCB design. Check out our coverage of some of the new features we are most excited for in KiCad 6.0 here.

spinning thread extruder

Spinning Threads Put The Bite On Filament In This Novel Extruder Design

When it comes to innovation in FDM 3D printing, there doesn’t seem to be much room left to move the needle. Pretty much everything about filament printing has been reduced to practice, with more or less every assembly available off the shelf. Even the business end — the extruder — is so optimized that there’s not much room left for innovation.

Or is there? The way [David Leitner] sees it, there is, which is why he built this rolling-screw extruder (if you can get to the Thingiverse link, [David] cross-posted on reddit, too). Standard extruders work on the pinch-roller principle, where the relatively soft filament is fed past a spring-loaded gear attached to a stepper motor. The stepper rotates the gear, which either advances the filament into or retracts it from the hot end. [David]’s design instead uses a trio of threaded rods mounted between two rings. The rods are at an angle relative to the central axis of the rings, forming a passage that’s just the right size for the filament to fit in. When the rings spin, the threads on the rods engage with the filament, gripping it around its whole circumference and advancing or retracting it depending on which way it’s spinning. The video below shows it working; we have to admit it’s pretty mesmerizing to watch.

[David] himself admits there’s not much advantage to it, perhaps other than a lower tendency to skip since the force is spread over the entire surface of the filament rather than just a small pinch point. Regardless, we like the kind of thinking that leads to something like this, and we’ll bet there are probably unseen benefits to it. And maybe the extruder actually is a place for innovation after all; witness this modular nozzle swapping system.

Continue reading “Spinning Threads Put The Bite On Filament In This Novel Extruder Design”

An Arduino Nano connected to a portable tape recorder

Audio Tape Interface Revives Microcassettes As Storage Medium

In the early 1980s cassette tapes were the standard storage medium for home computer users; readers of a certain age will remember fiddling with audio jacks, tape counters and signal levels, then waiting for several minutes while a program (hopefully) loaded correctly. While most people happily upgraded to much more reliable floppy disks, [Zack Nelson] decided to go back in time and add a suitably classic storage medium to a retrocomputing project, in the form of a cassette interface. The cassette player he had available was a Pearlcorder L400, which uses the smaller microcassette instead of the familiar audio tapes used in your Walkman or boombox.

A microcassette and a computer interface for a tape recorder
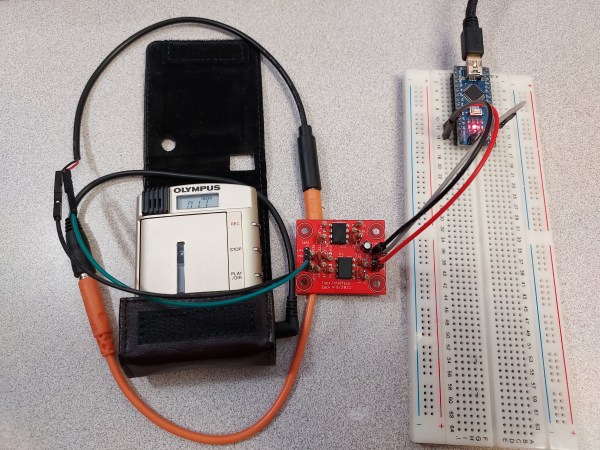
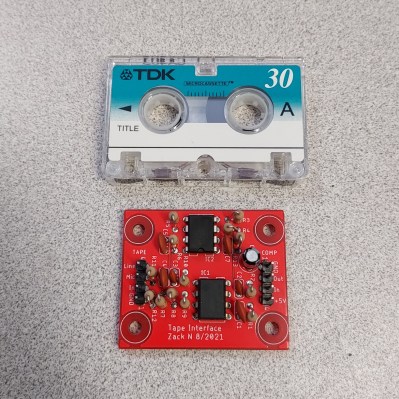
[Zack] designed the entire thing from the ground up: first he decided to use differential Manchester encoding,  which provides immunity against common disturbances like speed variations (which cause wow and flutter). The data is encoded in the frequency range from 1 kHz to 2 kHz, which suits the bandwidth of the cassette player. Next, he designed the interface between the computer and the tape recorder; built from an op-amp and a comparator with a handful of discrete components, it filters the incoming signal and clips it to provide a clean digital signal to be read out directly by the computer.

The system is demonstrated by hooking it up to an Arduino Nano, which reads out the data stream at about 3000 baud. The noise it makes should bring back memories to anyone brought up with the “PRESS PLAY ON TAPE” message; if it inspires you to make your own, we’re happy to report that full schematics and source code are available. [Zack] is not the first one to make his own cassette interface; we’ve seen a somewhat more complicated analog design before, as well as one based on an FPGA.