A lot of making goes on in this community these days, but sometimes you’ve just gotta do some old fashioned hacking. You might have grabbed an old Speak and Spell that you want to repurpose as an interface for a horrifyingly rude chatbot, or you’ve got a calculator that is going to become the passcode keypad for launching your DIY missiles. You want to work with the original hardware, but you need to figure out how to interface all the buttons yourself.
Thankfully, this is usually an easy job. The vast majority of buttons and keypads and keyboards are all implemented pretty much the same way. Once you know the basics of how to work with them, hooking them up is easy. It’s time to learn about key matrixes!
A hackerspace is a place that generally needs to be accessed by a wide group of people, often at weird and unusual hours. Handing around keys and making sure everything is properly locked up can be messy, too. To make it easy for hackers to get in to [Peter]’s local hackerspace, a simple electronic system was whipped up to grant access.
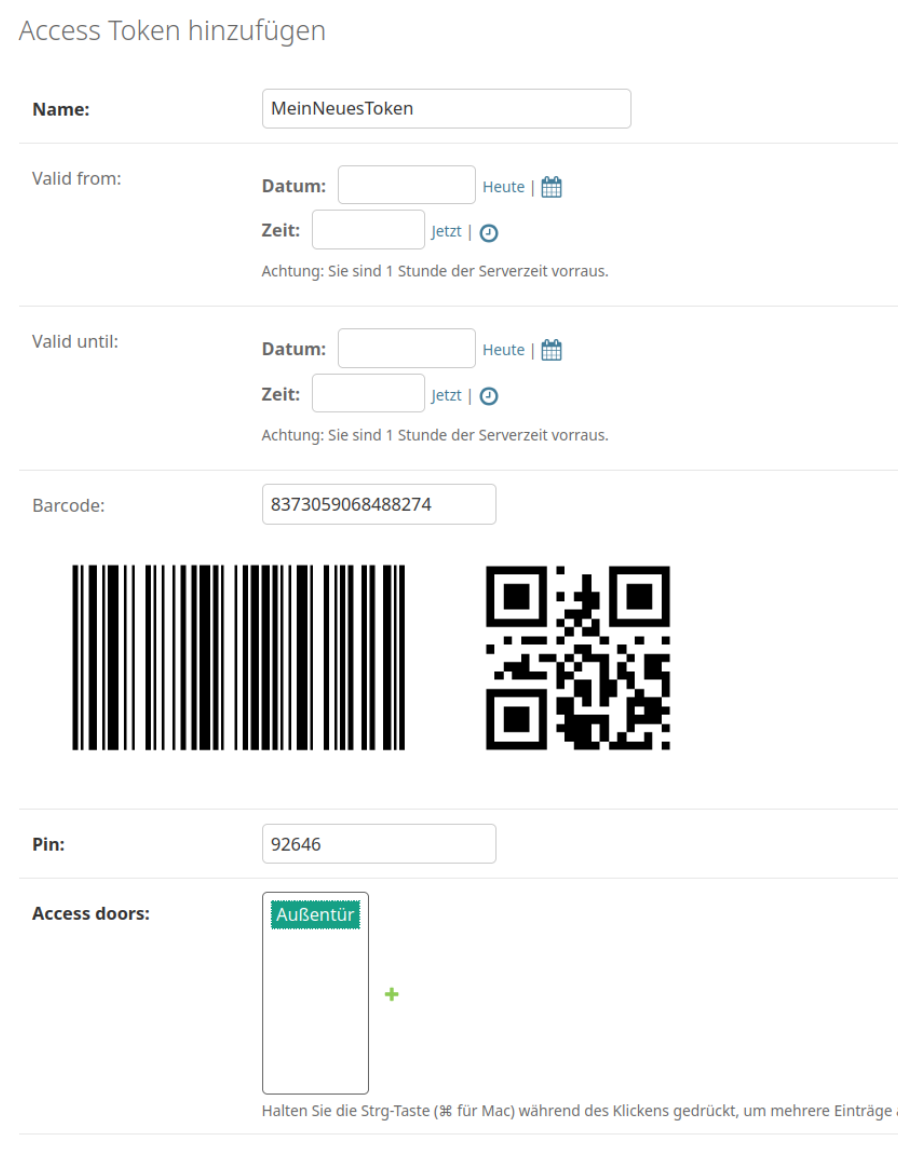
The combined use of QR code & PIN adds a layer of security.
The basic components of the system are a keypad, a QR code and barcode scanner, a stepper motor, an Arduino Nano, and a Raspberry Pi. The keypad is read by an Arduino Nano, which is also responsible for talking to a stepper motor driver to actuate the lock cylinder. A secondary Arduino mounted inside the building is used to control the stepper motor, which actuates the lock cylinder once authentication is complete.
The system works on the basis of two-factor authentication. Regular users authenticate to enter by presenting a QR code or barcode, and entering a matching PIN number. The system can also be set up for PIN-only entry on a temporary basis.
For example, if the hackerspace is running an event, a simple four-digit pin can allow relatively free access for the duration without compromising long-term security. Actual authentication is handled by the Raspberry Pi, which takes in the scanned barcode and/or PIN, hashes it, and checks it against a backend database which determines if the credentials are valid for entry. If so,they command the second Arduino to unlock the door.
While it’s not technically necessary for a project like this — in fact, you could argue it’s preposterously overkill — we have to take particular note of the machined aluminum enclosure for the keypad. Mere mortals could just run it off on their 3D printers, but if you’ve got access to a CNC router and a suitably chunky piece of aluminum, why not show off a bit?
The construction of a large language model (LLM) depends on many things: banks of GPUs, vast reams of training data, massive amounts of power, and matrix manipulation libraries like Numpy. For models with lower requirements though, it’s possible to do away with all of that, including the software dependencies. As someone who’d already built a full operating system as a C learning project, [Ethan Zhang] was no stranger to intimidating projects, and as an exercise in minimalism, he decided to build a generative pre-trained transformer (GPT) model in the kernel space of his operating system.
As with a number of other small demonstration LLMs, this was inspired by [Andrej Karpathy]’s MicroGPT, specifically by its lack of external dependencies. The first step was to strip away every unnecessary element from MooseOS, the operating system [Ethan] had previously written, including the GUI, most drivers, and the filesystem. All that’s left is the kernel, and KernelGPT runs on this. To get around the lack of a filesystem, the training data was converted into a header to keep it in memory — at only 32,000 words, this was no problem. Like the original MicroGPT, this is trained on a list of names, and predicts new names. Due to some hardware issues, [Ethan] hasn’t yet been able to test this on a physical computer, but it does work in QEMU.
It’s quite impressive to see such a complex piece of software written solely in C, running directly on hardware; for a project which takes the same starting point and goes in the opposite direction, check out this browser-based implementation of MicroGPT. For more on the math behind GPTs, check out this visualization.