Last time we found out the idea of space stations is surprisingly old. By the 1950s, everyone knew we’d be working in beautiful space stations that rotated like a wheel to give us the illusion of gravity. Of course, that didn’t happen. But we did get some practical space stations, even before the current crop. The road to get there, though, was predictably bumpy.
Convair: From TASSEL to MARS
Convair had been studying multi-person orbital stations under Krafft Ehricke since the late 1950s. One result was TASSEL, an acronym for the Three Astronaut Space System Experimental Laboratory. Proposed in 1960, TASSEL was a three-man laboratory intended for an Atlas-Centaur launch into a roughly 200-nautical-mile orbit and missions lasting two or three weeks.
Around the same time, the Air Force asked contractors for proposals for a Military Test Space Station, or MTSS. Convair was one of five companies selected for the study in 1960. The surviving record suggests that Convair’s TASSEL work fed directly into its MTSS proposal.
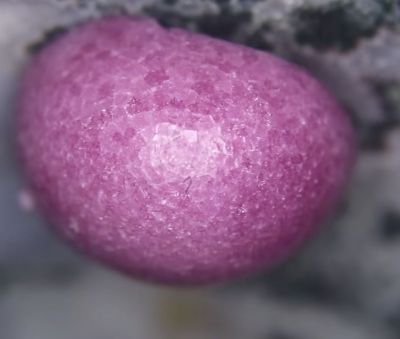
Not the prettiest ruby, for sure. (Credit: Gems of Science, YouTube)
Sapphires and rubies aren’t just pretty, they also got a range of practical uses. This makes it even more useful to be able to make them at home for obviously completely innocent experiments. Cue [Gems of Science] and his attempts to make good-looking rubies, without resorting to the brute-force laser blasting approach that [Styropyro] previously used to create murky-looking gems.
That basic method used involves blasting aluminium oxide with a laser, which results in a container full of what are technically gems, but – as the image on the right makes clear – not exactly the prettiest or easiest to shine up. Much of the problem here is that these are hollow geodes composed of countless tiny crystals instead of solid singular crystals.
Although there are commercial ways to fairly easily create large crystals from a small seed crystal, none of these lend themselves to a DIY hobbyist with just a garage to muck about in. This leaves one alternative: the flux method. Rather than melting the material that will be grown onto the seed crystal, this flux crystal growth method uses a solvent (flux) and temperatures that a home kiln can achieve.
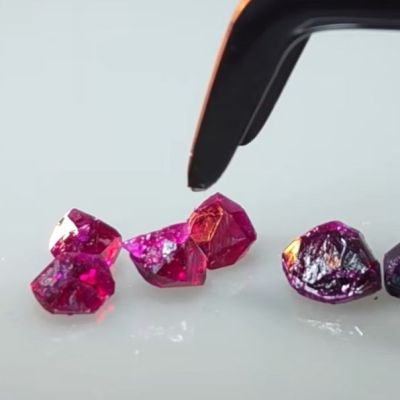
These rubies may be small, but are very shiny. (Credit: Gems of Science, YouTube)
Of note here is also that it’s the addition of Cr3+ ions into the base Al2O3 matrix that makes a ruby into a ruby, by giving it its red glow. In order to grow crystals this way you need to pick not only a suitable solvent, but also use a crucible that doesn’t want to become part of said crystal. Unfortunately a platinum crucible runs into the thousands of USD, but a graphite crucible should do if you keep oxygen away from it.
For the flux molybdenum oxide was used, mixed with chromium oxide and aluminium oxide to provide the ingredients for crystal growth. Unfortunately added charcoal interfered with the molybdenum, ruining that batch. This led to trying out more crucible types to find a recipe that worked, thereby finding out that an ‘alumina’ crucible also contained silica, which poisons the reaction, resulting in only tiny ruby crystals.
Ultimately pure alumina crucibles seemed to work great, until they began to shatter en masse, resulting in pained wallet noises and the purchases of some pre-loved platinum crucibles. This worked really well, but now the flux was evaporating too quickly to enable large crystal growth, thus requiring additives to stabilize it. Along with temperature cycling to induce the growth of larger crystals, this finally generated some solid results. After a first batch of smaller rubies, next up larger ones of up to 10 mm were grown.
While cutting one of these large rubies to set into a ring it was clear that it was still rather flawed, with pockets of flux captured into the crystal, but with the basic method now more or less dialed in it should be possible to address these small flaws as well.
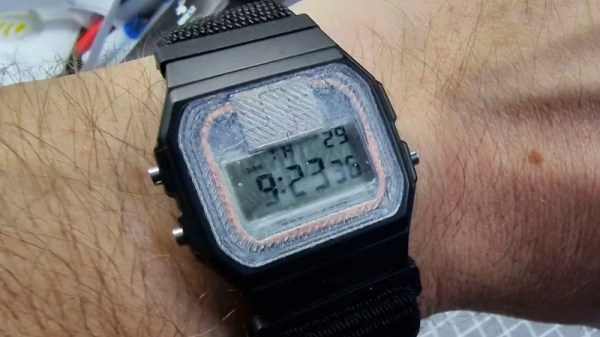
The Casio F-91W digital watch is perhaps one of the most successful pieces of consumer electronics ever made, having quietly supplied the essential function of an inexpensive and accurate LCD digital timepiece for many decades. As a result it has a huge following, and we’ve seen plenty of projects based upon it. [Matteo P] has one that we think you’ll like, he’s turned his Casio into a contactless payment device. We missed it when it came out, but sometimes a good project needs sharing.
If you’re a long-time Hackaday reader you may remember our investigation of 13.56 MHz NFC cards in which we showed you a disassembled card in which he antenna was a tuned circuit covering most of the card, with a small coupling coil for the chip. It’s this kind of card he uses, and ends up with an SLA printed front face for the watch that places the chip above the display and puts a pick-up coil around the outside. The most interesting part of the write-up though isn’t in the build, instead it’s the deep-dive into designing the RF parts and ensuring a good coupling at something close to resonance. Read it, if you fancy trying NFC-enabling any other random items.