Secret Messages On Plastic, Just Add Tesla Coil

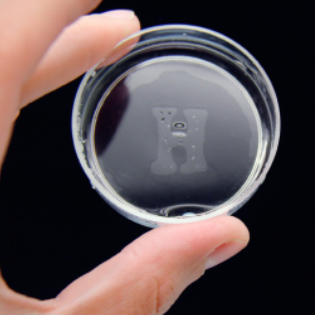
Here’s a short research paper from 2013 that explains how to create “hydroglyphics”, or writing with selecting surface wetting. In it, an apparently normal-looking petri dish is treated so as to reveal a message when wetted with water vapor. The contrast between hydrophobic and hydrophilic surfaces, which is not visible to the naked eye, becomes visible when misted with water. All it took was a mask, and a little treatment with a modified Tesla coil.
Plastics tend to be hydrophobic, meaning their surface repels water. These plastics also tend to be non-receptive to things like inks and adhesives. However, there is an industrial process called corona treatment (invented by Verner Eisby in 1951) that changes the surface energy of materials like plastics, rendering them more receptive to inks, coatings, and adhesives. Eisby’s company Vetaphone still exists today, and has a page describing the process.

What’s this got to do with the petri dishes and their secret messages? The process is essentially the same. By using a Tesla coil modified with a metal wire mesh, the surface of the petri dish is exposed to the coil’s discharge, altering its surface energy and rendering it hydrophilic. By selectively blocking the discharge with a nonconductive mask made from a foam sticker, the masked area remains hydrophobic. Mist the surface with water, and the design becomes visible.

The effects of corona treatment decay over time, but we think this is exactly the sort of thing that is worth keeping in mind just in case it ever comes in useful. Compact Tesla coils are fairly easy to get a hold of nowadays, but it’s also possible to make your own.

Cheap Musical Tesla Coil Put Through Its Paces

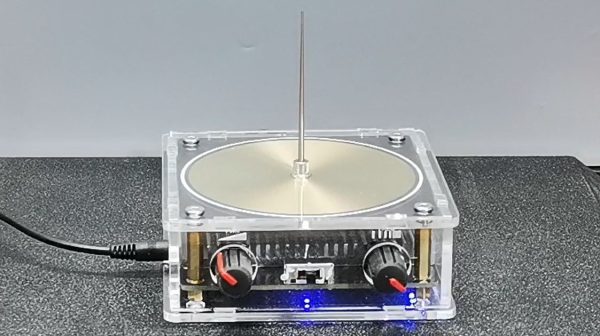
Once upon a time, musical Tesla coils were something you primarily saw at high-voltage hobby meets. They’ve become more popular in recent years, and now you can even buy cheap examples online. [mircemk] decided to buy one and gave it a whirl.

The device comes with a power supply capable of delivering 2 amps at 48 V.  It’s a solid-state design, relying on SMD MOSFETs to generate high-voltage, high-frequency output that makes the sparks we all know and love. The pancake coil is key to the design, and is made using a trace on the PCB — a neat technique compared to making one with a laborious winding operation.

The coil can be used to simply generate sparks, or it can be modulated musically. In this mode of operation, it’s intended to be driven by square wave audio for simplicity’s sake. As seen in [mircemk]’s video, the sound quality is pretty decent for a cheap device, and the Super Mario theme is readily recognizable. As a guide, he also demonstrates how to drive the device using an Arduino set up for square wave audio output.

If you prefer to build your own singing Tesla coil, you can go that route instead. Or, you could buy one of these and hack it, and drop us a line with what you come up with! Similar devices are all over the ‘net. Continue reading “Cheap Musical Tesla Coil Put Through Its Paces”

Build Your Own Class-E Musical Tesla Coil

We’ve all seen a million videos online with singing Tesla coils doing their thang. [Zach Armstrong] wasn’t content to just watch, though. He went out and built one himself! Even better, he’s built a guide for the rest of us, too!

His guide concerns the construction of a Class-E solid state Tesla coil. These are “underrated” in his opinion, as they’re simple, cheap, and incredibly efficient. Some say up to 95% efficient, in fact! It’s not something most Tesla coil fans are concerned with, but it’s nice to save the environment while making fun happy sparks, after all.

[Zach]’s guide doesn’t just slap down a schematic and call it good. He explains the theory behind it, and the unique features too. He uses an adjustable Schmitt trigger oscillator for the build, and he’s naturally given it an audio modulation capability because that’s a good laugh, too.

If you’ve ever wanted to convince you’re friends you’re incredibly smart and science-y, you can’t go wrong with a singing Tesla coil. This beats out Jacob’s ladder and most other plasma experiments for sheer mad scientist cred.

Have fun out there! Video after the break.

Continue reading “Build Your Own Class-E Musical Tesla Coil”

A Single Transistor Solid State Tesla Coil

Tesla coils are one of those builds that capture the interest of almost anybody passing by. For the naïve constructor, they look simple enough, but they can be finicky beasts—beasts that can bite if not treated with respect. [Mirko Pavleski] has some experience with them and shares it with us over on Hackaday.io. One of the first big improvements of this build style is the shift from the originally used spark gap commutator to that of a direct AC drive via a MOSFET oscillator. This improves the primary drive power for its size and eliminates that noisy spark gap. That’s one less source of broadband RF noise and the audible racket these produce.

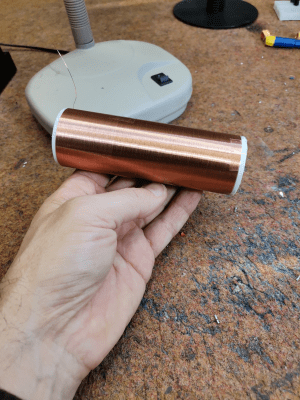
A hand holding a secondary coil for a Tesla coil build
You can buy ready-wound secondary coils from the usual CN suppliers

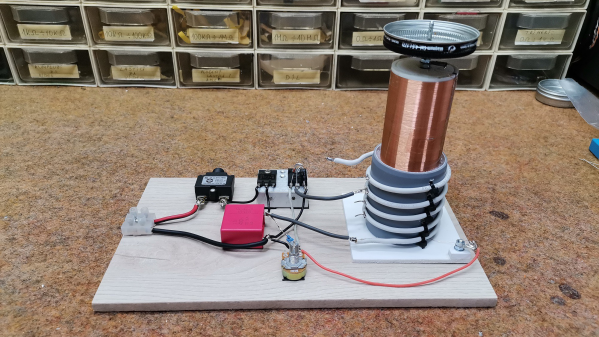
The primary side of a Tesla coil is usually a handful of turns of thick wire to handle the current without melting. This build runs at two or three amps, giving a primary power of around 150 Watts. However, this is quite a small unit; with larger ones, the power is much higher, and the resulting discharge sparks much longer. On the secondary side, the air-coupled coil is formed from 520 turns of much thinner wire since it doesn’t need to convey so much current. That’s the thing with transformers with large turns ratios — the secondary voltage will be much higher, and the current will be correspondingly much lower. The idea with Tesla coils is that the secondary circuit forms a resonant circuit with the ‘top load’, usually some hollow metal can. This forms an LC circuit with a corresponding resonant frequency dependent on the secondary inductance values, the object’s capacitance and anything else connected. The primary circuit is designed to resonate at this same frequency to give maximum power coupling across the air gap. Changing either circuit can spoil this balance unless there is a feedback circuit to keep it in check. This could be with a sense coil, a local antenna or something more direct, like in this case.

To ensure the primary circuit doesn’t melt, it needs to be able to drive a reasonable current at this frequency, often in the low MHz range. This leads to a common difficulty: ensuring the switching transistor and rectifying diode are fast enough at the required current level with enough margin. [Mirko] points out several components that can achieve the operating frequency of around 1.7 MHz, which his top load configuration indicates.

For a bit more info on building these fascinating devices, you could check out our earlier coverage, like this useful guide. Of course, simple can be best. How about a design with just three components?

Continue reading “A Single Transistor Solid State Tesla Coil”

Another Tesla Coil Starts

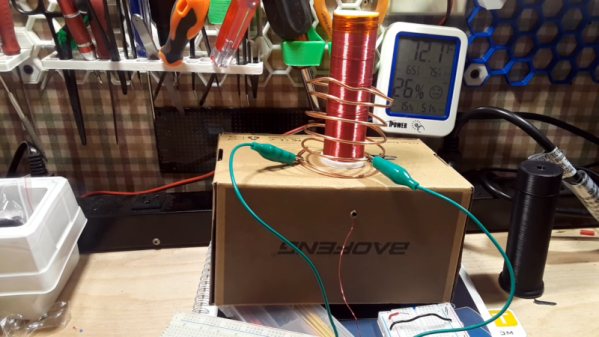
Everyone interested in electronics should build at least one Tesla coil. But be careful. Sure, the high voltage can be dangerous, but the urge to build lots of coils is even worse. [Learnelectronics] shows how to build a slayer exciter using a 3D-printed core, and lots of wire of course. You can see the coil, an explanation of the design, and a comparison to a cheap kit in the video below.

Of course, you hear about Tesla coils, but it is really more of a Tesla transformer. The 3D-printed core holds the many turns of the secondary coil. The larger Tesla coil, amusingly, upset the camera which made it hard to get close-up shots.

Continue reading “Another Tesla Coil Starts”

No Acid: Open ICs With A Tesla Coil

We’ve taken ICs apart before, but if they are in an epoxy package, it requires some lab gear and a lot of safety. Typically, you’ll heat the part and use fuming nitric acid (nasty stuff) in a cavity milled into the part to remove the epoxy over the die. While [100dollarhacker] doesn’t provide much detail, he appears to have used a Tesla coil to do it — no hot acid required.

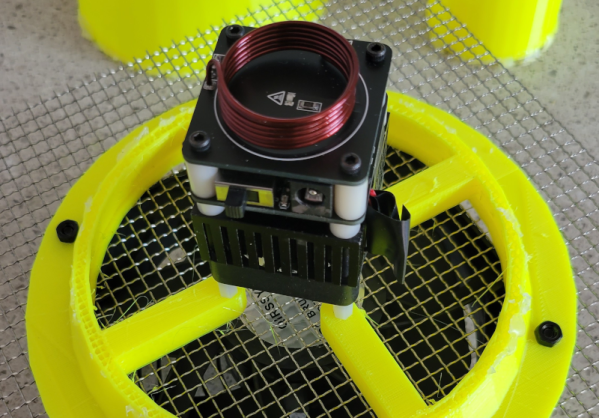
Initial results were promising but took a long time to work. In addition, the coil gets very hot, and there is a chance of flames. The next attempt used a 3D printed cone with a fan to push the plasma over the chip. The first attempt shorted something out, and so far, each attempt eventually burns out the MOSFET driver.

We are always interested in the practical uses of Tesla coils and what’s inside ICs, so this project naturally appealed to us. We hope to see more success reported on the Hackaday.io page soon. Meanwhile, if you have a coil and an old IC lying around, try it. Maybe you’ll figure out how to make it work well and if you do, let us know.

The easiest chips to open are ceramic packages with a gold lid. Just use a hobby knife. There are less noxious chemicals you can use. If you want to use fuming nitric, be sure you know what you are doing and maybe make some yourself.

Build A Tesla Coil With Just Three Components

Tesla coils are beautiful examples of high voltage hardware, throwing sparks and teaching us about all kinds of fancy phenomena. They can also be quite intimidating to build. [William Fraser], however, has come up with a design using just three components.

It’s a simplified version of the “Slayer Exciter” design, which nominally features a transistor, resistor and LED, along with a coil, and runs on batteries. [William] learned that adding a capacitor in parallel with the batteries greatly improved performance, and allowed the removal of the LED without detriment. [William] also learned that the resistor was not necessary either, beyond starting the coil oscillating.

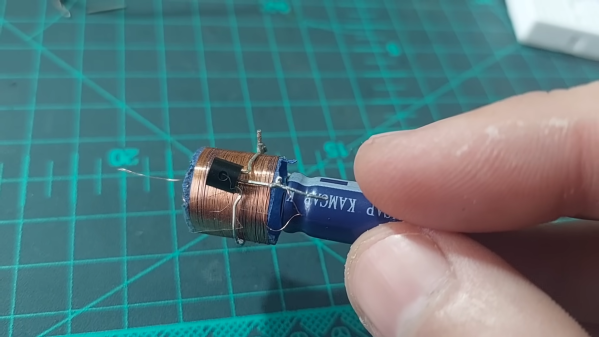
The actual 3-component build uses a 10 farad supercapacitor as a power source, hooked up to a 2N3904 NPN transistor and an 85-turn coil. It won’t start oscillating on its own, but when triggered by a pulse of energy from a piezo igniter, it jerks into life. The optimized design actually uses the shape of the assembled component leads to act as the primary coil. The tiny Tesla coil isn’t big and bold enough to throw big sparks, but it will light a fluorescent tube at close proximity.

If you like your Tesla coils musical, we have those too.

Continue reading “Build A Tesla Coil With Just Three Components”