From RepStrap To RepRap; A 3D Printer Is Born

[Gavilan Steinman] just printed and assembled his own RepRap machine and filmed the process. This isn’t news but we found it very interesting to watch. He started with a RepStrap, a rapid-prototyping 3D printer that as built by hand instead of printed by a similar machine. This is the seminal step in the self-replicating process.

From there he prints an extruder head which improves the quality of the parts the RepStrap can produce. We then see time-lapse footage of the printing process for a Mendel unit, the second generation of RepRap machines. We’ve embedded the video after the break. It’s a great way to spend ten minutes on a Sunday afternoon.

Continue reading “From RepStrap To RepRap; A 3D Printer Is Born”

A small plastic object can be seen in front of the tip of a hypodermic needle. The object is made of clear, slightly purple-tinted plastic. It is roughly circular, with edges thicker than the center.

The Latest From RepRapMicron – Nail Gel, First Objects, And More

We’ve been following [Vik Olliver]’s progress on the μRepRap project with interest for some time now. The project’s goal is to build a 3D printer that can print feature sizes down to about 10 microns – the same feature size used in the Intel 4004 processor. At the recent Everything Open 2026 conference, [Vik] presented an overview of all the progress he’s made in the last year, including printer improvements, material woes, and the first multi-layer prints (presentation slides).

The motion stage has undergone some fundamental improvements recently. The original XY motion table was supported on four flexures which allowed movement in X and Y, but also introduced slight variations in Z – obviously a problem in a system that needs to be accurate down to the microns. The latest version now uses complementary flexures to maintain a constant Z height, and eliminates interference between the X and Y axes. The axis motion drivers were also redesigned with parallel-bar linear reducers inspired by a pantograph, increasing their usable range from two to eight millimeters.

Rather than extruding material, the μRepRap uses an electrochemically-etched needle point to deposit UV-curable gel on the build surface. [Vik] found that a bit of nitric acid in the needle etching solution gave the edges of the probe a bit of a rough texture which let it hold more resin. He started his test prints using normal 3D printer resin, but it turns out that dissolved oxygen inhibits curing – quite a problem for small, air-exposed droplets. Fortuitously, UV nail gel does cure in air, and the next set of tests were printed in nail gel, including the first layered prints (one of which can be seen above, on top of a hypodermic needle). The μRepRap can’t yet print large numbers of layers, but [Vik] did print some hinged parts that could be folded into shape.

There’s much more in the presentation than can be covered here, including some interesting thoughts about the possibility of 3D printing electrochemical memory cells in ionic gel. Near the end of the presentation, [Vik] listed some pieces of related work, including necroprinting and this homemade micro-manipulator.


EnderSpark: Convert Your Broken Creality FDM Printer Into An EDM Machine!

EDM (Electrical Discharge Machining) is one of those specialised manufacturing processes that are traditionally expensive and therefore somewhat underrepresented in the DIY and hacker scenes. It’s with great delight that we present EnderSpark, a solution to not one but two problems. The first problem is how to perform CNC operations on hard-to-machine materials such as hardened metals (without breaking the bank). The second problem is what to do with all those broken and forgotten previous-generation Creality Ender 3D printers we know you have stashed away.

To be honest, there isn’t much to a cheap 3D printer, and once you ditch the bed and extruder assembly, you aren’t left with a lot. Anyway, the first job was to add a 51:1 reduction gearbox between the NEMA 17 motors and the drive pullies, giving the much-needed boost to positional accuracy. Next, the X and Y axes were beefed up with a pair of inexpensive MGN12H linear rails to help them cope with the weight of the water bath.

Continue reading “EnderSpark: Convert Your Broken Creality FDM Printer Into An EDM Machine!”

RepRapMicron Promises Micro-fabrication For Desktops With New Prototype

3D printing has transformed how hobbyists fabricate things, but what additional doors would open if we could go even smaller? The µRepRap (RepRapMicron) project aims to bring fabrication at the micron and sub-micron scale to hobbyists the same way RepRap strove to make 3D printing accessible. New developments by [Vik Olliver] show a promising way forward, and also highlight the many challenges of going so small.

New Maus prototype is modular, setting the stage for repeatable and reliable 3D printing at the micro scale.

How exactly would a 3D printer do micro-fabrication? Not by squirting plastic from a nozzle, but by using a vanishingly tiny needle-like effector (which can be made at any workbench via electrochemical erosion) to pick up a miniscule amount of resin one dab a time, curing it with UV after depositing it like a brush deposits a dot of ink.

By doing so repeatedly and in a structured way, one can 3D print at a micro scale one “pixel” (or voxel, more accurately) at a time. You can see how small they’re talking in the image in the header above. It shows a RepRapMicron tip (left) next to a 24 gauge hypodermic needle (right) which is just over half a millimeter in diameter.

Moving precisely and accurately at such a small scale also requires something new, and that is where flexures come in. Where other 3D printers use stepper motors and rails and belts, RepRapMicron leverages work done by the OpenFlexure project to achieve high-precision mechanical positioning without the need for fancy materials or mechanisms. We’ve actually seen this part in action, when [Vik Olliver] amazed us by scribing a 2D micron-scale Jolly Wrencher 1.5 mm x 1.5 mm in size, also visible in the header image above.

Using a tiny needle to deposit dabs of UV resin provides the platform with a way to 3D print, but there are still plenty of unique problems to be solved. How does one observe such a small process, or the finished print? How does one handle such a tiny object, or free it from the build platform without damaging it? The RepRapMicron project has solutions lined up for each of these and more, so there’s a lot of discovery waiting to be done. Got ideas of your own? The project welcomes collaboration. If you’d like to watch the latest developments as they happen, keep an eye on the Github repository and the blog.

The frame of a delta 3D printer is shown. The toolhead of the 3D printer does not have a hotend installed, but instead has a frame with a circular hole in the middle.

A Toolchanging Delta 3D Printer

We’ve seen quite a few delta 3D printers, and a good number of toolchanging printers, but not many that combine both worlds. Fortunately, [Ben Wolpert]’s project fills that gap with a particularly elegant and precise delta toolchanger.

The hotend uses three steel spheres and triangular brackets to make a repeatable three-point contact with the toolhead frame, and three pairs of corresponding magnets hold it in place. The magnets aren’t in contact, and the three magnets on the toolhead are mounted in a rotating ring. A motorized pulley on the printer’s frame drives a cable which runs through a flexible guide and around the rotating ring.

The whole setup is very reminiscent of the Jubilee toolchanging system, except that in this case, the pulley rotates the ring of magnets rather than a mechanical lock. By rotating the ring of magnets about 60 degrees, the system can move the pairs of magnets far enough apart to remove the hotend without much force.

The rest of the toolchanging system is fairly straightforward: each tool’s parking area consists of two metal posts which slot through corresponding holes in the hotend’s frame, and the motherboard uses some RepRapFirmware macros to coordinate the tool changes. The only downside is that a cooling fan for the hotend still hadn’t been implemented, but a desk fan seemed to work well enough in [Ben]’s tests. The files for the necessary hardware and software customizations are all available on GitHub.

We’ve only seen a similar toolchanging system for a delta printer once before, but we have seen a great variety of toolchangers on the more common Cartesian systems. Don’t like the idea of changing extruders? We’ve also seen a multi-extruder printer that completely eliminates tool switching.

Continue reading “A Toolchanging Delta 3D Printer”

A 3D printer frame made of red plastic is shown on the left-hand side of the image. On the right-hand side, there is a large motor with a plastic frame attached to the frame. Next to the 3D printer, a blue plastic mesh is being fed through a red plastic frame.

The Most Printable 3D Printer Yet

Despite the best efforts of the RepRap community over the last twenty years, self-replicating 3D printers have remained a stubbornly elusive goal, largely due to the difficulty of printing electronics. [Brian Minnick]’s fully-printed 3D printer could eventually change that, and he’s already solved an impressive number of technical challenges in the process.

[Brian]’s first step was to make a 3D-printable motor. Instead of the more conventional stepper motors, he designed a fully 3D-printed 3-pole brushed motor. The motor coils are made from solder paste, which the printer applies using a custom syringe-based extruder. The paste is then sintered at a moderate temperature, resulting in traces with a resistivity as low as 0.001 Ω mm, low enough to make effective magnetic coils.

Continue reading “The Most Printable 3D Printer Yet”

Art of 3D printer in the middle of printing a Hackaday Jolly Wrencher logo

Hackers, Patents, And 3D Printing

Last week, we ran a post about a slightly controversial video that claimed that a particular 3D-printing slicing strategy was tied up by a patent troll. We’re absolutely not lawyers here at Hackaday, but we’ve been in the amateur 3D printing revolution since the very beginning, and surprisingly patents have played a role all along.

Modern fused-deposition modelling (FDM) 3D printing began with Stratasys’ patent US5121329A, “Apparatus and method for creating three-dimensional objects”, and the machines they manufactured and sold based on the technology. Go read the patent, it’s an absolute beauty and has 44 different claims that cover just about everything in FDM printing. This was the watershed invention, and today, everything claimed in the patent is free.

Stratasys’ patent on the fundamental FDM method kept anyone else from commercializing it until the patent expired in 2009. Not coincidentally, the first available home-gamer 3D printer, the Makerbot Cupcake, also went on sale in 2009.

The Stratasys machines were also one of the big inspirations for Adrian Bowyer to start the RepRap project, the open-source movement that basically lead to us all having cheap and cheerful 3D printers today, and he didn’t let the patent stop him from innovating before it lapsed. Indeed, the documentation for the RepRap Darwin dates back to 2007. Zach [Hoeken] Smith delivered our hackerspace the acrylic parts to make one just around that time, and we had it running a year or two before the Cupcake came out of the company that he, Bre, and Adam shortly thereafter founded.

The story of hackers and 3D printers is longer than the commercial version of the same story would imply, and a lot of important innovations have come out of our community since then too. For instance, have a look at Stratasys’ patent on heated bed technology. At first read, it seems to cover removable heated beds, but have a look at the cutout at the end of claim 1: “wherein the polymer coating is not a polymer tape”. This cutout is presumably in response to the at-the-time common practice of buying Kapton, PEI, or PET tape and applying that to removable heated bed surfaces. I know I was doing that in 2012, because I read about it on IRC or something, long before the Stratasys patent was filed in 2014. They could only get a patent for sprayed-on coatings.

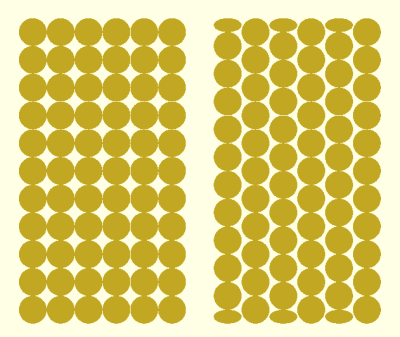
As [Helge] points out, it’s also easily verifiable that the current patent on “brick layers” that we’re worrying about, filed in 2020, comes later than this feature request to Prusa Slicer that covers essentially the same thing in 2019. We assume that the patent examiner simply missed that obvious prior art – they are human after all. But I certainly wouldn’t hesitate to implement this feature given the documented timing.

I would even be so bold as to say that most of the post-2010 innovation in 3D printing has been made by hobbyists. While the RepRap movement was certainly inspired by Stratasys’ invention in the beginning, our community is where the innovation is happening now, and maybe even more starkly on the software side of things than the hardware. Either way, as long as you’re just doing it for fun, let the suits worry about the patents. Hackers gotta hack.