This week on The Hacklet we’re featuring some of the best keyboard hacks from Hackaday.io!
Hackers are really into their keyboards. Everyone has a favorite, and those favorites vary wildly. Mechanical, soft touch, ergonomic, QWERTY, DVORAK, chorded, you name it, there is a hacker, maker, or engineer who loves it, or absolutely hates it. For some, no commercial product is perfect. All is not lost though, as a custom keyboard is just a hack away!
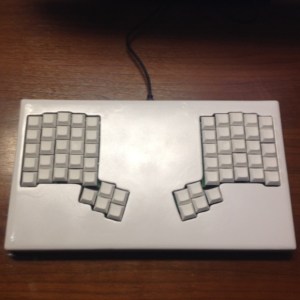
[Warren Janssens] gets things rolling with Ergo60, his 60 key ergonomic keyboard. [Warren’s] layout is a pair of 25 key hand clusters, each with a matching 5 key thumb cluster. This layout minimizes lateral wrist movement. With the reduced key count and stacked keys, the user’s hands never move from the home row. [Warren] rolled his own PCBs for Ergo60. A Teensy 2.0 running a fork of TMK serves as Ergo60’s controller. [Warren’s] is running Cherry Black switches and his keycaps are from Signature Plastics. [Warren] is using Ergo60 as his daily driver these days, so it’s no surprise that he’s set the “Completed Project” tag.
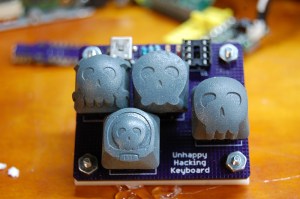
Some say he needs no keyboard at all, and that his heartbeat sounds just like an IBM Model M. All we know is he’s called [Brian Benchoff]. [Brian’s] created a pair of minimalist keyboard projects. The Unhappy Hacking Keyboard takes us back to basics. After all, computers run on 1’s and 0’s, right? What more could a person need? Apparently just a space and return. Unhappy Hacking Keyboard uses an ATtiny85 with V-USB as the controller and the interface. Keys are cherry MX blues. The keycaps are [Brian’s] own Hackaday Cherry MX Keycaps printed by Shapeways.
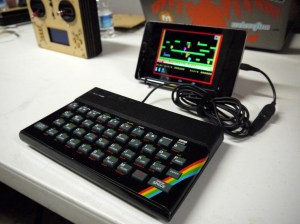 An entire generation of hackers don’t know the joy of typing on a tiny rubber keyboard. [Alistair MacDonald] aimed to fix that, so he turned an old computer into a keyboard with his ZX Keyboard. [Alistair] started with a broken ZX Spectrum. He gutted the original electronics and added an Ardunio Pro Mini running the V-USB library. [Alistair] directly wired the row and column I/O lines from the keyboard to his Arduino. The result is a keyboard which is the perfect size for cell phones, Raspberry Pi’s and the like.
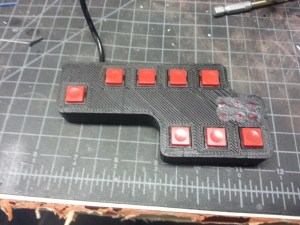 [Servo] teaches us new ways to type with Chordy KEY, his chording keyboard project. Chordy Key is meant to be used in the left hand. Five finger buttons and three thumb buttons are all that is needed to chord out 64 different letters and symbols. [Servo] utilized an ATmega32U4 powered Sparkfun pro micro to control his keyboard. Chordy Key is a proof of concept, but with [Servos’s] use of 3D printed parts, Chordy Key looks like it’s ready for your next wearable computing project!
 [jmptable] is also working on a chorded keyboard design. Chord Keyboard uses only 7 keys to send the entire ASCII character set and a few control combinations. [jmptable] used an ATmega328P as his processor. Chord keyboard isn’t wired though. An RN-42-HID module provides bluetooth connectivity to the world.
[jmptable] has provided an amazing amount of detail on his research, including one of his goals of adding a chorded keyboard to the Gameboy Advance. They keyboard itself would be mounted on the spine of a game cartridge. We would love to see that idea come to fruition, [Servo]!
 Finally we have [Gertlex], who just wanted a scroll wheel embedded in his keyboard. He got there with the help of an Apple Mighty Mouse. Keyboard with Apple Mouse Scroll Ball is one of those hacks that looks like it original equipment. [Gertlex] took a drill to a Targus slim USB keyboard, putting a small hole right between the ESC and F1 keys. He fit the scroll ball from his Apple Mighty Mouse in the hole. Electronics are as simple as plugging the mouse and keyboard into the same USB hub. The only downside to the design is that [Gertlex’s] keyboard doesn’t recognize fast enough to send key presses during the boot process.
That’s just about enough keystrokes for this episode of The Hacklet. As always, see you next week. Same hack time, same hack channel, bringing you the best of Hackaday.io!
Update – check our our keyboard list right here!

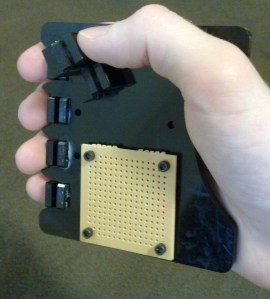
 [Tom] told us that the team is currently redesigning their hardware. The next generation prototype board with more protection can be seen in the far right of the top photo. He also mentioned that they’re shooting for 5 digits of accuracy, placing them on par with many bench scopes. We’re skeptical to say the least about 5 digits, but the team is definitely putting their all into this product. We’ll wait until the Kickstarter backers start getting their final devices to see if Voltset is everything it’s cracked up to be.
 [Windell and Lenore] from Evil Mad Scientist Laboratories brought a few hacks along. They picked up an old Radio Shack music player chip at the
  [Cal Howard] brought his DIY VR goggles. [Cal] converted a Kindle Fire into an Oculus Rift style head mounted display by adding a couple of magnifying lenses, some bamboo kebab sticks to hold the lenses in place. Judicious use of cardboard and duct tape completed the project. His current hurdle is getting past the Fire’s lack of an accelerometer. [Cal] planned to spend Sunday at Maker Faire
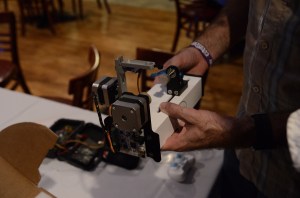


