Two Player Space Invaders Via FPGAs

Last semester, [Peter], [Jared], and [Jeremy] took a course on embedded systems. They managed to turn out a very accurate copy of the classic Space Invaders in their class. Not wanting good code to go to waste, they decided to develop two player Space Invaders, and we wouldn’t mind testing it out.

The guys built their Space Invaders clone on a Virtex II dev board. Wanting a little more hardware development, they picked up a pair of RF trancievers so the two boards could communicate with each other. The rules of two-player Space Invaders is fairly simple; if you destroy an alien, there’s a 30% chance it will appear on your opponent’s screen. Hit the space ship that flies along the top of the screen, and 1 to 7 aliens will appear on the opponent’s screen. It’s a bit like two player Tetris where your victories bring about your friend’s downfall.

The guys put a really neat spin on an old game, and we’d love to try it out. Check out the guy on the left losing a game of Space Invaders to his lab partner after the break.

Continue reading “Two Player Space Invaders Via FPGAs”

Arduino Heliostat Calculates The Position Of The Sun

We’re past the winter solstice and the days are getting longer, but that doesn’t mean we’re not sick of the sun setting around 5 in the afternoon. There is a way to get more sunlight through our windows – a heliostat. Lucky for us, [Gabriel] sent in his Open Source Sun Tracking / Heliostat project that can reflect sunlight through our windows all winter long.

Using mirrors to brighten up a room is an ancient practice; a few thousand years ago, heliostats went by the archaic term, “slaves.” Luckily there’s a far more elegant way of doing things nowadays – an Arduino. [Gabriel] came up with an Arduino sketch that calculates the altitude and azimuth of the sun using only latitude, longitude and time zone. [Gabriel] used this sketch to drive a pair of stepper motors and reflect sunlight through his window.

You can check out [Gabriel]’s demo of his heliostat after the break.

Continue reading “Arduino Heliostat Calculates The Position Of The Sun”

Hackaday Links: January 2, 2012

The worst computer keyboard, ever

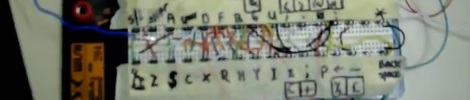
[Gerardus] found an old BBC Master Compact computer for $15. The only problem is the computer didn’t have a keyboard. It’s not a problem if you can make a keyboard out of an old breadboard. It’s not a Model M, but it works.

Emergency ribbon cable repair

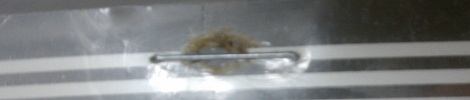
[Thomas] works in a hospital. One night, a piece of equipment went down because of a bad ribbon cable. Doctors were yelling at him to get the equipment up and running so out of frustration, he took stapler to the cable. It held up until a replacement arrived. Check out these pics: one and two.

Nobody remembers Little Nemo: Adventures in Slumberland

Here’s [Alan]’s gigantic Nautilus art car with a huge mechanical iris. Just watch the video and be amazed. We won’t hazard a guess as to how much money went into all that brass and copper, but we can confirm an Arduino controls the iris. Check out the build page.

Light up street art

[Grissini] put up an instructable for a light box that displays [Bansky] street art. We’d go with some RGB leds and a [Keith Haring] motif, but more power to ya.

A theater wind machine

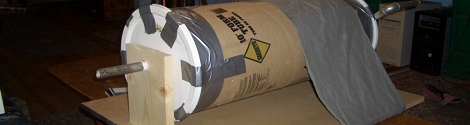
This wind machine was built by [Willaim] for his High School’s choir concert. It’s basically a concrete form tube with plastic lids taped on and a piece of pipe serving as an axle. The machine makes a wind noise with the help of some nylon pants.

See Through Everything With A Home Made X-ray

[Grenadier] built his very own x-ray machine. He’s no stranger to high voltage – we’ve seen his Jacob’s Ladders and Marx generators. Surely he can handle himself with high voltage and dangerous equipment. With this portable x-ray machine, [Grenadier] has begun overloading Geiger counters. We’re just happy he knows what he’s doing.

The key component of [Grenadier]’s portable x-ray machine is the Coolidge tube, a simple vacuum tube that produces x-rays with the help of 75 kilovolts of power. The finished build looks awesome. Two meters display the milliamps and kilovolts going to the x-ray tube, and a trio of nixies display the exposure time.

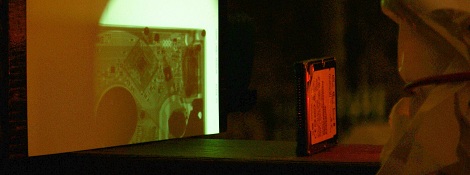
Even though [Grenadier] doesn’t have x-ray film, he can see through things with a scintillation screen that fluoresces when exposed to ionizing radiation. There are two pictures of the x-ray in action – one showing the inside of a pen and the guts of a hard drive (as shown in the title pic).

The output of the x-ray was measured with a Geiger counter. [Grenadier] was able to get a hit every second or so at 50 yards, and very loud white noise at 1 foot. Check out the video of [Grenadier]’s Buildlounge laser cutter contest submission after the break.

via Buildlounge

Continue reading “See Through Everything With A Home Made X-ray”

Making Pure Caffeine At Home

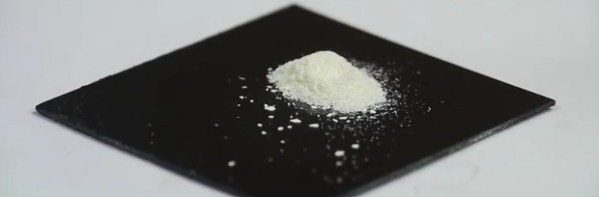
If you’ve ever thought about extracting caffeine from coffee beans, [Ben] is the guy for you. The last time we ran into him, he had already produced a few aerogel monoliths with a few chemicals, pipe fittings, and some CO2. We’re guessing he needed another use for his supercritical drying chamber, so after looking over a few patents, he decided to make pure caffeine in his garage.

The extraction began with green coffee beans inside the drying chamber. Liquid CO2 is pumped in and heated to the supercritical point. After a few hours, the caffeine will have been extracted from the beans and can be drained from the chamber. Right now, the process results in an inky goo that contains caffeine. [Ben] refined this a little further with Methylene Chloride, a process he’ll document in a future video.

Of course it goes without saying that this build is a little bit on the dangerous side. We’re confident in [Ben]’s abilities to know what he’s doing, but we’re not going to endorse this for every joker on the Internet. Also, two spoonfuls of caffeine will kill you, so try not to screw around with that either.

Continue reading “Making Pure Caffeine At Home”

Disco Icosahedron Rings In The New Year

While city engineers were setting up the multicolored ball of lights in Times Square this year, [Phil] at adafruit was busy designing the X2 Time Ball, a disco icosahedron perfect for celebrating the new year.

The ball is made of 20 acrylic triangles zip-tied together into an icosahedron. On each face, six RGB pixels light up via commands from an Arduino. The entire project is able to be controlled remotely thanks to the help of a pair of XBees. [Phil] whipped up a Processing sketch to control the LED ball any way we could possibly imagine.

Although it may be a little late to build an LED disco ball for this year’s New Year’s Eve party, that doesn’t mean we couldn’t use it the other 364 days of the year. It’s perfect for parties, weddings, and our weekly lightswitch raves. Check out the action video of the Time Ball after the break.

Continue reading “Disco Icosahedron Rings In The New Year”

Full Color Laser TV

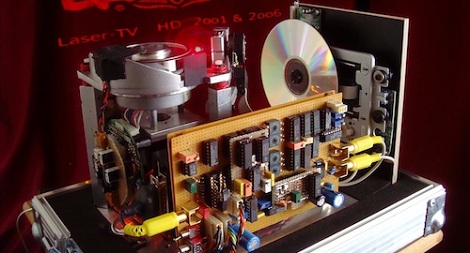
Back in 2001, [Helmar] made an awesome monochrome video display out of a red laser pointer and a spinning 18-sided mirror. Blue and green lasers are much less expensive than they were a decade ago, so [Helmar] decided to go full color with his laser projector. (In German, so fire up Chrome or get the Google translation)

The ancient website for [Helmar]’s green-only projector goes over the principles of operation. A single laser shines onto a multi-faceted polygonal mirror. This is reflected onto another mirror that provides the reflection for each line in a frame of video. Earlier this year, [Helmar] hacked up a red and blue laser to complement the preexisting green laser. The end result is an RGB projector powered by friggin’ lasers.

As far as we can tell, the projector only has composite input; the attached DVD player provides all the signaling for that. Amazingly, [Helmar] didn’t use a microcontroller for the circuitry. All the electronics are simple logic gates. Really amazing if you ask us.

Continue reading “Full Color Laser TV”