Homebrew On The Rigol DS1052E ‘scope

We love our little Rigol 1052E oscilloscope. It’s seen us through some perplexing problems and loved being upgraded from 50 MHz to 100 MHz. We’ve always been pleased with its role dictating waveforms for us, but we never thought we’d see homebrew apps for our little ‘scope.

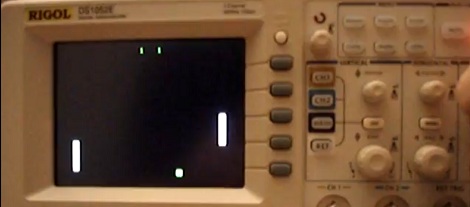
We’re not exactly sure who [Krater] is, but he’s been working on some homebrew development for the Rigol DS1052E oscilloscope. Right now the capabilities are somewhat limited; all programming is via PEEKs and POKEs. Still, this is a fairly impressive development.

This wonderful little ‘scope has already had some time in the limelight by being easy to upgrade to 100 MHz. Hopefully with the new capabilities (Tetris, somebody make Tetris), this scope will become a staple in workshops around the world.

A tip ‘o the hat goes to [Rainer Wetzel] for sending this one in. Check out the video after the break to see an almost-working game of Pong playing on the 1052E

EDIT: [krater] dropped into the comments to tell us about his blog entry. Keep up the good work.
Continue reading “Homebrew On The Rigol DS1052E ‘scope”

Printing With Clear Polycarbonate

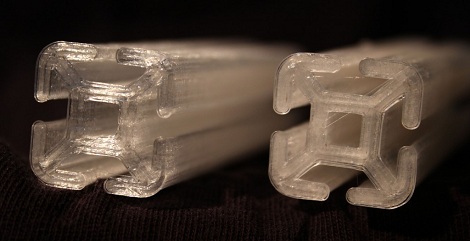
Those of us with 3D printers have had two major choices when selecting a material to print with – ABS, a very hard plastic, and PLA, a more brittle plastic with a lower melting point. [Alex] and [Luke] have been experimenting with printing polycarbonate and creating clear crystalline objects on a standard 3D printer.

The first foray into printing polycarbonate didn’t go so well for [Luke]. Objects came out looking very milky and there was a bit of popping during filament extrusion. The guys solved this problem by putting the polycarbonate filament in a food dehydrator overnight to get rid of the moisture. Polycarbonate has a higher melting temperature than other plastics – around 260 degrees Celsius – which can cause some problems with Teflon insulators in the hot ends of extruders. The guys didn’t have any problems with fumes, though.

If you’ve ever wanted to print something clear, it looks like it’s now possible. Check out the video after the break to see a Makerbot Thing-O-Matic printing with clear polycarbonate.

Continue reading “Printing With Clear Polycarbonate”

So You Wanna Learn FPGAs…

FPGAs are the bee’s knees. Instead of programming a chip by telling it what to do, FPGAs allow you to tell a chip what to be. Like everything though, a new skill set is needed to fully exploit the power of FPGAs. [Mike Field] decided to give back to the internet community at large and put up a crash course in FPGA design.

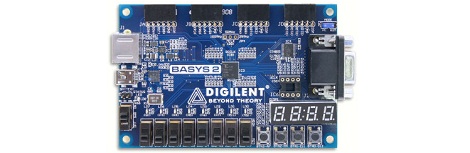
Right now, [Mike] has a couple of modules up that include subjects like binary math, busses, counting, and of course setting up the FPGA hardware. The recommended hardware is the Papilio One, although the Digilent Nexys2 is what [Mike] has been using so far.

We’ve seen a ton of awesome stuff that uses FPGAs, like the emulated Mac Plus, breaking HDCP, and an Ocarina of Time. [Mike]’s tutorials look like a great starting point for some FPGA work. [Mike] is also looking for some feedback on his tutorials, so if you’ve got an idea of what he should cover be sure to drop him a line.

EDIT: The server was running on an FPGA and we can’t find a cache anywhere. If you’ve found a mirror, send a message. Apparently Amazon’s EC2 runs on an FPGA.

Relighting A Gauge Cluster

When a few lights in the dashboard of  [Garrett]’s truck burned out, he was looking at a hefty repair bill. The repair shop would have to replace the huge PCB to change a few soldered light bulbs, so he was looking at a $500 repair bill. Lighting up a LED is everyone’s first project, so [Garrett] decided to change out the bulbs with LEDs and save a few dollars.

The repair was very simple – after removing the dials and needles, [Garrett] found a huge PCB with a few burnt out bulbs on board. He took a multimeter to each bulb’s solder pad and replaced each one with an LED and resistor. The finished project looks like it came out of a factory and is a huge improvement over the ugly amber bulbs originally found in his truck.  [Garrett] also posted a nice Instructable of his build showing the nicely soldered lamp replacements.

Solar-powered CNC Woodburning

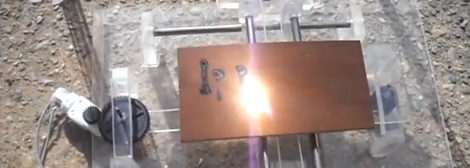
[Johnie] built himself a CNC woodburner powered by the sun. Like the solar 3D printer we saw last summer, [Johnie]’s build uses a giant Fresnel lens to focus sunlight onto a piece of wood. To get some control out of his build, a 2-axis bed was made from scrounged and junked parts.

The lens in [Johnie]’s build looks to be about a foot square – more than hot enough to burn a few holes in things from our experience. The bed (hopefully) gets around this problem by being built entirely out of clear acrylic. The idea behind the acrylic bed is that the focused light will pass through harmlessly, and not melt the entire thing.

Now that we think about it, we couldn’t come up with a better project to enter in the Buildlounge laser cutter contest. For everybody else working on their laser cutter projects, the deadline is January 1st. Better get those wrenches out and irons hot, because we’ve seen a few awesome projects for the Buildlounge build off already.

Augmented Reality Ex Nihilo

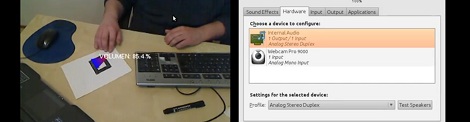
[David] sent in a nice project to demonstrate augmented reality with ARtoolkit and discuss the deep philosophical underpinnings of the meaning of nothingness. The good news is he was able to create a volume control button on a sheet of paper with a marker. The bad news is the philosophical treatment is a bit weak; [David] built something cool, so we’re able to let that slide for now.

This build was inspired by the Impromptu Sound Board made using a Kinect and a piece of paper. The idea behind the sound board is simple – draw some buttons on the paper, and use them to play short sound clips. [David] took this idea to make a small tutorial on augmented reality for Occam’s Razor.

The hardware is very simple – just a webcam, a piece of paper, and a marker. After [David] draws a large square on the paper, the code recognizes it as a volume control. Rotating the paper counterclockwise increases the volume, and clockwise turns the volume down. It’s a neat build to get into the foundations of augmented reality.

Check out the video demo of [David]’s build after the break.

Continue reading “Augmented Reality Ex Nihilo”

Repairing A Commercial-grade Pick And Place Machine

It looks like Null Space Labs has a new pick and place machine. This immense repair job began when [Charliex] and [Gleep] found a JukiPlacemat 360 pick and place machine. The idea of having their very own pick and place machine proved intoxicating, possibly too much so because the didn’t return the machine when they found out it wasn’t working.

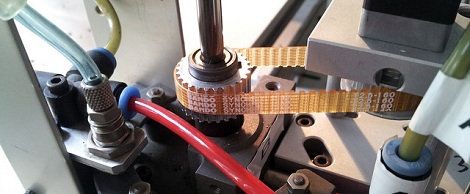
After a ton of work that involved adding a camera, [Charliex] and the rest of the builders at Null Space Labs finally have their own pick and place machine that works. This was a complete rebuild from the ground up. So many things didn’t work on the machine, they might have been better off building one from scratch. Aside from the massive effort that went into turning the shell of a machine into a working unit, we really have to commend everyone who worked on it.

The team added a nice GUI to control the machine. The guys have already run a successful test and ovened a few boards, so everything works as it should have at purchase. It’ll be great for making next year’s LayerOne conference badges.