History Of Digital Equipment Corp And Bonus PDP-11 Replica Build

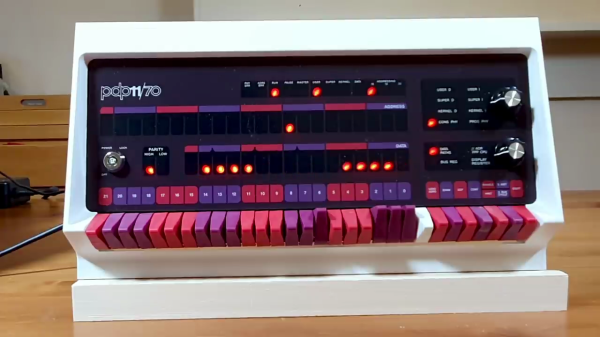
[RetroBytes] takes us on a whirlwind tour of the history of the Digital Equipment Corporation (DEC), its founder Ken Olsen, and during intermission builds up a working replica of the PDP-11 from a kit. DEC was a major player in the early computer industry, cranking out a number of models that were both industrial workhorses and used in computer laboratories to develop many of the operating systems and tools whose descendants we still use today. On top of that, DEC’s innovative, employee-friendly, and lightweight company structure was generally well-liked by its employees and a welcomed departure from the typical behemoths of the day.

This video takes us from the beginnings of DEC and its roots in MIT up to the PIP-11 era, highlighting major architectures and events along the way such as the PDP-1, PDP-8, and PDP-11. [RetroBytes] says he has a DEC Alpha sitting on the sidelines, so there may be a few follow-up videos in the future — perhaps one on the VAX as well.

We’ve covered this particular PDP-11 replica last year, and if these replica kits are your cup of tea, check out our coverage of kit designer [Oscar Vermeulen]’s presentation. Have you ever used real PDP or VAX computers? Let us know your war stories in the comments below.

Continue reading “History Of Digital Equipment Corp And Bonus PDP-11 Replica Build”

An Interview With Reinhard Keil

Over on the Embedded FM podcast, [Chris] and [Elecia] just released their interview with [Reinhard Keil] of compiler fame. [Reinhard] recounts the story of Keil’s growth and how it eventually became absorbed into Arm back in 2005. Along with his brother Günter, the two founded the company as Keil Software in the Americas, and Keil Elektronik in Europe. They initially made hardware products, but as the company grew, they became dissatisfied with the quality and even existence of professional firmware development tools of the day. Their focus gradually shifted to making a CP/M- and a PC-based development environment, and in 1988, they introduced the first C-compiler designed for the 8051 from the ground up.

Love it or hate it, the Arm Keil suite of µVision IDE and the MDK/Cx51 compiler have been around a long time and used by embedded developers in many industries. Although a free and restricted-use version is available, the license fees prevent most folks from getting very enthusiastic about it. Pricing aside, the µVision IDE has its critics: [Jay Carlson], who used every IDE under the sun a few years ago in his review of sub-one-dollar microcontrollers, opined that it was nothing more than a free editor you get with C51 or MDK-ARM. On the other hand, even [Jay] concedes is that every chip he tested was officially supported by Keil and worked out of the box. Another thing that is important to some users is being able to produce consistent binaries from old projects. This isn’t important for your one-off MQTT hot tub thermometer. But if you need to recompile firmware for a fifteen-year-old railroad signaling system that has multiple certifications and regulatory approvals, using the original compiler and library versions is a huge help.

[Reinhard] goes on to discuss various tools and systems being developed at Arm by his team, such as improvements and additions to the CMSIS suite, the transition of the online Mbed compiler to the new Keil Studio Cloud, and an Arm hardware virtualization tool for cloud-based CI verification. Lest you think everything at Arm is proprietary and expensive, he points out that Arm is a major contributor to the GCC project and the CMSIS components are open source. Even if you aren’t interested in Arm/Keil tools, do check out the interview — it’s quite interesting and touches on several topics of general interest to all firmware developers. Or if you prefer, read the interview when the transcript is completed.

Low-Cost, Two-Channel Scriptable Waveform Generator

Microcontroller addict [Debraj] decided to make his own programmable sine wave generator, and was able to put it together for under $40 USD. Other than low-cost, his list of requirements was as follows:

  • Dual sine wave output, synchronized
  • Frequency, Amplitude, and Phase control
  • Low harmonics under 1 MHz
  • Scriptable via Python

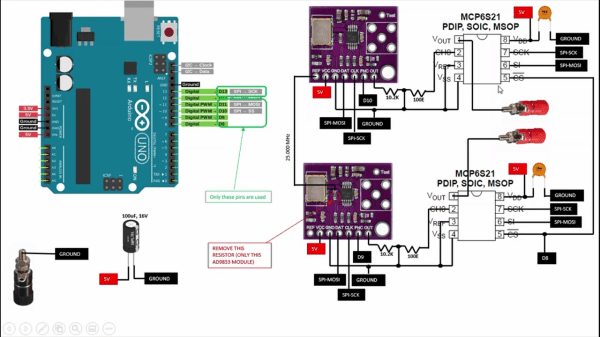
The heart of the project is the Analog Devices AD9833, a complete Direct Digital Synthesis (DDS) waveform generator system on a chip. If you’ve ever rolled your own DDS using discrete ICs or in an FPGA, you can appreciate the benefit of squeezing the phase accumulator, sine lookup table, DAC, and control logic all into a single ten-pin package. [Debraj] uses AD9833 modules from the usual online vendors for a few dollars each. He synchronizes the generators by disconnecting the reference crystal on the second module and driving it from the first one. The remaining specifications are met by the inherent characteristics of the DDS system, and the scriptable interface is accomplished with an Arduino controlling the AD9833 chips and two programmable gain amplifiers (MCP6S31). We like the confidence that [Debraj] displays by sketching the initial circuit diagram with a ball-point pen — check out the sketch and the final pictorial schematic in the video below the break.

This is a good example of combining off-the-shelf modules to quickly build a project. This approach is great for one-off builds or as a proof-of-concept test bed that can later be spun onto a custom PCB. Another reason to use modules these days is that the modules are often in-stock but the chips are unobtainable. Though it appears [Debraj]’s only needs one of these generators, it would be an easy board to layout and build — if you can buy the parts.

Continue reading “Low-Cost, Two-Channel Scriptable Waveform Generator”

Novena Open Source Laptop Reborn As Desktop Machine

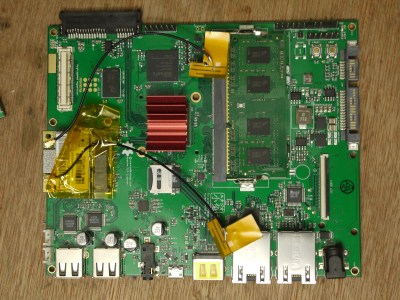
When your 5-year-old laptop dies it’s usually time for a replacement. But [Andrew Menadue]’s Novena laptop is fully open-source. He has full access to all the documentation, so he decided to try his hand at repairing it instead. The power supply circuit board went up in smoke one day — he attributes this to poor battery health due to him not using it frequently enough. Given his usage pattern, he decided to switch the Novena into a desktop machine.

He made the conversion with a new pass-through power supply board, and the computer booted up but with no display. It seems that the power supply failure took out additional circuits as well. [Andrew] goes down a deep rabbit hole of board and chip swapping, all to no avail. Eventually the display suddenly springs to life, and he concludes the problem was with the EEPROM configuration settings and not LCD display hardware.

Experimenting with LCD Outputs on the Mainboard

It’s comforting to know that you can easily spin a replacement PCB for your computer when needed. But this situation is far from mainstream. Furthermore, all projects, open-sourced or not, face the issue of part obsolescence, even Novena. Back in 2019 founders [Bunnie] and [Xobs] issued an end-of-life announcement on the project’s five year anniversary for this very reason. The fact that Novena availability even lasted five years was due to up-front purchases of critical parts.

We wrote about the Novena way back in 2014, and more recently the MNT Reform project. What are your thoughts on these open source laptop projects? Do you have any laptops that you’ve rehabilitated after five or more years? Let us know in the comments below.

Coin-Operated Graphing Calculator Console

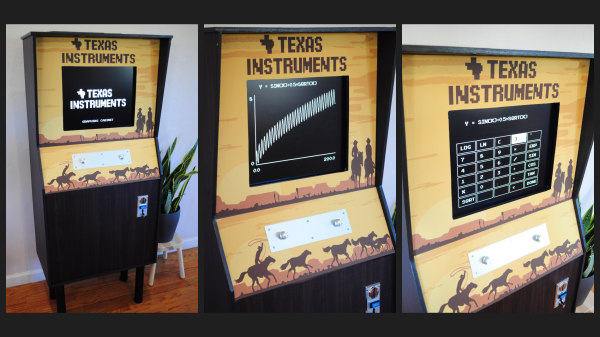
Longtime hacker [Peter Jansen] was so impressed with a piece in The Onion from last year that he decided to build this coin-operated Texas Instruments graphing calculator console on a whim (video below the break — warning vertical orientation).

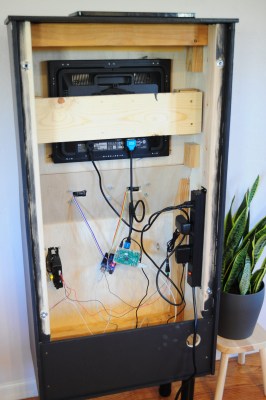
With nothing more to go on than the fake mock-up pictured from the original satirical article, [Peter] was able to scale the dimensions from the photo making a few reasonable assumptions. He built the project over the holidays, enlisting his father and daughter as helpers. The cabinet is framed in 2×3 lumber and faced with wood veneer covered plywood and vinyl overlays for the graphics.

The computing power is from a Raspberry Pi with an Arduino Uno serves as an I/O processor. It was a bit tricky to control a calculator with only two knobs, but he makes it work. However, at 25 cents per plot with no apparent hard-copy capability, this console calculator might be a bit pricey for all but casual plotting over a few beers at the local pub.

You might remember [Peter] from some of his hacks we featured over the years, like his home-brew CT scanner or placing fourth in the first Hackaday Prize contest in 2014 with the open sourced tricorder project.


Continue reading “Coin-Operated Graphing Calculator Console”

Simple Dev Board Module Socket

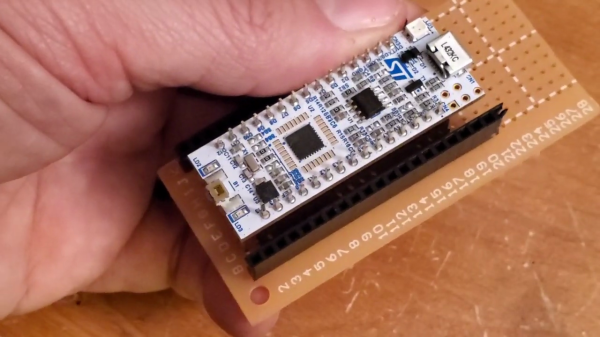
When you’re building a quick prototype or a one-off project it’s nice to be able to securely mount the various modules and development boards. Sometimes these boards have mounting holes, but often they don’t. As an example from the latter category, digital music instrument maker and performer [DIYDSP] shows us how to build a simple socket to mount an STM32 Nucleo-32 module.

The socket is built on a standard pad-per-hole piece of vector board cut to the desired size. Pairs of female pin header strips are soldered down to the board. The inner pair of headers is for the module, the outer pair is for your interconnections. The headers are connected up with short solder bridges, and [DIYDSP] recommends you extend the outer pair several pins longer than necessary. These extras can be used for additional power or ground points, or on some boards they could connect to the debug header pins. He prefers to use female sockets because that lessens the odds that an accidentally bent pin will short something out.

Final step is to drill your mounting holes in the desired location, and no more development boards free-floating and held up only by wires. Do you have any tips for mounting these kinds of modules, either individually as shown here or onto PCBs? Let us know in the comments.

Continue reading “Simple Dev Board Module Socket”

One Tool Twists Wires, And Skewers Shish Kebabs

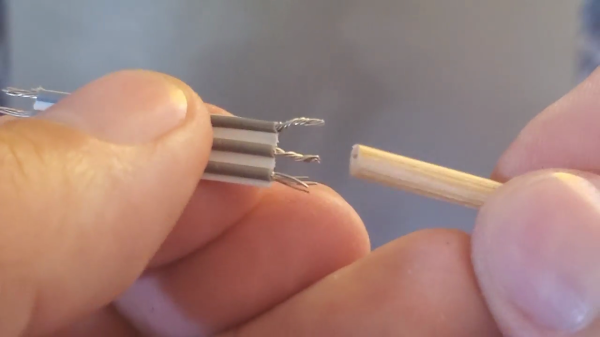
Twisting stranded wire with your fingers in preparation for tinning and/or soldering is almost a reflex for folks making electronic assemblies. But what if the wires are too close to get your fingers around, or you have the fingers of a sumo wresters? Well [DIYDSP] has a solution for you (see video below the break) that’s easy to make from a shish kebab skewer that’s probably rolling around your kitchen drawer. The reason that [DIYDSP] wanted to twist such closely spaced wires was to solder a length of 0.1 in O.C. stranded ribbon cable directly onto a PCB pin header pattern.

The method is very simple. Drill a long hole in the factory-cut flat end, followed by using a countersink bit to give a conical taper to guide the wires in. [DIYDSP] found that a 1/16 inch (1.6 mm) drill bit was a bit too large to grip the types of wires he was using, and finally settled on a 0.6 mm bit. If you are using larger wires, you should experiment to get the right size, or just build a handful of these of differing diameters since they’re so easy to make — just mark them clearly so you don’t accidentally grill shish kebabs with them on the BBQ.

The resulting tool is not unlike the business end of a hand-held wire-wrap tool, but works different principle and is a fraction of the cost. If you do any amount of interconnect wiring with stranded wires, then you should check out this video and whip up a couple of these to throw in your tool box.

Continue reading “One Tool Twists Wires, And Skewers Shish Kebabs”