About Right

I really enjoyed reading Anne Ogborn’s piece on making simple DIY measurement devices for physical quantities like force, power, and torque. It is full of food for thought, if you’re building something small with motors and need to figure out how to spec them out.

A Push Stick

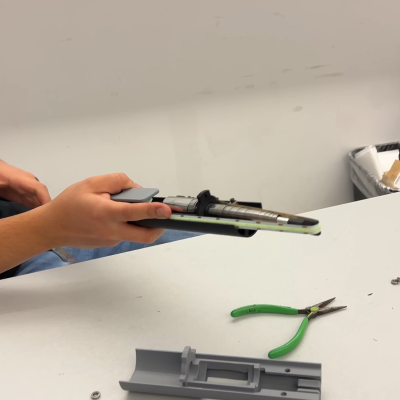
Aside from a few good examples, what I really took home from this piece is how easy it can be to take approximate measurements. Take the push stick, which is a spring-loaded plunger in a transparent barrel. You use it to measure force by, well, squeezing the spring and reading off how far it deflects. That’s obvious, but the real trick is in calibration by pushing it into a weighing scale and marking divisions on the barrel. That quickly and easily turns “it’s pressing this hard” into an actual numerical force measurement.

The accuracy and precision of the push stick are limited by the quality of your scale and the fineness of the pen tip that you use to mark the barrel. But when you’re just looking to choose among two servo motors, this kind of seat-of-the-pants measure is more than enough to buy the right part. Almost any actual measurement is better than a wild-ass guess, so don’t hold yourself to outrageous standards or think that improvised quantitative measurement devices aren’t going to get the job done.

Al Williams quoted a teacher of his as saying that the soul of metrology is “taking something you know and using it to find something you don’t know”, and that sums up this piece nicely. But it’s also almost a hacker manifesto: “take something you can do and use it to do something that you can’t (yet)”.

Got any good measurement hacks you’d like to share?

Hackaday Supercon 2024 Call For Participation: We Want You!

We’re tremendously excited to be able to announce that the Hackaday Supercon is on for 2024, and will be taking place November 1st through the 3rd in sunny Pasadena, California. As always, Supercon is all about you, the Hackaday community. So put on your thinking caps because we’d like to hear your proposals for talks and workshops! The Call for Speakers and Call for Workshops forms are online now, and you’ve got until July 9th to get yourself signed up.

Supercon is a fantastic event to geek out with your fellow hackers, and to share the inevitable ups and downs that accompany any serious project. Like last year, we’ll be featuring both longer and shorter talks, and hope to get a great mix of both first-time presenters and Hackaday luminaries.

Honestly, just the crowd that Supercon brings together is reason enough to attend, but then you throw in the talks, the badge-hacking, the food, and the miscellaneous shenanigans … it’s an event you really don’t want to miss. And as always, presenters get in for free, get their moment in the sun, and get warm vibes from the Hackaday audience. Get yourself signed up now!

No Solder! Squeeze Your Parts To The PCB

What’s solder for, anyway? It’s just the stuff that sticks the parts to the PCB. If you’re rapid prototyping, possibly with expensive components, and want to be able to remove chips from the board easily when you spin up the next iteration, it would be great if you didn’t have to de-solder them to move on. If only you could hold the parts without the solder…

That’s exactly the goal behind [Zeyu Yan] et al’s SolderlessPCB, which uses custom 3D printed plastic covers to do the holding. And it has the knock-on benefit of serving as a simple case.

In their paper, they document some clever topologies to make sure that the parts are held down firmly to the board, with the majority of the force coming from screws. We especially like the little hold-down wings for use with SMD capacitors or resistors, although we could absolutely see saving the technique exclusively for the more high value components to simplify design work on the 3DP frame. Still, with the ability to automatically generate 3D models of the board, parts included, this should be something that can be automated away.

The group is doing this with SLA 3D printing, and we imagine that the resolution is important. You could try it with an FDM printer, though. Let us know if you do!

This is the same research group that is responsible for the laser-cut sheet-PCB origami. There’s clearly some creative thinking going on over there.

Institutional Memory, On Paper

Our own Dan Maloney has been on a Voyager kick for the past couple of years. Voyager, the space probe. As a long-term project, he has been trying to figure out the computer systems on board. He got far enough to write up a great overview piece, and it’s a pretty good summary of what we know these days. But along the way, he stumbled on a couple old documents that would answer a lot of questions.

Dan asked JPL if they had them, and the answer was “no”. Oddly enough, the very people who are involved in the epic save a couple weeks ago would also like a copy. So when Dan tracked the document down to a paper-only collection at Wichita State University, he thought he had won, but the whole box is stashed away as the library undergoes construction.

That box, and a couple of its neighbors, appear to have a treasure trove of documentation about the Voyagers, and it may even be one-of-a-kind. So in the comments, a number of people have volunteered to help the effort, but I think we’re all just going to have to wait until the library is open for business again. In this age of everything-online, everything-scanned-in, it’s amazing to believe that documents about the world’s furthest-flown space probe wouldn’t be available, but so it is!

It makes you wonder how many other similar documents – products of serious work by the people responsible for designing the systems and machines that shaped our world – are out there in the dark somewhere. History can’t capture everything, and it’s down to our collective good judgement in the end. So if you find yourself in a position to shed light on, or scan, such old papers, please do! And then contact some nerd institution like the Internet Archive or the Computer History Museum.

DIY Bimetallic Strip Dings For Teatime

Do you like your cup of tea to be cooled down to exactly 54 C, have a love for machining, and possess more than a little bit of a mad inventor bent? If so, then you have a lot in common with [Chronova Engineering]. In this video, we see him making a fully mechanical chime-ringing tea-temperature indicator – something we’d be tempted to do in silicon, but that’s admittedly pedestrian in comparison.

The (long) video starts off with making a DIY bimetallic strip out of titanium and brass, which it pretty fun. After some math, it is tested in a cup of hot water to ballpark the deflection. Fast-forward through twenty minutes of machining, and you get to the reveal: a tippy cup that drops a bearing onto a bell when the deflection backs off enough to indicate that the set temperature has been reached. Rube Goldberg would have been proud.

OK, so this is bonkers enough. But would you believe a bimetallic strip can be used as a voltage regulator? How many other wacky uses for this niche tech do you know?

Thanks [Itay] for the tip!

The 2024 Business Card Challenge Starts Now

If you want to make circuits for a living, what better way to impress a future employer than to hand them a piece of your work to take home? But even if you’re just hacking for fun, you can still turn your calling into your calling card.

We are inviting you to submit your coolest business card hacks for us all to admire, and the top three entries will win a $150 DigiKey shopping spree.  If your work can fit on a business card, create a project page for it over on Hackaday.io and enter it in the 2024 Business Card Contest. Share your tiny hacks!

To enter, create a project for your hacked business card over at Hackaday IO, and then enter it into the 2024 Business Card Challenge by selecting the pulldown on the left. It’s that easy.

Continue reading “The 2024 Business Card Challenge Starts Now”

Tool-Building Mammals

It’s often said of us humans that we’re the only “tool-using mammals”. While not exclusive to the hacker community, a bunch of us are also “tool-building mammals” when we have the need or get the free time. I initially wanted to try to draw some distinction between the two modes, but honestly I think all good hackers do both, all the time.

We were talking about the cool variety of test probes on the podcast, inspired by Al Williams’ piece on back probes. Sometimes you need something that’s needle-thin and can sneak into a crimp socket, and other times you need something that can hold on like alligator clips. The infinite variety of jigs and holders that make it easier to probe tiny pins is nothing short of amazing. Some of these are made, and others bought. You do what you can, and you do what you need to.

You can learn a lot from looking at the professional gear, but you can learn just as much from looking at other hackers’ bodge jobs. In the podcast, I mentioned one of my favorite super-low-tech hacks: making a probe holder out of a pair of pliers and a rubber band to hold them closed. Lean this contraption onto the test point in question and gravity does the rest. I can’t even remember where I learned this trick from, but I honestly use it more than the nice indicator-arm contraptions that I built for the same purpose. It’s the immediacy and lack of fuss, I think.

So what’s your favorite way of putting the probe on the point? Home-made and improvised, or purpose-built and professional? Or both? Let us know!