C64 Joystick Adapter

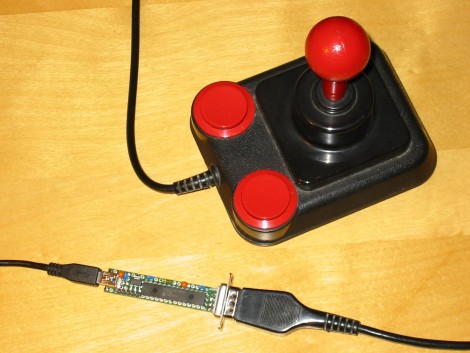
[Marcus Gritsch] wanted to do his retro gaming using retro hardware… or at least using some retro hardware. Although he was playing his Commodore 64 games in an emulator, he figured that using an original controller would boost the nostalgia quite a bit. This is a vintage Competition Pro joystick that has buttons and a joystick of a similar quality to arcade hardware and a DE-9 connector. He managed to connect new to old by building his own USB to C64 joystick adapter.

His project started out by breadboarding a circuit based on a PIC 24FJ64GB002 microcontroller. This does all of the work, having native USB support, and no problem reading and translating the signals from the old hardware which are simply conductors for each internal switch that pull to ground when actuated. Once working, he soldered everything to some protoboard; a connector at each end, the chip itself, a voltage regulator, and some passive components. It’s a, robust build that should give him years of emulated fun.

Years Of Robotic Projects – Dumped For Your Enjoyment

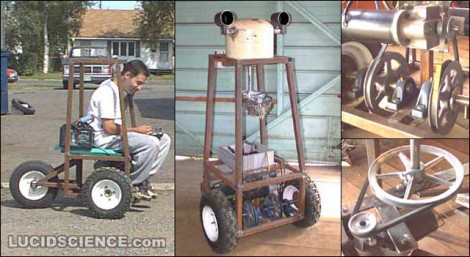
Meet tippy, just one of the multitude of robotic projects [Oneironaut] has taken on over the years. He ‘dug deep’ and put together a huge data dump of pictures and descriptions of his old robotic projects, then posted them for your enjoyment. When he wrote in to Hackaday on Monday he mentioned 33 pages of them, but he must be adding material as he finds it because we see 52 pages.

These aren’t micro-robots either. These are I’m going to chase you down because I’m your worst nightmare robots. They use heavy welded-iron frames, lead-acid batteries, and gear-motor driven locomotion. Some of his project names include The Tank, The Sentinel, and The Megatron. Bookmark the link you see above, because you’re going to want to spend some time sifting through the candy-shop of projects which seem to be too plentiful to be the hobby of just one man. Although we shouldn’t be surprised, just look at the multitude of spy-gadgets he’s come up with lately like the GPS tracker and the long-range laser night vision.

Throw Together A Temperature Logger In Minutes

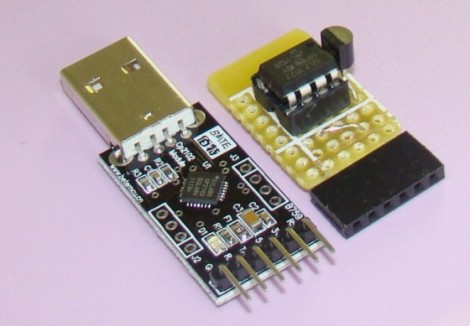
[Rajendra] found an easy way to make a USB temperature logger. He already had a USB to UART adapter that takes care of the heavy lifting. On one end it’s got the USB plug, on the other a set of pins provide a ground connection, 3.3V and 5V feed, as well as RX/TX lines.

To get the hardware up and running all he needed was something to read a temperature sensor and push that data over the serial connection. An 8-pin microcontroller in the form of a PIC 12F1822 does the trick. It runs off of the 5V pin on the USB-UART, and uses the ADC to get temperature data from an MCP9701A sensor.

The sample rate is hard-coded into to the PIC’s firmware, but adding a button, or coding some serial monitoring could easily make that configurable. [Rajendra] used Processing to write an app which displays the incoming temperature info and uses the computer to time-stamp and log the inputs. We could see this as a quick solution to tracking wort temperature during fermentation to make sure your beer comes out just right.

On The Life Of [Dennis Ritchie]

Chances are you have already heard of the passing of [Dennis Ritchie]. We admit, we’re among the throngs who knew little of his life, but [Cade Metz] has posted an excellent remembrance of his life which we think is well worth reading.

[Dennis] passed on October 12th at the age of 70. This image shows him receiving the National Medal of Technology awarded to him by [Bill Clinton] in 1998. His legacy lives on in the work that earned him this award as the creator of the C programming language; a side project which he developed to help him achieve the creation of a new system kernel called UNIX. This work, of course, was the precursor that led to universal software packages like OSX, iOS, Linux, and even Windows (which at one point was itself written using the C language).

There has been some Internet fodder regarding media coverage of [Steve Jobs’] death and not of [Dennis’] passing. It’s harder for those lacking experience with programming to comprehend [Dennis’] contributions. We’re glad to have an opportunity to pass on the story of his life and to take a moment to appreciate his accomplishments.

[Thanks Dave]

[Photo Source]

Monkey-powered Scooter Is All Electric

[Knife141] lets this monkey push him around all day long. It’s a whimsical touch for his scratch-built electric scooter. He started the build without a set of plans, cutting angle iron and clamping it together until the frame looked about right. Once the welding was done, he began adding all the parts to make it functional. There are front and rear brakes, operated by a lever on the handlebars. The rear wheel has a sprocket bolted to it, along with some spacers to give the chain adequate clearance.

Inside the saddle enclosure you’ll find a set of three lead-acid batteries. These are 12 volt 10 amp models that provide 36 volts of juice to the electric motor. The only thing we know about the electronics is that both the motor and the controller were purchased at a surplus store.

The sock monkey that pushes him around is sort of an afterthought. But since it’s just a couple of wheels with the feet attached, this might make a fun project for the kids to add to a bike.

LCD Backpack: From Arduino Board To Homemade Pcb

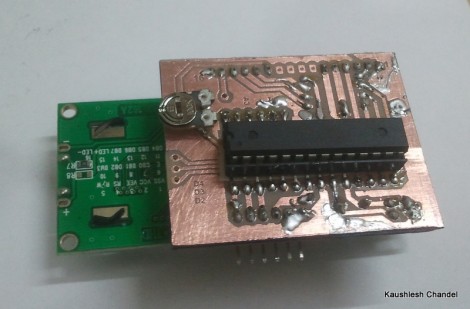
[Kaushlesh Chandel] prototyped a few projects on his Arduino that use an HD44780 Character LCD. Wanting to keep these projects in one piece, but not sacrifice his Arduino board, so he etched his own LCD backpack that is Arduino compatible. If you’ve never made it past the Arduino board to build a module that only uses the parts you need for a project, this is a great source of inspiration for you to give it a try.

The design that [Kaushlesh] drew up is quite simple. It connects directly to the single in-line header of the character LCD. It looks like he’s using the 4-bit mode for addressing that display, which leaves you with quite a few pins (both digital and analog) to work with in the future. The important components rolled into his design are the chip itself, an ATmega8/168/328, the crystal to make sure it is running at the correct speed for Arduino timing, and a trimpot for adjusting the contrast on the display. The final feature you’ll want to be sure to include in your own design is a pin header for programming the chip via an FTDI cable.

Never etched your own PCB before? Give our PCB fab tutorial a try.

PopCARD Vending Machine Enhancement Gets Upgraded

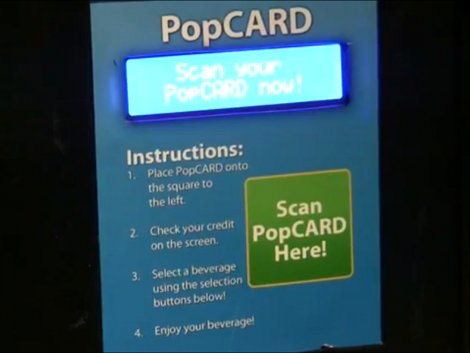
[Alex] wrote in to let us know he just completed a pretty major upgrade to his PopCARD RFID vending machine system. You may remember that earlier this year he added an Arduino based RFID reader to a soda machine so that thirsty patrons could pay with plastic instead of cold hard cash. That system worked, but at the beginning of the video after the break [Alex] goes over some of its flaws. There was a button to add cash from the card to the machine in $1 increments, rather than the system just knowing how much to charge you. Also, if you accidentally selected something that was out of stock you were out of luck and were charged anyway.

The new system does away with the button, and knows what product is sold out. The control hardware was upgraded to an Arduino mega to gain extra I/O pins. The device now sits in between the machine’s buttons and its own controller. When cash is used, the Arduino sits passively and lets the machine do its thing. But when a card is scanned, it takes over control of the buttons, sensing your selection, then simulating coin and button presses to vend accordingly. The new setup also uses an Ethernet shield which allows [Alex] to tell what items are running low without being at the machine itself.

Continue reading “PopCARD Vending Machine Enhancement Gets Upgraded”