A Capacitive Discharge Welder/cutter For All Your Lightweight Needs

microspot-welder

[Radu Motisan] wrote in to share a cool project he has been working on lately, a pulsed microspot welder/cutter.

The device is capable of spot welding thin metals such as foils and battery tabs by sending a pair of high current pulses between the two electrodes whenever [Radu] presses the trigger button. The cutting portion of his device uses the same general mechanism, though it requires a far greater number of pulses to get the work done.

The welding/cutting process is controlled by an ATMega16, which is also tasked with taking input from the user and displaying information on the LCD panel. The microcontroller creates quick (in the ten to several hundred microsecond range) pulses for both welding and cutting, with the latter obviously requiring a long series of pulses.

[Radu] started out using a relatively small capacitor array to power the device, but has recently upgraded to a 1.6 Farad car audio capacitor, which works (and looks) much better than before. His blog seems to update every few days with more pictures and details about his welding station, so be sure to check back often for updates.

Be sure to stick around to see a short video of [Radu] adding metal tabs to batteries and tearing down an aluminum can with his cutter.

Continue reading “A Capacitive Discharge Welder/cutter For All Your Lightweight Needs”

Wireless Solar Water Heater Controller Ensures Hot Water Every Time

water-heater-controller

[Peter Sobey] had a solar hot water heater installed in his home, which worked great until he relocated his kitchen to a neighboring room. Now a good bit further from the tank, the hot water reaching his sink was tepid at best due to the increased distance and temperature limiting mixer valve in the new heater.

He installed a salvaged solar panel and water tank solely for use in his kitchen, but as the panel was located above the tank, he had to find a way to actively monitor and control the water temperature. His pump and valve system was originally driven with an off the shelf PICAXE-based controller, but he eventually got the urge to add a wireless display and control panel to the mix.

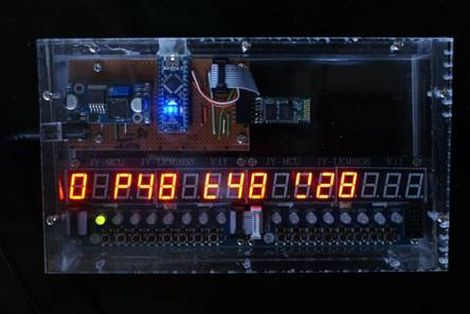
A pair of Arduino Nanos run the show now, one of which resides in the pump controller box, while the other is used in the temperature display box in his kitchen. He uses a set of Bluetooth modules to link the Arduinos together, relaying temperature data and allowing him to send the pump controller manual commands if needed.

He says the system works a treat, and he’s much happier with his homebrew controller than the one he used originally.

Hard Resetting Your Ford Touch System The Easy Way

ford-sync-reset

[Jeff Clymer] owns a Ford Focus, and while he’s generally happy with the car, the “My Ford Touch/Sync” system can be buggy at times. He spends a lot of time in the car each day, so when the entertainment center locks up as it is frequently known to do, he has to turn off the car and pull a fuse to reset the system. Since pulling a fuse while on the road is pretty impractical, he decided to install a reset button, making system reboots a breeze.

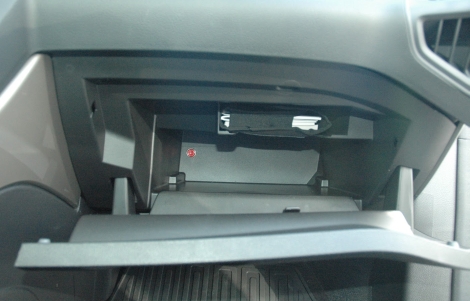
He started by disassembling various fuses until he found one with an easy to remove fusible link. Once it was in pieces, he soldered a pair of wires to the fuse terminals and connected everything to a normally closed momentary pushbutton switch. After adding an inline fuse holder and reinserting the original fuse, he installed the button into the back of his glove box

Now instead of physically removing the fuse each time his stereo locks up, he can simply push a button and be on his way. Here’s hoping a software fix is coming for [Jeff’s] car sooner rather than later!

Vintage VT100 Terminal Computing…with A Beaglebone

decbox

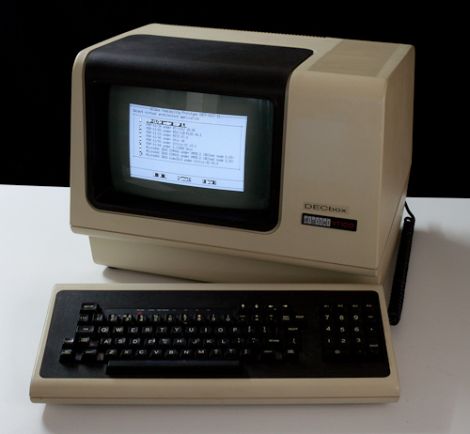
A cool little project came our way, which we thought might be of interest to some of you vintage computer buffs. [Joerg Hoppe] wrote in to share a DEC VT100 terminal he resurrected in a novel fashion.

His “DECBox” system was created with a Beaglebone, which he uses to run a wide array of PDP11/VAX terminal emulators, thanks to the SIMH project. [Joerg] constructed an expansion shield for the Beaglebone that provides several UART connections, enabling him to connect it to his DEC terminal over a serial interface. Since he added several serial plugs to the Beaglebone, he can even run multiple emulator installations in parallel on different terminals without too much trouble.

[Joerg’s] efforts are mainly for a vintage computer display he is constructing, but setting up such a system of your own should be no problem. If you happen to have one (or more) of these boxes sitting around collecting dust, this would be an easy way to get them all up and running without bulky external hardware, since the Beaglebone tucks nicely into the rear expansion slot on a VT100.

Be sure to check out his site for more details on how his DECBox software package works as well as for more pictures of vintage terminal goodness.

Monitoring Home Electricity Usage Via A Tidy Wall Display

power-meter-display

[Janne Mäntyharju] wanted to get an idea as to how much electricity he consumed in his new home, mainly to see if using his fireplace for additional heat had any effect on his bill. Luckily his power meter was mounted in the utility room of his house, making it easy to keep tabs on his usage.

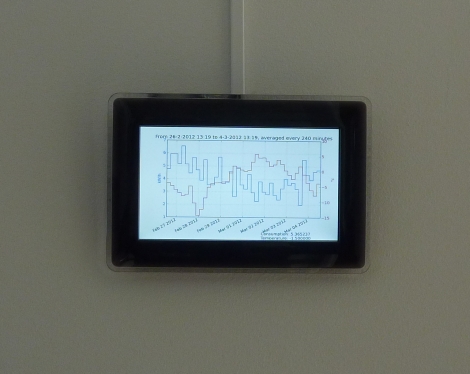
His meter features a small LED that blinks a fixed number of times per consumed Kilowatt hour, so he mounted a photoresistor and ATtiny2313 above it to detect the light pulses. [Janne’s] server polls the microcontroller every 5 minutes over an XBee connection, recording the power usage in an SQL database for further analysis. From this database, he generates graphs showing both the temperature in his home as well as the average electricity usage for the specified time period.

[Janne] also wanted to make the data easily accessible, so he constructed a wall-mounted display using a Beagleboard and digital picture frame. The display not only shows his electricity usage, but it toggles between the weather, calendar events, IRC logs, and pictures from his security camera.

We’ve certainly seen this sort of electric meter monitoring before, but it serves as a quick reminder that given the right tools, watching your power usage (among other things) can be as easy as taking a quick glance over at the wall.

oscope-reverse-engineering

Reverse Engineering An Oscilloscope Circumvents Vendor Crippleware

The crew over at the Hungarian Autonomous Center for Knowledge (H.A.C.K.) say they aren’t the most well-funded organization out there, so they were stoked when they found they could afford to bring a slightly used UNI-T UT2025B digital oscilloscope into the shop. As they started to tinker with it, the scope revealed one major shortcoming – screenshots were only accessible via a USB connection to a Windows computer.

Since they didn’t have any Windows boxes in house, [András Veres-Szentkirályi] decided he would try reverse-engineering the protocol so they could get access to this useful feature.

He set up a Windows VM, and using Wireshark on the host Linux box, [András] sniffed the data passing over the scope’s USB interface. He was able to identify what looked like image packets being sent to the VM, which he was able to decode using a small Python script. The resultant images were monochrome and they didn’t look quite right, but it was a start. As he dug further [András] found that he was overlooking some of the color data packed into the images, and after a bit of fiddling he got the sharp, colorful image you see above.

It turns out that while the scope has a monochrome LCD, it sends 16-bit color images over the USB interface – images that the Windows’ client degrades before displaying them on the screen. So in the end, he was not only able to get the scope working on any OS with the ability to run Python, he was able to grab far better images than the manufacturer ever intended – A very nice hack if we do say so.

Be sure to swing by the H.A.C.K. wiki as well as the project’s github repository if you have one of these scopes and are looking to wring some better images out of the hardware.

USB Dongle Generates And Enters Your Passwords So You Don’t Have To

usb-password-dongle

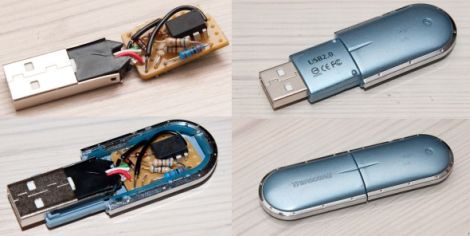
Like many businesses out there, [Joonas Pihlajamaa’s] employer requires him to change his password every few months. Instead of coming up with a complex, yet easy to remember password again and again, he built a small USB device to do the work for him.

He dismantled an old USB memory stick, fitting it with an ATtiny85 with its required components on a small piece of perfboard. Using the knowledge he gleaned from his previous USB HID tinkering, he programmed the ATtiny to act as a USB keyboard which enters his password for him whenever he plugs it in.

The USB dongle not only types his password in for him, it can generate a new password with a few simple keystrokes whenever he desires. Obviously it merely takes someone getting their hands on his USB stick to compromise security, but it does beat a Post-It under the keyboard any day.

Continue reading to see a short video of his USB password dongle in action, and be sure to swing by his site for more details on how it was all put together.

Continue reading “USB Dongle Generates And Enters Your Passwords So You Don’t Have To”