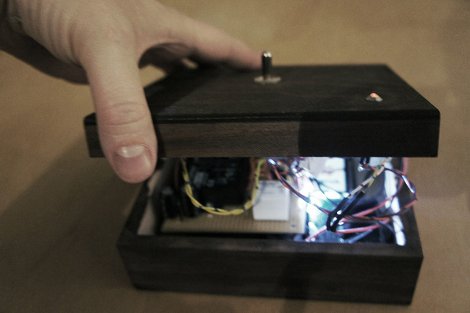
The Phone Box

[Nerdindustries] had a interesting idea; “what if you could just flip a switch and call someone?”. This happens a lot, especially in companies where your trying to catch a certain someone who is always swamped in phone calls. The Phone Box is a basic Nokia cellphone that has a number stored into its speed dial. To help aid in communication the phones output is directed to a three and a half watt amplifier module ensuring that your going to hear it.

A delay circuit was made out of a basic RC network, so when you hit the switch the phone has a chance to power up and fully boot. Once the delay triggers it presses the speed dial button and off you go. Now someone has already asked “Why don‘t you just call them?”, and we got a kick out of the first answer “calling someone is NOT nerdy.”

Join us after the break for a quick video.

Continue reading “The Phone Box”

Remote Entry Via Android And Launchpad

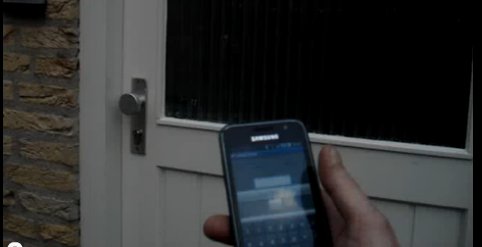
[MarkoeZ] had an issue with keys breaking off in his door lock, and while normal people might try to simply replace the lock all together, [MarkoeZ] decided to do it the “Hackaday” way by adding a bluetooth lock to his door. His door is already setup where someone can walk up to it, page an internal intercom and have someone buzz you in. From the inside the intercom was modded with a TI Launchpad with a “deal extreme” bluetooth module and relay.

Access is granted by the use of an android phone running “BT_Serial_Tester” which is a simple app that allows you to send characters over bluetooth. Just enter a pin, grab the door before the buzzer times out, and you’re in! A starting point for the MSP code and schematics are available on his blog. Join us after the break for a quick demonstration video.

Continue reading “Remote Entry Via Android And Launchpad”

Shove A Hub Into That Keyboard

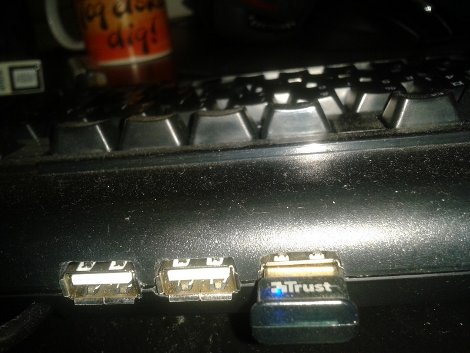
As masters of technology, our desks are often cluttered with odds and ends. We have cables spewing out of every nook, and our computer ports full. The last thing we really want is more stuff getting in the way or buried under piles of technical documentation when adding something like a USB hub. That is where [Michael] comes in, shoving a small USB hub into his Logitech keyboard.

The keyboard is already USB, and the hub has 3 forward facing ports and a fourth single port in the rear. Taking the 2 devices apart he used the already there USB cord from the keyboard replacing the input cord of the hub. Then he removed the rear port and directly wired his keyboard onto the hub.

From there, its just a matter of figuring out where he wanted the hub, and cutting out the plastic. He used a knife, and had fond memories of some minor cuts, which leads us to recommend being (more) careful. A little application of fire to blade goes a long way.

Once the keyboard is back together he has a convenient 3 port hub on the back of his keyboard that looks factory and saves clutter.

Make A Simple O-scope With A FTDI Board And A Couple Of ADC’s

[RandomTask] has posted a nice tutorial on how to use a FTDI serial to usb converter, and a couple analog to digital converters to make a simple software oscilloscope. Using a “Universal Serial to USB converter” and one of many FTDI break out boards, he first reprograms the chip using FTDI’s programming software to put the device into a FIFO (first in first out) mode.

From there a pair of ADC0820 8 bit digital to analog converters are wired up, and input is fed to a couple 555’s for testing. It should be noted that there is no input protection, so things like voltages above 5 volts, or negative voltages are a big no-no with this setup. It still could be very handy while working with micro controllers or other digital circuits.

Data is then sent to the computer and displayed using a VB.net program, which has some basic features like scale and triggering, but also contains a couple bonuses like Calc Freq and Calc V delta calculation.

Many people have these little serial to usb converters, and might be in need of a simple scope. If you’re one of them, then you can cobble this together pretty darn quickly, and cheaply.

Unshredding Paper

[Roel] had read that people won the DARPA shredder challenge, but that their technology was kept a secret, interested in this concept he also remembered an episode of the X-Files where they had reconstructed shredded paper using a computer system. Unlike most computer based TV show BS this did not seem to be too far fetched so he went about trying it himself.

First a note is written, and then cut up into strips, the strips are then scanned into a computer where the magic happens. Next each strip outlined in polygons and then the software is to follow the polygon outline looking for a change in color at the pixel level. The software then goes into a pattern matching mode and reassembles the paper based on a scoring system.

While not many people use old fashioned strip shredders anymore, the basic idea works and if you really wanted to expand it could be applied to cross cut or particle shredders.

Got Dead Bugs In Your Stereo?

It happens to the best of designers, spending untold amounts of time designing a complex device just to find out that you missed a trace, or you couldn’t rout something to something else. As time marches on its becoming a bit less common to pop open a commercially produced device and see a little jumper wire or 2 flying across a pcb, or a resistor straddling an IC.

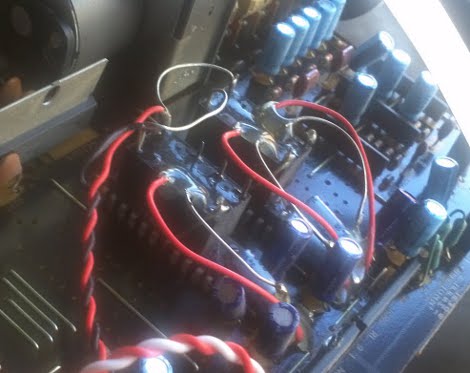
But when [Ilektron] opened up a Yamaha Dolby Pro Logic receiver to scavenge for parts he saw a very big “oops” and a even wilder fix. The maker took a pair of relays, flipped them “belly up” and hot glued them into place on top of a pair of ICs. Then the mess was “dead bug” wired to the circuit using insulated and uninsulated bus wire, contacts were then reinforced / insulated using more hot glue.

This is one of the most hacky fix we have seen in a commercially produced product, but we would love to hear your amusing horror stories of “WTH did they do?” So join us in the comments after the break.

Programming AVR I2C Interface

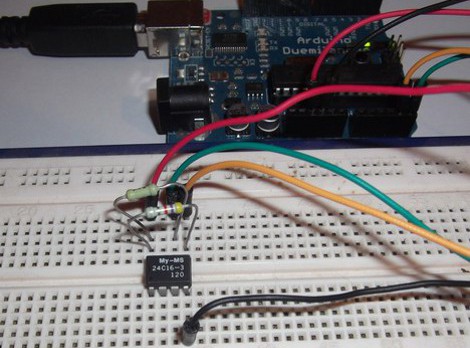
I2C as many of you know, is a simple serial interface for many peripheral devices to micro controllers, but it can quickly become confusing to people who may not be accustom to it. Because of that, I2C tutorials are always welcome, and this new tutorial by [Embedds] does an excellent job of how to use I2C with an AVR with a 24C16 2Kbyte EEPROM.

The first half of the tutorial provides a clear explanation of how I2C works, including its signal structure, addressing, and data packets. It then moves on to AVR territory showing how to setup the I2C in an AtMega micro controller. The author uses a pretty standard to most of us Arduino, with software written in AVR C and a nifty little GUI programming application which eases the hassle of dealing with AVRDude directly.

Plenty of code samples follow from twiddling registers to a full blown application reading and writing bits from the EEPROM to a serial terminal on a PC.