Video gamers know about cheat codes, but assembly language programmers are often in search of undocumented instructions. One way to find them is to map out all of a CPU’s opcodes and where there are holes, try those values, and see what happens. Not good enough for [Ken Shirriff]. He prefers examining the CPU’s microcode and deducing what each part of it does.
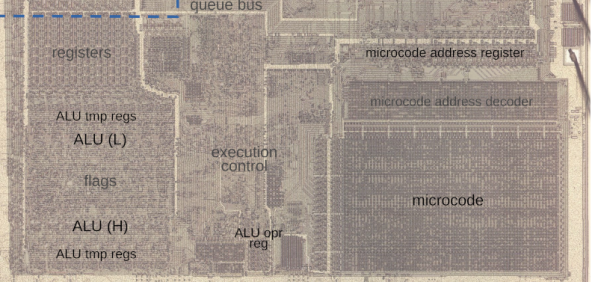
Microcode is a feature of many modern CPUs. The CPU runs several “microcode” instructions to process a single opcode. For the Intel 8086, there are 512 micro instructions, each with 21 bits. Each instruction has two parts: a part that moves a source to a destination and another that performs some other operation, such as an ALU operation. [Ken] explains it all in the post, including several hidden registers you can’t see, but the microcode can.
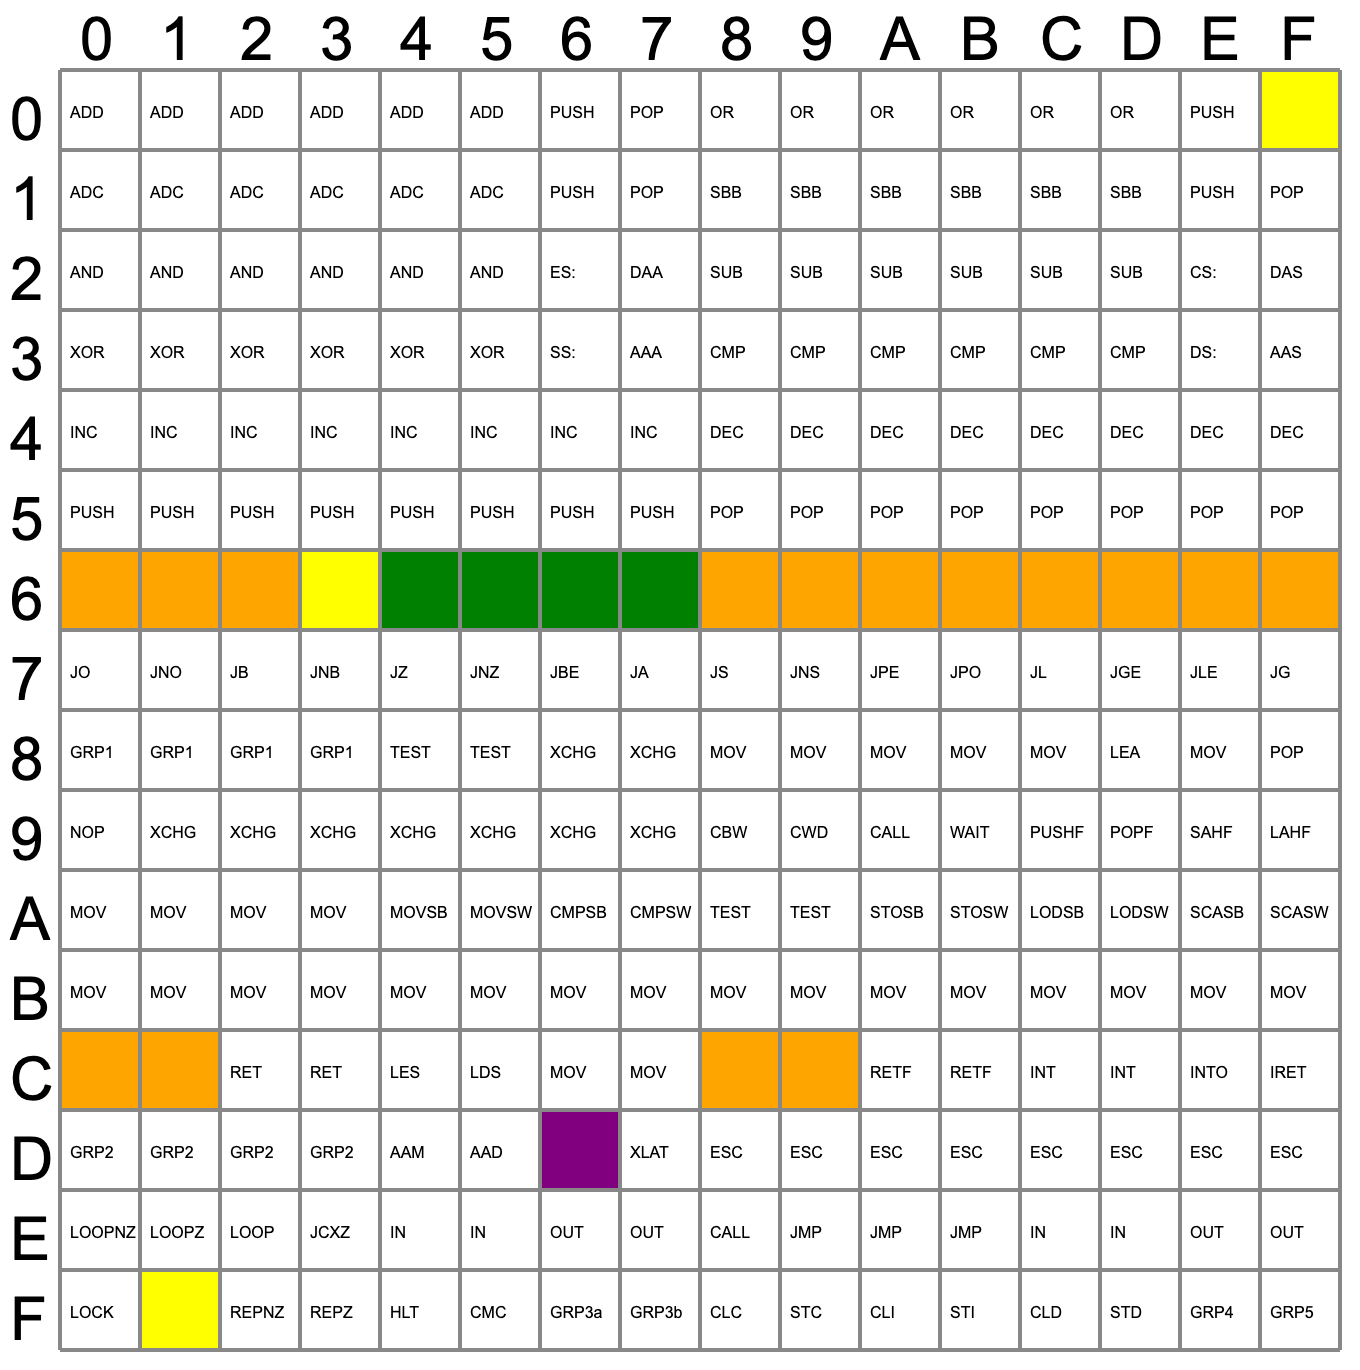
Some of the undocumented instructions are probably not useful. They are either impractical or duplicate a function you can already do another way. Not all of the instructions are there for technical reasons. For example, opcode D6, commonly known as SALC for “Set AL to Carry”, seems to exist only as a trap for anyone making a carbon copy of Intel’s microcode. When other companies like NEC made 8086 clones, having an undocumented instruction would strongly suggest they just copied Intel’s intellectual property (in NECs case, they didn’t).
Other cases happen where an instruction just doesn’t make sense. For example, you can pop all segment registers, and though it is not documented, you can deduce that POP CS should be opcode 0F. The problem is there is no sane reason to pop CS off the stack. The instruction works; it just isn’t useful. The opcodes from 60-6F are conditional jumps that are no different from the instructions at 70-7F because of decoding. There is no reason to document both identical instruction ranges.
The plot thickens when you go to two-byte instructions. You’ll find plenty of instructions of dubious value. You don’t hear much about undocumented instructions anymore. Why? Because modern CPUs have enough circuitry to dedicate some to detecting illegal instructions and halting the CPU. But the 8086 was squeezed too tight to allow for such a luxury. Good thing for people like us who enjoy solving puzzles.
You can still get a modern CPU to tell you more about instructions even if it won’t run them. Even the 80286 had some secret opcodes.