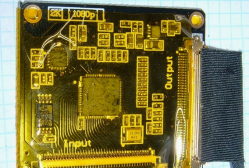
PCB Design Review: HDMI To LVDS Sony Vaio LCD Devboard

Today, we revisit another board from [Exentio] – a HDMI/DVI to LVDS transmitter for the Sony Vaio P display. This board is cool to review – it has a high-speed serial interface, a parallel interface, a healthy amount of power distribution that can be tricky to route, and many connectors to look over.

I’ve decided to show this review to you all because it demonstrates a PCB improvement concept we haven’t yet touched upon, that you should absolutely know about when doing board layout. Plus, I get a chance to talk about connector choice considerations!

The board is lovely. It integrates the DPI-LVDS circuit we’ve previously reviewed, but also a HDMI to parallel RGB chip from Texas Instruments, TFP401, a chip appreciated enough that even Adafruit has adapters with it. The fun thing about this chip is that it doesn’t even handle EDID like the usual HDMI to RGB/LVDS chips you get on cheap Aliexpress boards. So, there’s no firmware to take care of – it just receives a HDMI/DVI signal, converts it into parallel RGB, then converts that to LVDS, and off to the display it goes. The downside is that you have to provide your own EDID with an EEPROM, but that isn’t that tricky.

Again, this is a two-layer board, and, again, I like this – fitting tracks to the smallest possible space is a respectable and enjoyable challenge. This board has absolutely done well by this challenge. I do see how this board could be routed in an even better way, however, and it could be way way cleaner as a result. For a start, rotating the chip would improve the odds a whole lot.

The Chip Gets Rotated

Continue reading “PCB Design Review: HDMI To LVDS Sony Vaio LCD Devboard”

Displays We Love Hacking: LVDS And EDP

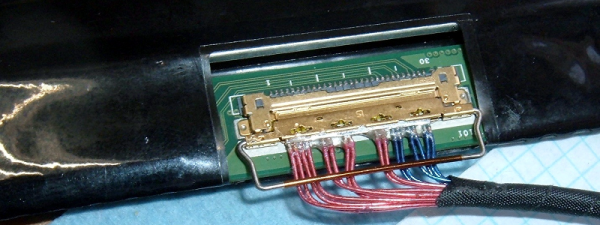
There are times when tiny displays no longer cut it. Whether you want to build a tablet or reuse some laptop displays, you will eventually deal with LVDS and eDP displays. To be more exact, these are displays that want you to use either LVDS or eDP signaling to send a picture.

Of the two, LVDS is the older standard for connecting displays, and eDP is the newer one. In fact, eDP has mostly replaced LVDS for things like laptop and tablet displays. Nevertheless, you will still encounter both of these in the wild, so let’s start with LVDS.

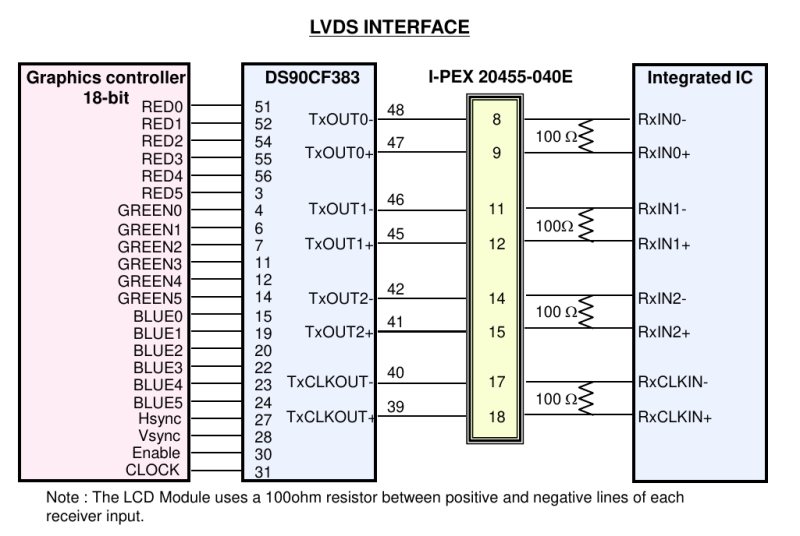
The name “LVDS” actually comes from the LVDS signaling standard (Low-Voltage Differential Signaling), which is a fairly generic data transfer standard over differential pairs, just like RS485. Using LVDS signaling for embedded display purposes is covered by a separate standard called FPD-Link, and when people say “LVDS”, what they’re actually talking about is FPD-Link. In this article, I will also use LVDS while actually talking about FPD-Link. Barely anyone uses FPD-Link except some datasheets, and I’ll use “LVDS” because that’s what people actually use. It’s just that you deserve to know the distinction so that you’re not confused when someone mentions LVDS when talking about, say, industrial machinery.

Both LVDS and eDP run at pretty high frequencies – they’re commonly used for color displays with pretty large resolutions, so speed can no longer be a constraint. eDP, as a successor technology, is a fair bit more capable, but LVDS doesn’t pull punches either – if you want to make a 1024 x 768 color LCD panel work, you will use LVDS, sometimes parallel RGB – at this point, SPI just won’t cut it. There’s a lot of overlap – and that’s because LVDS is basically parallel RGB, but serialized and put onto diffpairs. Let me show you how that happened, and why it’s cool.

Continue reading “Displays We Love Hacking: LVDS And EDP”

PCB Design Review: DPI-LVDS Sony Vaio LCD Devboard

Ordering a PCB with mistakes sucks. We should help each other avoid such mistakes – especially newcomers. One of the best ways to avoid these mistakes, especially if it’s your first one, is to get a few other people to look at it. You deserve to get a PCB that is as functional and as helpful as humanly possible, so that you can be happy with your project, and feel ever so slightly more confident in yourself in whatever you shall set out to do next.

At the end of last year, I put out a call for design review submissions, and we’ve received enough projects to make me feel overwhelmed for a bit. A design review has always felt like a personal thing, and here we are doing them in public. But in that sense, we hope that everyone can learn from them, and we hope to push forward a healthy review culture.

What’s more, these articles won’t just be design review. Every project I’m highlighting is worthy of a Hackaday feature just on its own, so tune in and learn more about them!

Today’s Contestant

For this example, I will be walking through a review I’ve already given someone with a pretty cool board, for a pretty cool project I’ve already shown you. Remember the Sony Vaio remake project? A fair bit of people have reached out to me afterwards, and one of them, [Exentio] also had the same Sony Vaio rebuild idea in mind. We started chatting, and he decided to tackle one of the project’s milestones, and perhaps the most crucial one – adapting the LCD.

Continue reading “PCB Design Review: DPI-LVDS Sony Vaio LCD Devboard”

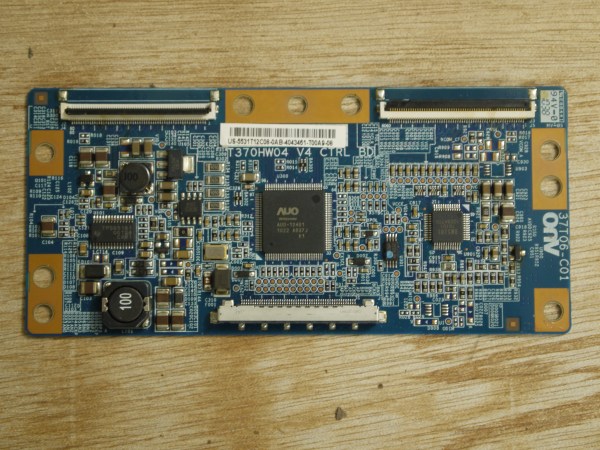
The AUO-manufactured controller board of an LG-branded TV. (Credit: Andrew Menadue)

What To Do With A Broken Television When You Can’t Fix It

Who can say ‘no’ to a free TV, even if it’s broken? This was the situation [Andrew Menadue] ended up in last year when he was offered an LG 39LE4900 LCD TV. As [Andrew] describes in the blog post along with videos (see first part embedded after the break), this particular television had been taken to a television repair shop previously after the HDMI inputs stopped working, but due to a lack of replacement parts the owner had to make due with the analog inputs still working. That is, until those stopped working as well.

The nice thing about these TVs is that they are very modular inside, as [Andrew] also discovered to his delight. In addition to the LG controller board, an inverter board and the power supply board, this TV also contained a TCON PCB. After some initial unsuccessful swapping of the parts with EBay replacements, nothing was (surprisingly) working, but it did turn out that the TCON and inverter boards are made and sold by AUO (major Taiwanese display manufacturer), along with the display itself.

In the end it turned out that the AUO boards and screen were fine, and after sourcing a board to convert VGA input to the LVDS signal accepted by the TCON board, the whole display worked. Naturally using a board with HDMI inputs would be nice, but it does show how a ‘broken’ TV can be turned into a really nice, big monitor without all too much effort if it’s just the controller board that went on the fritz.

Continue reading “What To Do With A Broken Television When You Can’t Fix It”

Recycling A Laptop Screen Into A Portable Folding Monitor

There’s plenty of times we’ve seen a laptop fail, break, or just become too slow for purpose despite the fact that it’s still packing some useful components. With all the single-board computers and other experiments lurking about the average hacker workshop, it’s often useful to have a spare screen on hand, and an old laptop is a great way to get one. This recycled display build from [Gregory Sanders] is a great example of how to reuse old hardware.

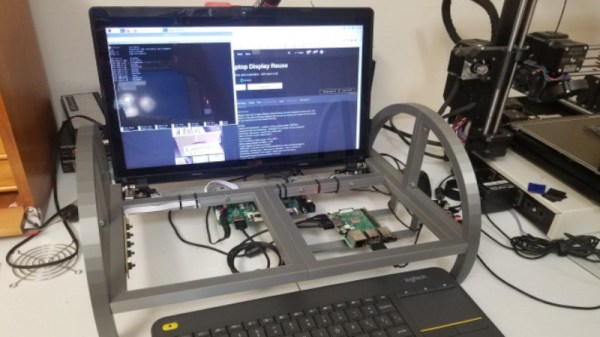
The build doesn’t simply package a laptop monitor in the same way as a regular desktop unit. Instead, [Gregory] designed a custom 3D printed frame with an arch design. The laptop screen is installed onto the frame using its original hinges, and [Gregory] designed in standoffs for an laptop LCD driver board to run the display as well as a generic frame where single-board computers can be installed.

The result is a portable monitor that can be folded up for easy transport, which is also self-supporting with its nice large base. It can also be used with other hardware, as it has a full complement of DVI, HDMI and VGA inputs on board. Of course, while you’re tinkering with laptop displays, you might also consider building yourself a dual-screen laptop as well.

Hack A ThinkPad Display

Hackers really like their tools. This leads to holy wars over languages, editors, keyboards, and even laptops. The problem with laptops is that they age, and not always gracefully. [Syonyk] likes his ThinkPad T430S, except for one thing, its TN display wasn’t really very good. These flat screens use an older technology and show color changes with different viewing angles among other problems. So he managed to upgrade the device’s screen to IPS with the help of a replacement screen and an adapter (see right). Apparently, many similar ThinkPads can take the same sort of upgrade.

The problem is that the laptop uses LVDS to talk to the TN screen, while newer screens are likely to use Embedded DisplayPort (eDP) which is a different protocol entirely. However, there’s now a converter that [Syonyk] found on eBay (from China, of course). For about $70, the motherboard’s LVDS output can transform to eDP. Of course, you also need an IPS display panel.

Continue reading “Hack A ThinkPad Display”

Making A Thinkpad Great Again

The Thinkpad X220 is almost a perfect laptop. The X220 is small, light, was the last small Thinkpad to use 35W CPUs, has great Linux support, incredible battery life, and can be found used very inexpensively. For the Thinkpad Mafia, the X220 is a badge of honor, but it does have one glaring drawback: the LCDs in these laptops are capped at 1366×768 resolution.

A few wizards in Japan and China have taken up the X220 and developed an adapter to give this tiny laptop the display it deserves. Mentions of a FHD mod – the Lenovo-speak for a Thinkpad display upgrade – can be found on Taobao, but the anglosphere doesn’t get these cool toys. [Vectro] decided his X220 wasn’t up to snuff and decided to build his own Thinkpad mod to give his trusty companion a bigger and brighter display. He succeeded, and did it in a way that’s much better than any previous attempt.

Stock, the X220 uses an LVDS bus for internal video, and there aren’t enough lanes on this bus for a 1080 display. The usual way of modifying the X220 for a display with higher resolution is tapping into the eDP present on the Thinkpad dock connector. [Vectro]’s solution differs slightly from the usual way of doing things – instead of using an I2C EEPROM to report the resolution, DPI, and model of display, he’s using a microcontroller. This gives him the ability to control the power state and brightness level of the display. It’s a great solution, and is designed to be a relatively easy drop-in mod.

The new display works, and Thinkpadding at 1080 is awesome, but there’s still work to be done. The dock connector is incompatible with this mod, and hopefully scaling this up for small-scale production. Producing a few X220 FHD kits is going to be a problem, as each wire in the eDP cable is individually soldered to the connector. It doesn’t scale well, but there is certainly a demand to make the greatest Thinkpad even better.