A few weeks back, we got a taste for two-stage tentacle mechanisms. It’s a look at how to make a seemily complicated mechanism a lot less mysterious. This week, we’ll take a close look at one (of many) methods for puppeteering these beasts by hand. Best of all, it’s a method you can assemble at home!
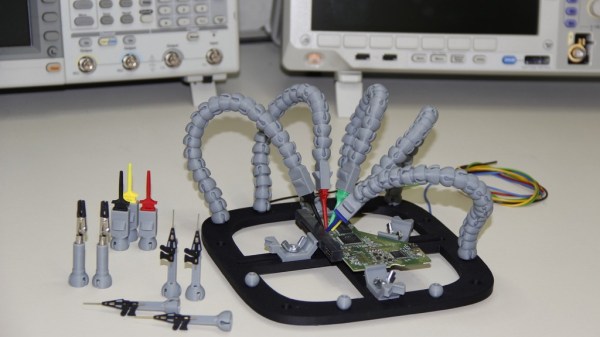
Without a control scheme, our homebrew tentacle can only “squirm around” about as much as an overcooked noodle. It’s pretty useless without some sort of control mechanism to keep all the cables in check at proper tension. Since the tentacle’s motion is driven by nothing more than four cable pairs, it’s not too difficult to start imagining a few hobby servos and pulleys doing the job. To get us started, though, I’ve opted for hand controllers just like the puppeteers of the film industry.
Enter Manual Control
Hand controllers? Of all the possibilities offered by electronics, why select such an electronics-devoid caveman approach? Fear not. Hand controllers offer us a unique set of opportunities that aren’t easy to achieve with most alternatives.
Continue reading “Two-Stage Tentacle Mechanisms Part II: The Cable Controller”


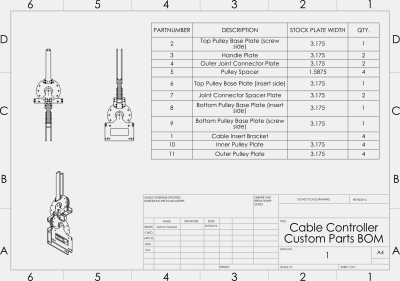 In a good-ol’ engineers-for-engineers fashion, I’m doing something a little different for this post: I’m finishing off this series with a set of assembly videos, a BOM, and the original CAD files to make that beast on the front page come to life. As for why, I figured: why not? Even though these mechanisms have lived in the robotics community and film industry for years, they’re still lacking the treatment of a solid, open design. This is my first shot at closing that gap. Get yourself a cup of coffee. I’m about to give you every bleeding detail on the-how-and-why behind these beasts.