Simple Trick For Replacing Game Boy Cart Batteries While Retaining Game Saves

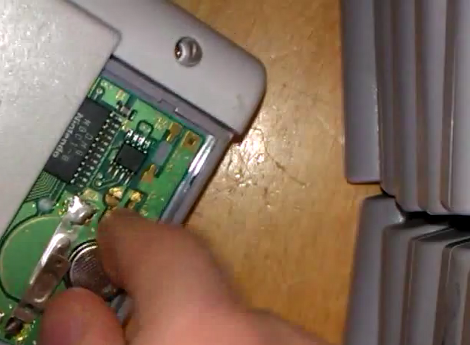
[Adr990] wants to make sure his Game Boy game saves aren’t lost to aging batteries. They’re stored in SRAM with a small coin cell inside the cartridge to keep the memory energized when the game is not being played. But if you pull out the battery in order to replace it the data will be lost in the process. It turns out that you can hot-swap the battery without too much effort. As shown in the video after the break, he disassembled the case of the cartridge, then replaced the battery while the Game Boy is switched on. The edge connector feeds power which will keep the SRAM active while the backup battery is removed. We’re sure this could be done with a bench supply as well, but you’ll need to do your own testing before risking those prized game saves.

The other option is to backup your SRAM before replacing the batteries. We’ve seen an AVR-based cartridge dumper, and also one that uses an Arduino. Both should be able to read and write SRAM data. Continue reading “Simple Trick For Replacing Game Boy Cart Batteries While Retaining Game Saves”

Adding A MIDI Input To A Game Boy

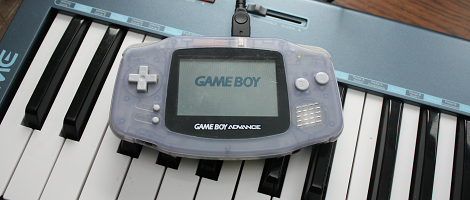
[Sprite_tm] is back again, and his work never fails to impress. His latest project is a Game Boy Advance MIDI synth that takes MIDI data from a keyboard or sequencer and maps that to Game Boy sound channels.

Because he seems to never do anything the normal way, [Sprite_tm] decided to run the Game Boy without a cartridge. We’ve seen this before; the GBA boots into the synth software over the link cable with multibooting.

Continue reading “Adding A MIDI Input To A Game Boy”

Going A Long Way For Game Boy Advanced Video Out

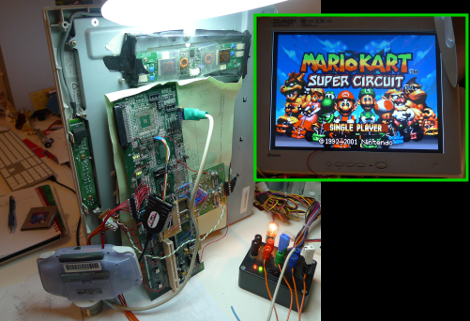
Here’s an intense hack that lets [Matt Evans] play Game Boy Advanced on a larger LCD monitor. He didn’t take the easy way out during any step of the process.

He’s using an FPGA to translate the LCD signals from the GBA hardware into a 1280×960 picture that is then pushed to the large monitor. But did he use an FPGA development board? No, instead he picked up an old PCI card at a surplus store because it had a Xilinx Virtex-E FPGA. So the first thing he had to do there was to remove unneeded components and figure out how to make the connections to reprogram that chip.

So next you’d grab a working monitor and hook it up to the FPGA signal, right? Wrong, [Matt] had a slightly borked monitor, getting rid of the LVDS section and wiring up his own connections to push the RGB signals through in parallel.

Yeah, that’s a lot of work. But as you can see in the clip after the break, it works like a charm. If you’re looking for some other gnarly video-out hacks, check out this one that lets you play Game Boy on an oscilloscope.

Continue reading “Going A Long Way For Game Boy Advanced Video Out”

Game Boy Communicates Directly With An SD Card

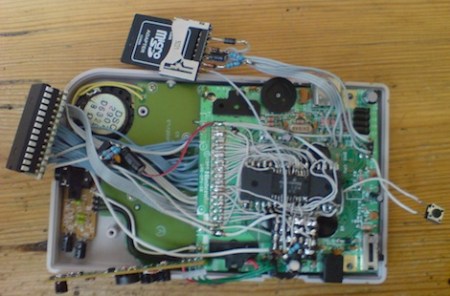
[kgsws] just finished his Game Boy upgrade that allows him to load games from an SD card. Loading a game off an SD card has been done before, but [kgsws] decided to not to use a cartridge-based device. In the end, he threw out all the stops and finished his project by having the Game Boy access an SD card directly.

[kgsws] his project trying to figure out how to put some GPIO pins on a game cartridge, but figured that this would take too much hardware. After looking at the specs of the link port, he realized that it was the wrong polarity. Not to be deterred, [kgsws] realized that there was something like a general-purpose I/O on the Game Boy – the joypad input.

Continue reading “Game Boy Communicates Directly With An SD Card”

Game Boy VGA Using An FPGA

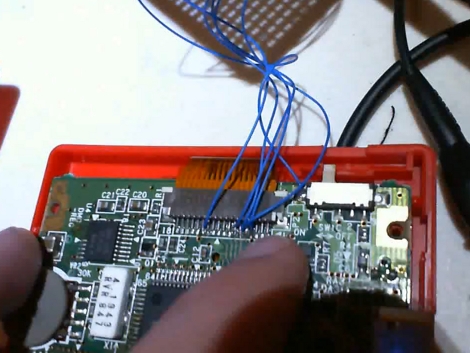
[ViDAR] was looking for a project to keep him occupied and settled on creating a VGA converter for his Game Boy. He had some difficulty finding pinouts for the LCD and CPU but working with what was known, and an oscilloscope, he found the necessary signal. Tap into just a few lines using those thin blue wires; Vsync, Hsync, clock, and two data pins. From there a development board with an Altera Cyclone II field-programmable gate array takes care of the heavy lifting. The board already has hardware for a VGA connection so it was just a matter of processing the incoming signals into the VGA standard. His demo video is embedded after the page break.

Want a dedicated solution? Check out this Game Boy video adapter inside a VHS cassette.

Continue reading “Game Boy VGA Using An FPGA”

Original Shell Houses A Game Boy Advance SP

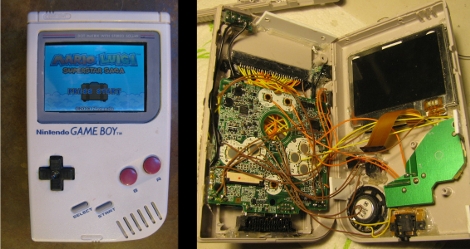
[Jackson] decided he wanted to give his original Game Boy a bit more power so he replace the internals with those from a Game Boy Advance SP. This keeps the case work to a minimum, as the original was larger than the SP. He kept the buttons, speaker, headphone jack, and power switch but modified the enclosure to use the volume, charger, and battery from the newer hardware. The cartridge connector was relocated to match the slot in the back half of the case, with the color screen being the biggest giveaway that someone’s monkeyed with the device. Not a bad use for a dead Game Boy, as least you’ll be playing this one instead of dedicating it to virtual storage.

Diving Deep Into The Game Boy LCD Protocol

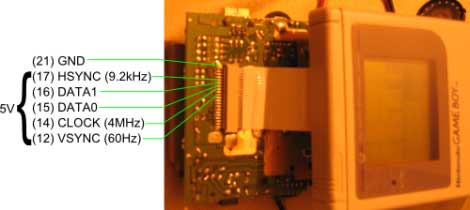
[Craig] wanted to make the original Game Boy LCD screen do his bidding so he sniffed out the data protocol that it uses. We were amused when he mentions that there’s an army of people out there looking to build pointless crap as part of a hobby. Guilty. And he goes on to outline why this LCD screen is a great resource for hobbiests.

As you can see in the pinout above, it uses 5V logic, with a 4 MHz data clock. These traits are both very friendly to a wide range if inexpensive microcontrollers. If you know how to address the display it should be very easy to use. Furthermore, the low pin count is thanks the to a 4-shade grayscale screen, limiting the data pins to just two. [Craig] hooked up his Saleae Logic probe to capture communications and walks us through what he discovered. During this process he proved to himself that he had figured out the protocol by exporting captured data from the logic probe and reassembling it into an image on his computer.