Go Portable With GameCube Advance SP

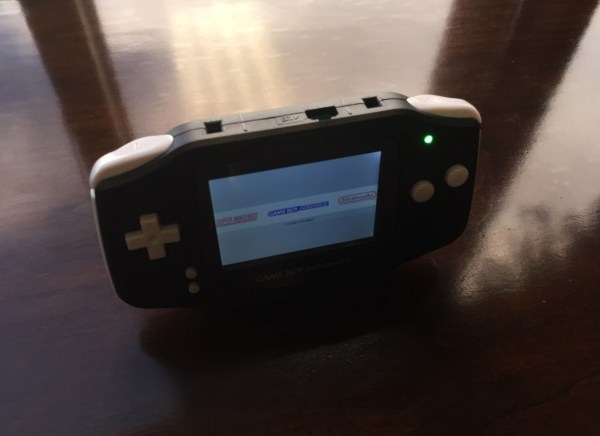
Off the hop, we love portable consoles. To be clear, we don’t just mean handhelds like the 3DS, or RetroPie builds, but when a maker takes a home console from generations past and hacks a childhood fantasy into reality — that’s amore. So, it’s only natural that [Bill Paxton]’s GameCube re-imagined as a Game Boy Advance SP has us enthralled.

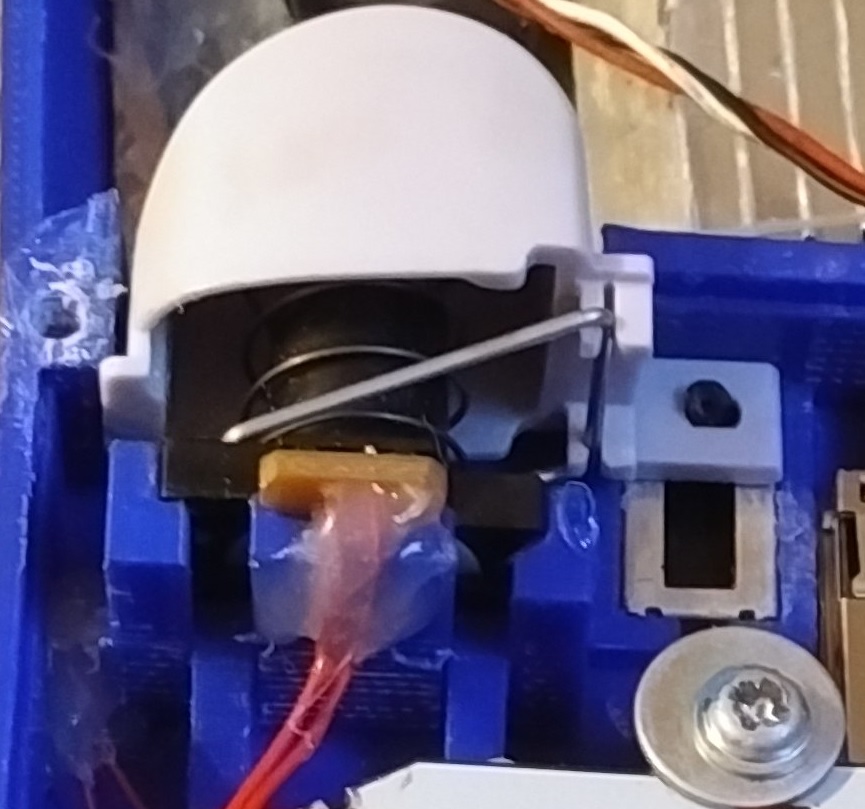
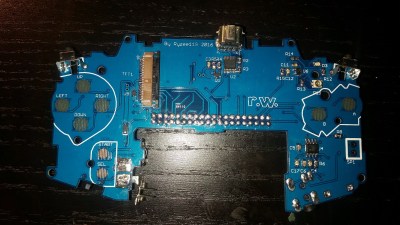
Originally inspired by an early 2000’s imagined mockup of a ‘next-gen’ Game Boy Advance, [Paxton] first tried to wedge a Wii disk drive into this build. Finding it a bit too unwieldy, he opted for running games off of SD cards using a WASP Fusion board instead. Integrating the controller buttons into the 3D printed case took several revisions. Looking at the precise modeling needed to include the L and R shoulder buttons, that is no small feat.

Sadly, this GameCube SP doesn’t have an on-board battery, so you can’t go walking about with Windwaker. It does, however, include a 15 pin mini-din VGA-style port to copy game saves to the internal memory card, a switching headphone jack, amp, and speakers. Check it out after the break!

Continue reading “Go Portable With GameCube Advance SP”

Emulating A GameBoy Advance Inside Of A Gameboy Advance

[Ryzee119]’s GBA might not look so different at first glance. The screen is way better than you remember, but that may just be your memory playing tricks on you. The sound comes out of the speakers. It feels the right weight. It runs off AA batteries. Heck, even the buttons feel right.

emulating-gba-inside-gba
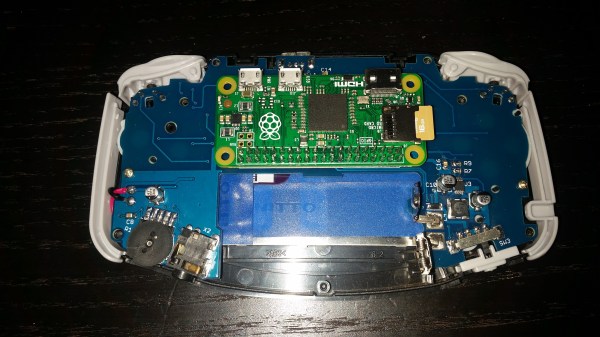
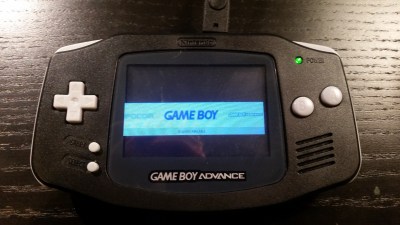
It’s not until you notice that it really shouldn’t be playing any games without a cartridge inserted that you know something is not right in the Mushroom Kingdom. When you look inside you see the edge of a Raspberry Pi Zero instead of the card edge connector you expected.

It took a lot of work for [Ryzee119] to convert a dead, water damaged, GBA to a thriving emulation station based around a Pi Zero. The first step was desolder the components he couldn’t find anywhere else. The LR buttons, the potentiometer, and even the headphone jack. The famously hard to see screen, of course, had to go.  It was replaced by a nice TFT. Also, the original speaker was too corroded from the water and he sourced a replacement.

Custom replacement PCB

Next he took a good photo of the GBA’s circuit board. We wonder if he used the scanner method mentioned in the comments of this article? He spent a lot of time in Dassault’s DraftSight, a 2D CAD program, outlining the board. Then, after thoroughly verifying the size of the board for the Nth time he imported the outlines to EagleCAD.

He managed to cram quite a bit onto the board while remaining inside the GBA’s original envelope. The switches, potentiometer, and jack went back to their original locations. Impressively, he made his own pad traces for the A, B, and D-Pad buttons. The mod even handles slowly decreasing battery voltages better than the original.

In the end it all snaps together nicely. He’s configured it to boot into the emulator right at start-up. If you’d like one for yourself, all his files are open source. 

Game Pie Advance Brings Retro Gaming To Your Fingertips

We love our Game Boy and RetroPie mods here at Hackaday because the Raspberry Pi Zero has made it easier than ever to carry a pocket full of classic games. [Ed Mandy] continues this great tradition by turning a matte black Game Boy Advance into a RetroPie handheld.

Details are scant on how [Mandy] built his Game Pi Advance, but we can glean a few details from the blog post and video. A Raspberry Pi Zero running RetroPie appears to be piggybacking on a custom PCB that slots neatly into the GBA case. This provides easy access to the Pi Zero’s USB and micro HDMI via the cartridge slot to connect to an external screen, as well as a second controller to get some co-op NES and SNES action on. It’s worth noting here that [Mandy] has foregone adding X and Y buttons in the current version.

Continue reading “Game Pie Advance Brings Retro Gaming To Your Fingertips”

Original Shell Houses A Game Boy Advance SP

[Jackson] decided he wanted to give his original Game Boy a bit more power so he replace the internals with those from a Game Boy Advance SP. This keeps the case work to a minimum, as the original was larger than the SP. He kept the buttons, speaker, headphone jack, and power switch but modified the enclosure to use the volume, charger, and battery from the newer hardware. The cartridge connector was relocated to match the slot in the back half of the case, with the color screen being the biggest giveaway that someone’s monkeyed with the device. Not a bad use for a dead Game Boy, as least you’ll be playing this one instead of dedicating it to virtual storage.