USB Rotary Phone: A Lync To The Past

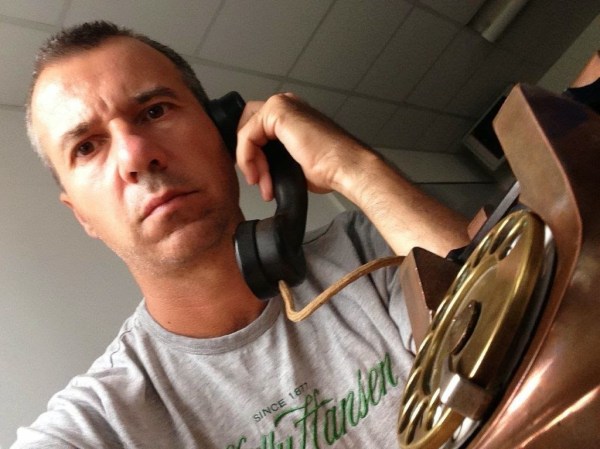
[Ivan] is fed up with all this rampant virtualization. When his company took away his physical desk phone in favor of using MS Lync, he was driven to build a USB rotary phone. His coworkers loved it and one of them asked [Ivan] to build another. The build log focuses on converting his coworker’s vintage brass and copper number that must weigh a ton.

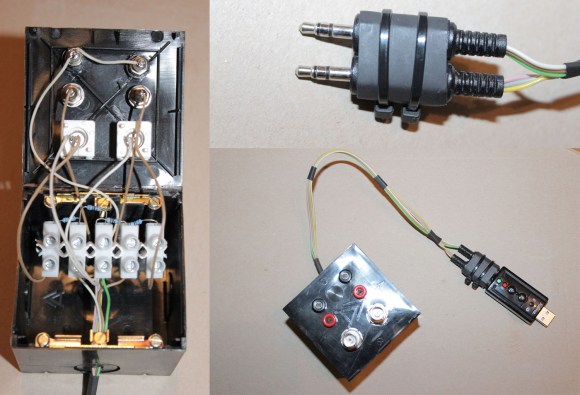
He had to do a bit more work with this one because it had rusted out inside and a few of the contacts were bent. The good news is that the speaker and microphone were in working order and he was able to use them both. After restoring the stock functionality, he added a USB sound card and created a USB keyboard using a PIC32MX440F256H.

The rotary phone’s dial works using two switches, one that’s open and one that’s closed when no one is dialing. Once dialing is detected, the open switch closes and the closed switch clicks according to the dialed digit (ten clicks for 0). [Ivan] also reads the switch hook state and has added debouncing. This gave him some trouble because of the quick response expected by the PC bus, but he made use of interrupts and was allowed to keep his seat.

Please stay on the line. [Ivan]’s videos will be with you shortly.

Continue reading “USB Rotary Phone: A Lync To The Past”

Pi Musicbox 0.5 Released

Pi MusicBox Logo


Have an extra Raspberry Pi kicking around? Pi MusicBox provides a way to quickly turn it into a standalone streaming device that can fetch music from tons of sources. The latest release of Pi MusicBox adds a bunch of new features.

We took a look at this software over a year ago, and noted that it made streaming Spotify easy, and had support for controlling tracks using Music Player Daemon (MPD). The newest release supports AirPlay, DNLA, Google Music, SoundCloud, and several other music sources.

Since the analog audio output on the Pi isn’t great, Pi MusicBox includes support for a variety of USB sound cards. It’s also possible to use the HDMI port for digital audio output, which can be connected into your home theatre system.

If you want to build a standalone music device, this looks like a great place to start. The user community has built a variety of projects that run this software, which are featured on the Pi MusicBox homepage.

MIDI And Vintage FM Synthesis

FM

Before the days when computers could play and record audio that far surpassed the quality of CDs, sound cards were very, very cool. Most audio chips from the 80s, from the Commodore SID is pretty much a synth on a chip, but you can also find similar setups in ancient ISA sound cards. [Emilio] pulled one of these cards with an ADLIB OPL2 chip on it, and used a PIC micro to create his very own FM synthesis synth (IT, translatatron, although Google is screwing up the formatting).

The Yamaha YM3812 chip, otherwise known as the OPL2, was a fairly complete synthesizer in a very tiny package using FM synthesis for some very unique sounds. Once [Emilio] had the PIC sending commands to the sound chip, he added MIDI support, allowing him to play this vintage ‘synth on a chip’ with a keyboard instead of a tracker.

Judging from the video below, it sounds great, and that’s with [Emilio] mashing the keys for a simple demo.

Continue reading “MIDI And Vintage FM Synthesis”

The Basics Of Frequency Modulation

fm-modulation

[brmarcum] takes us back to analog building block basics with his Frequency Modulation and Demodulation tutorial. Frequency Modulation (FM) sounds simple at first, but understanding the electronics behind modulation and  demodulation of an FM signal can be confusing. We’ve covered the basics before, but FM is so tightly associated with broadcast radio that searches often become muddled with references to RF, stereo, antennas, and transmitters.

[brmarcum] hopes to fill that gap with a simple circuit that modulates an audio signal to FM, then demodulates and amplifies it to be played on a small speaker. He used a Digilent Analog Discovery kit in his experiments, but an oscilloscope (an older analog scope would be perfect here) would work for output. Signal generation duties could easily be handled by a 555 circuit at the low end, and a computer sound card at the higher end.

[brmarcum] obviously put some time into his tutorial, but it’s not a tome of FM modulation. He’s broken down the modulation and demodulation circuits into their basic op-amp stages with examples of what the signal should look like on a scope after each stage. That’s the beauty here. By building and testing each section, anyone new to analog can learn how things work. In places where the theory behind what’s going on gets too in-depth for an Instructable, [brmarcum] gives links to Wikipedia.

Raspberry Pi Bluetooth Receiver For Your Car Stereo

RasPi Car Audio

The ability to play music in your car over a Bluetooth connection is very handy. You can typically just leave your phone’s Bluetooth module turned on and it will automatically pair to your car. Then all you have to do is load up a music player app and press play. You don’t have to worry about physically tethering your phone to the car every time you get in and out of the vehicle. Unfortunately Bluetooth is not a standard option in many cars, and it can be expensive to buy an aftermarket adapter.

[parkerlreed] built his own solution to this problem using a Raspberry Pi. He first installed arch Linux on his Pi. He also had to install pulseaudio and bluez, which is trivial if you use a package manager. He then modified some of the Linux configuration files to automatically bring the Pi’s Bluetooth adapter online once it is initialized by the kernel.

At the end of the boot sequence, the Pi is configured to automatically log in to a virtual console as [parkerlreed’s] user. The user’s bashrc file is then altered to start pulseaudio in daemon mode at the end of the login sequence. This allows the Pi to actually play the audio via the Pi’s sound card. The Pi’s stereo output jack is then plugged into the vehicle’s auxiliary input jack using a standard audio cable.

The Reddit post has all of the configuration details you would need to duplicate this setup. [parkerlreed] also includes some commands you will need to setup the initial pairing of the Raspberry Pi to your smart phone. Be sure to watch the video demonstration below. Continue reading “Raspberry Pi Bluetooth Receiver For Your Car Stereo”

A Head Unit Docking Station

dock

[Ivan] had a simple idea: being able to control his Android device from the small keypad on his car’s steering column. This would allow him to cycle through apps, navigation, and audio tracks while never taking his hands off the wheel. Feature creep then set in and [Ivan] asked himself how he could charge his phone through the same interface. What he ended up with is a head unit that’s also a dock.

While [Ivan]’s steering wheel doesn’t have the nice integrated remote control buttons found in newer cars, he does have a Blaupunkt remote, a small, clip-on controller that has a an IR transmitter on it. The IR receiver was connected to a PIC microcontroller, sending commands to the phone for up, down, left, right, menu, and home. Audio output from the phone is handled by a small USB sound card connected to a USB hub, sending the audio signals directly into the head unit’s amplifier.

Having the phone charge while it’s still in USB host mode is the crucial part of this build; not being able to charge on a long car ride would quickly drain the battery and make a car dock kind of pointless. To accomplish this, [Ivan] simulated a Galaxy S4 dock with a few resistors in the USB port, allowing the phone to control the USB sound card, listen to the emulated keyboard and mouse, and charge at the same time.

It’s not a pretty build, but it is extraordinarily useful. In the videos you can see that [Ivan] pretty much pulled this build together from stuff he had sitting around – a great reuse of junk, and a great addition to his car at the same time.

Continue reading “A Head Unit Docking Station”

An Audio Based USB Oscilloscope And Signal Generator For $20

SoundScope

Are you interested in building a 20kHz 2-channel oscilloscope and a 2-channel signal generator for only $20 with minimal effort? Be sure to check out [Jana Marie’s] Instructable that goes over how to build this awesome tool from a cheap USB audio card.

We have featured tons and tons of DIY oscilloscopes in the past, but this effort resulted in something very well put together while remaining very simple to understand and easy to build. You don’t even need to modify the USB audio card at all. One of the coolest parts of this build is that you can unplug your probe assembly from your USB audio card, and bring it wherever your hacking takes you. After the build, all you need is [Christian Zeitnitz’s] Soundcard Oscilloscope program and you are good to go. One of the major downsides that is often overlooked when using an audio based oscilloscope, is that it is “AC coupled”. This means you cannot measure low-frequencies (including DC signals) using a sound card. Be sure to heed [Jana’s] advice and do not use your built in audio card as an oscilloscope. With no protection circuitry, it is a sure fire way to fry your computer.

What analog projects have you built around an audio interface? We have seen such an interface used for many different applications, including a few fun medical related hacks (be sure to keep safety your first priority). Write in and let us know!