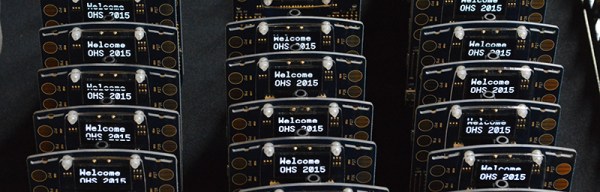
maplemaker mini v2 3d printer

MapleMaker 3D Printer Is As Printable As They Get

The term RepRap is fairly common and gets thrown around too often when generally talking about DIY 3D Printers. We must remember that the intent of the RepRap project “…is about making self-replicating machines…” and of course “…making them freely available for the benefit of everyone…“.

[MiniMadRyan] has recently designed a printer that could be considered the embodiment of the RepRap philosophy. He’s calling it the MapleMaker Mini V2. An extremely high percentage of the parts required to build this printer are, in fact, printable themselves. The frame pieces are printed, all of which can be printed on the printer thanks to the 6x8x6 inches print volume. The overall design is aesthetically pleasing, resembling that of a Lulzbot Mini.

The MapleMaker Mini V2 is self-replicating. The other part of the RepRap goal is to be free to the community. The design files are available on YouMagine and the assembly manual is better than those provided by most commercial companies. So if you’re looking to build a printer, be sure to add this one to your short list!


Astoundingly Great $60 3D Printer Called Chimera Bests Your Printer

When most people think of 3D printing, they think of Fused Deposition Modelling (FDM) printers. These work by heating a material, squirting it out a nozzle that moves around, and letting it cool. By moving the nozzle around in the right patterns while extruding material out the end, you get a part. You’ve probably seen one of the many, many, many FDM printers out there.

Stereolithography printing (SLA) is a different technique which uses UV light to harden a liquid resin. The Chimera printer uses this technique, and aims to do it on the cheap by using recycled parts.

First up is the UV light source. DLP projectors kick out a good amount of UV, and accept standard video inputs. The Mitsubishi XD221u can be had for about $50 off eBay. Some modifications are needed to get the focus distance set correctly, but with that complete the X and Y axes are taken care of.

For the Z axis, the build platform needs to move. This was accomplished with a stepper motor salvaged from a disk drive. An Arduino drives the motor to ensure it moves at the right rate.

Creation Workshop was chosen as the software to control the Chimera. It generates the images for the projector, and controls the Z axis. The SLA process allows for high definition printing, and the results are rather impressive for such a cheap device. This is something we were just talking about yesterday; how to lower the cost of 3D printers. Obviously this is cheating a bit because it’s banking on the availability of cheap used parts. But look at it this way: it’s based on older technology produced at scale which should help a lot with the cost of sourcing this stuff new. What do you think?

lego 3d printer

Lego Printer Prints Lego

[Gosse Adema] made his very first instructable by detailing his Lego 3D printer build. It’s Prusa i3 based, and originally started out as an A4 plotter with repurposed steppers out of an old HP printer. After upgrading to some NEMA 17 steppers, it became a full-blown 3D printer.

It turns out that NEMA 17 stepper mounting holes align perfectly with Lego, making it super easy to mount them. Check out this Lego ‘datasheet’ for some great details on measurements.

The brains of the printer are occupied by Marlin running atop a Atmega 2560, and Pronterface for the PC software. He tops it off with a Geeeteck built MK8 extruder boasting a 0.3 mm nozzle that accepts 1.75 mm filament.

As with almost any DIY 3D printer build, his first prints didn’t turn out so well. After adjusting the nozzle and filament size in the software, he started to get some good results. Be sure to check out the video below to see this Lego 3D printer in action.

Continue reading “Lego Printer Prints Lego”

Hackaday Links Column Banner

Hackaday Links: June 7, 2015

I’ve said over and over again that Apple’s MagSafe port is the greatest advancement in laptop tech in the last 15 years. Those charger connectors break, though, so how do you fix it? With Lego, of course (Google translatrix). Use a light-colored 1×4 brick so the LED will shine through.

Want to learn Git commands? Here’s a great game that does just that. It’s a really well-designed game/tutorial that walks you through basic Git commands.

Lets say you’re just slightly paranoid about the Bad Guys™ getting into your computer with 0-days and roller blades. You’d like to connect this computer to the Internet, but you don’t want to leave it connected all the time. The solution? A timer for an Ethernet switch. It’s actually a better solution than doing the same thing with scripts: there’s a real, physical interface, and if the Bad Guys™ get in when you are connected, they could just enable the network adapter anyway. An extremely niche use case, but that’s 99% of the security hacks we see.

The DaVinci 3D printer is an okay printer if you’re cool with the Gilette model. The filament cartridges are chipped, and the software is proprietary. These problems have been solved, and now you can use a standard RepRap heated bed and glass with the DaVinci. At this point, people are buying the DaVinci just to tear it apart.

printrbot simple metal fix

Cheap Hot End Modification Allows Easy Future Repairs

We’ve seen a lot of experimenting with 3D printers over the years, and that is a good thing. However, [Tyler] has had a bad experience with experimenting. He has a Printrbot Simple Metal and decided to try nylon weed wacker line. Since he wanted to get straight to printing, he skipped the apparently important step of drying the trimmer line before printing. This experimentation ended in several clogged nozzles. Removing and cleaning the nozzle several times put undo stress on the Ubis hot end wires and they broke. Things were not going well.

In an effort to make his printer more repairable, [Tyler] ordered up an aluminum RepRap heater block, heating resistor and thermistor. The heater block was tapped with standard M6 threads but the Ubis was 1/4 inch. This was remedied by drilling and tapping the M6 hole to 1/4-20.

Now for the nozzles, [Tyler] bought a handful of cheap brass acorn nuts. He drilled a hole for the molten plastic to exit the nozzle, then used a Dremel to grind the acorn nut’s dome into a cone. He reports it only took him about 5 minutes per nozzle.

It looks like [Tyler] got back to printing with a little creative thinking. Unfortunately, the Ubis and J-Head hot ends are not interchangeable. A couple of other ex-Ubis users have made J-Head adapters for their Printrbots.

PVC CNC

PVC CNC Machine Build Results In A Great Learning Experience

Hobby level CNC machines are fun to use and are a great tool to make your projects with. So how does a CNC newb get started? Our opinion is that it’s best to jump right in and get doing. [WTH] wanted to learn more about CNC machines and decided to build his own using parts that were kicking around his house.

As you can see, the frame is made from PVC pipe. In addition, the linear rails are also PVC and the linear bearings….. larger diameter PVC. Scavenged stepper motors and threaded rod are responsible for moving the X and Y axes. Electronics-wise, an Arduino Uno running GRBL and a Protoneer CNC Shield outfitted with StepSticks drive the motors. Here’s a test drawing completed by the machine:

PVC CNC

Admittedly, this CNC machine won’t be milling out steel parts any time soon but that is not the point. [WTF] has learned the mechanics, electronics and software associated with CNC machines and that was the point of the project. We are looking forward to seeing how his next machine comes out.

This isn’t the first PVC CNC machine we’ve seen on Hackaday, check out this unorthodox one.

The Hackaday Prize: An Ultra Low Cost 3D Printer Controller

This isn’t a Hackaday Prize entry that will change the world, but that doesn’t mean there’s not a place for it. [vdirienzo] is building an ultra low-cost 3D printer controller for 3D printers and other CNC machine. It’s not going to change the world, but it is a rather interesting little device.

This printer controller is very minimal, with a single-sided circuit board with just enough parts and components to make this board useful. The stepper motor drivers are from Pololu, and most of the other components are stuff you could pull out of a reasonably stocked junk drawer. The microcontroller is rather interesting; it’s an Arduino Nano. Instead of the ATMega644 and ‘Mega1280 microcontrollers found on other 8-bit printer controller boards, [vdirienzo] slimmed down the Teacup firmware to fit on the ATMega328 in the Arduino Nano.

The SinapTec is not by any means the first effort to create an ultra low-cost controller board for a 3D printer that can be assembled at home. The RepRap Gen 7 electronics can be manufactured on a RepRap or small CNC mill. There’s not much to these boards – just a small, single-sided board. If you want a small, simple, and cheap controller board for a 3D printer, this is all you need.

While a cheap 3D printer controller board doesn’t really fit with the ‘change the world’ theme of The Hackaday Prize, that doesn’t mean there’s still not a place in the contest for [vdirienzo]’s entry; we have a Best Product category, with a $100k prize and a six month residency in the Hackaday Design Lab. If that’s not enough reason to build something cool – even if it won’t change the world – we don’t know what is.


The 2015 Hackaday Prize is sponsored by: