All The Workshops, And The SMD Challenge Happening At Hackaday Remoticon

Last week we announced the first fifteen workshops happening at Hackaday Remoticon, November 6-8, 2020. The weekend really is packed full of these hands-on events, and you’re invited to participate from anywhere in the world. Today we’re excited to announce the rest of the workshops, all of which are currently open for registration.

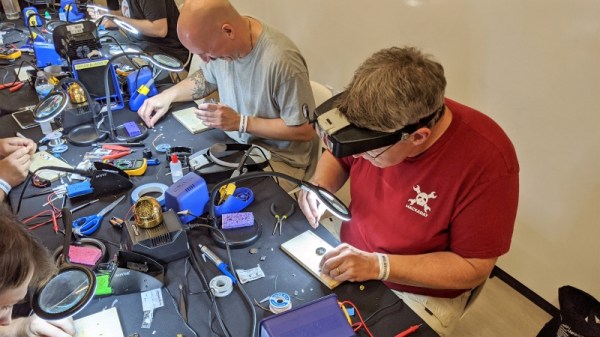
Can we get a few hundred people to show off their soldering skills (or amusing lack of skills) from their own workbench during the event? We think we can, so we’re running the SMD Challenge virtually this year. All of this, plus keynote talks, demos, a show-and-tell, and more make for one wild weekend. Read on!
Continue reading “All The Workshops, And The SMD Challenge Happening At Hackaday Remoticon”

This Four-Axis Stencil Printer Is The Ultimate In SMD Alignment Tools

Here at Hackaday we love all kinds of builds, and we celebrate anytime anyone puts parts together into something else. And while we love the quick and dirty builds, there’s just something about the fit and finish of this four-axis SMD stencil printer that really pushes our buttons.

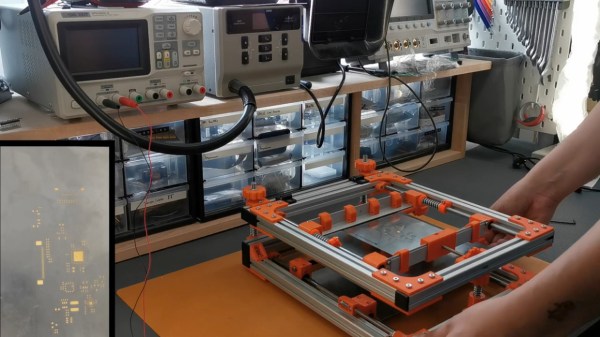
This build comes to us from [Phillip], who like many surface-mount users was sick of the various tape-and-PCB methods that are commonly used to align the solder stencil with the PCB traces. His solution is this fully adjustable stencil holder made from aluminum extrusions joined by 3D-printed parts. The flip-up frame of the device has a pair of clamps for securely holding the stainless steel stencil. Springs on the clamp guide rods provide some preload to keep the stencil taut as well as protection from overtensioning.

The stencil can move in the X-, Y-, and Z-axes to line up with a PCB held with 3D-printed standoffs on a bed below the top frame. The bed itself rotates slightly to overcome any skew in alignment of the PCB. [Phillip] was aghast at the price of an off-the-shelf slew-ring bearing for that axis, but luckily was able to print up some parts and just use simple roller bearing to do the same thing for a fraction of the cost. The frame is shown in use below; the moment when the pads line up perfectly through the stencil holds is oddly satisfying.

This puts us in mind of a recent, similar stencil printer we covered. That one was far simpler, but either one of these beats the expedient alignment methods hands down.

Continue reading “This Four-Axis Stencil Printer Is The Ultimate In SMD Alignment Tools”

Supercon SMD Challenge Gets 3D Printed Probes: Build Your Own

This year was the second SMD challenge at Supercon, so it stands to reason we probably learned a few things from last year. If you aren’t familiar with the challenge, you are served some pretty conventional tools and have to solder a board with LEDs getting progressively smaller until you get to 0201 components. Those are challenging even with proper tools, but a surprising number of people have managed to build them even using the clunky, large irons we provide.

During the first challenge, we did find one problem though. The LEDs are all marked for polarity. However, since we don’t provide super high power magnification, it was often difficult to determine the polarity, especially on the smaller parts. Last year, [xBeau] produced some quick LED testers to help overcome this problem. This year we refined them a bit.

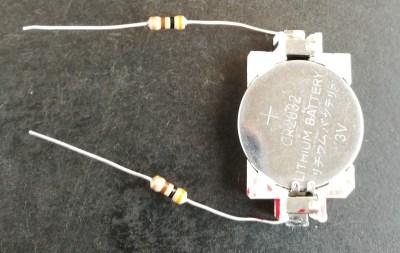
As you can see, the 2018 model was a very clever use of what was on hand. A CR2032 holder powered the probes and the probes themselves were two resistors. If you can get the LED to light with the probes you know which lead is the anode and which is the cathode. A little red ink makes it even more obvious. Continue reading “Supercon SMD Challenge Gets 3D Printed Probes: Build Your Own”

A Newbie Takes The SMD Challenge At Supercon

First-time visitors to Disneyworld often naively think they’re going to “do” the park in three days: one day for the Magic Kingdom, one day for Epcot, and one day for everything else. It’s easy to spot such people, collapsed on a bench or dragging exhausted kids around while trying to make their way to the next must-see attraction. Supercon is something like that — a Disney-esque theme park for hackers that will exhaust you if you don’t have a plan, and if you don’t set reasonable expectations. Which is why I was glad that I set only one real goal for my first Supercon: take the SMD Soldering Challenge.

Now, while I’m pretty handy with a soldering iron, I was under no illusion that I would be at all competitive. All my soldering experience has been with through-hole components, and while I also used to doing some production soldering on fine-pitch connectors, the whole surface-mount thing is new to me. I entered mainly because I wanted to see what was possible coming in raw. At best I’d learn what my limits are, and at worst I’d fail spectacularly and provide grist for a “Fail of the Supercon” post. It’s a win either way.

Continue reading “A Newbie Takes The SMD Challenge At Supercon”

3D-Printed Magazines Tame The SMD Tape Beast

Chances are pretty good that you’ve got a box or a bin somewhere in your shop with coils of SMD component tapes in it. If you’re lucky, the coils are somewhat contained in their conductive Mylar bags; if you’re more like us, the tapes are flopping around loose in an attempt to seemingly tie themselves together. In either case, these 3D-printed SMD magazines will bring a little order to the chaos, and make board assembly a little bit easier.

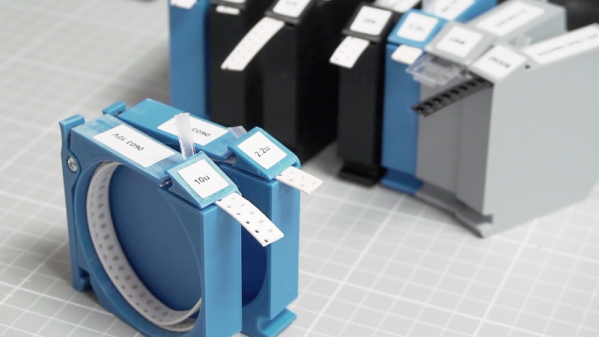
When we saw [Robin Reiter]’s build, we thought these would be cassettes for some sort of pick-and-place machine. But while they certainly look like they could be adapted to an automated PnP setup, [Robin]’s main goal was to provide organized storage for loose tapes. Each magazine has a circular reservoir to hold the coiled tape, with an exit slot at the front and a wedge that directs the cover tape in the opposite direction. This removes the cover tape to expose the components, clears it away from the pickup area, and as a bonus, allows the component tape to be advanced just by pulling back on the cover. Each magazine has a spring-loaded latch that clips onto a base that looks a bit like a DIN-rail; the weighted base holds several magazines and makes it easy to set up a manual pick-and-place session. The video below shows all the details.

For certain personality types, this really scratches an itch. We love the modular design, and the organization that these would bring to our shop would really help clean things up a bit. And if [Robin] were ever to take this design to the next level, adding something like this could be useful.

Continue reading “3D-Printed Magazines Tame The SMD Tape Beast”

Cheap Stereo Microscope Helps With SMD

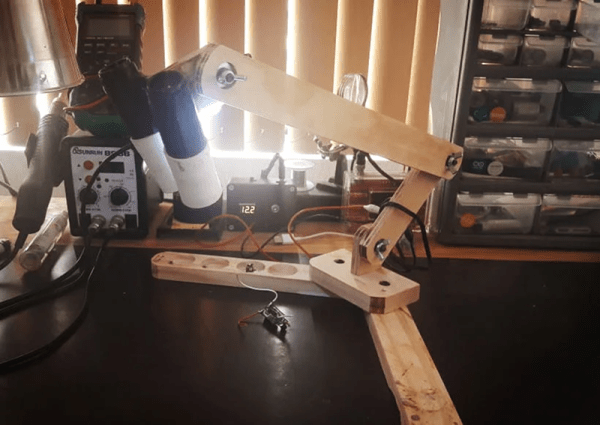
Soldering is best done under magnification. Parts become ever smaller and eyes get weaker, so even if you don’t need magnification now, you will. [Makzumi] didn’t want to shell out $400 or more for a good microscope so he hacked one from some cheap binoculars from the toy section on Amazon.

A lot of magnifiers aren’t really good for soldering because the distance between the work and the lens isn’t very large. The hacked ‘scope has about 4 inches of working distance, which is plenty of room to stick some solder and a hot iron under there. The resulting magnification is about 12 or 15X and he claims that the cell phone pictures he’s included aren’t as good as really looking through the eyepieces yourself.

Continue reading “Cheap Stereo Microscope Helps With SMD”

Solder SMDs With A Pan O’ Sand

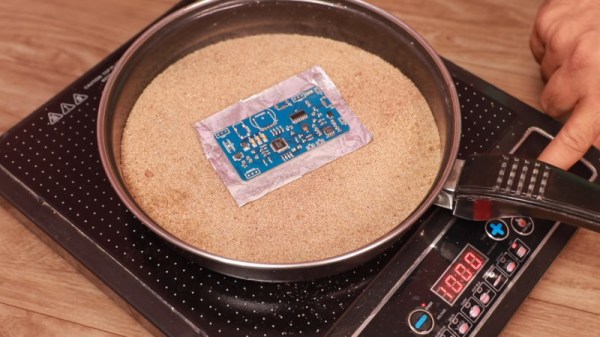
For those that grew up working with through-hole components, surface mount parts can be challenging to deal with. However, there are plenty of techniques out there that are more than accessible to the DIY set. With the right gear, soldering SMD boards is a snap – just get yourself a hot pan of sand (Youtube link, embedded below)!

The process starts with a professionally manufactured PCB, and accompanying stencil. All major PCB CAD packages are capable of generating stencil files these days, and many manufacturers will throw in a laser cut stencil for minimal extra cost with a PCB order. The board is first mounted on a stable surface, and has solder paste applied, before components are placed with tweezers. Perfect placement isn’t necessary, as the surface tension of the molten solder pulls components into their correct orientations. The populated board is then placed on a bed of sand in a frying pan, which is placed on an induction cooktop. The board is then heated until the solder melts, and all the components are neatly reflowed. Once allowed to cool, the board is done!

The trick is that the sand helps evenly heat the circuit board, while keeping it a safe distance away from the heat source. Results are good, and the process is far quicker than hand soldering. It’s easy to keep an eye on the process too. Of course, the traditional method is still to use the humble toaster oven, but new techniques are always useful. We’ve seen it done with a Bunsen burner, too. Video after the break.

Continue reading “Solder SMDs With A Pan O’ Sand”