Best Product Entry: Pocket Thermal Camera

One of the entries in the Hackaday Prize Best Product competition is [x-labz]’s pocket thermal imager. It’s more than a prototype, it’s a design conceived to get out into the world and be used by many. Best Product entries are open until July 24th, and with a $30,000 cash prize on the line let’s take a look at some of the things that elevate a project to product status.

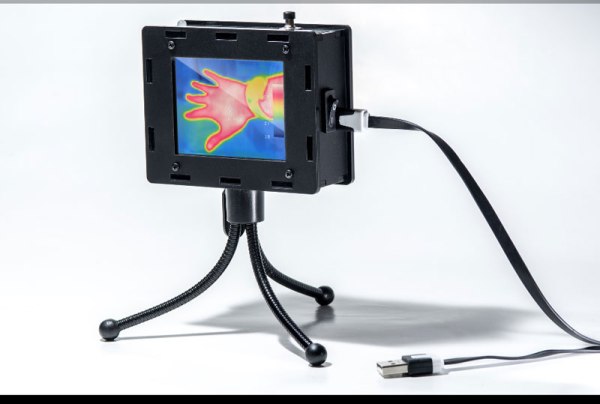
Thanks to recent advances in the state of thermal image sensors, a tool that gives you Predator vision is almost a necessity on the modern workbench. The pocket thermal imager will find drafts in your house during winter, will tell you how to cook a steak, figure out what part is shorting out in your latest electronics project, and will tell you how terrible the heated bed is on your 3D printer.

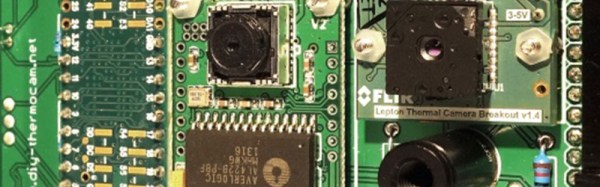
[x-labz]’s thermal camera is based around the FLIR Lepton image sensor, an 80×60 pixel thermal imaging sensor that’s good enough for most uses. This camera is soldered onto a PCB sandwich containing an Atmel SAMD21 microcontroller, full-color OLED display, SD card, and a battery management system.

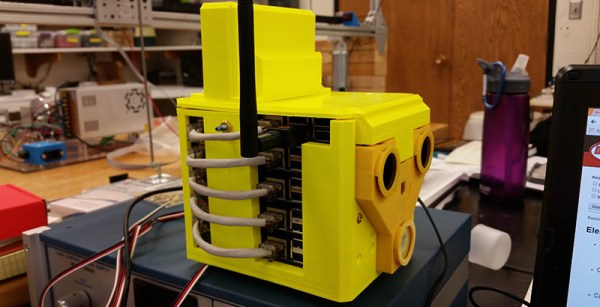
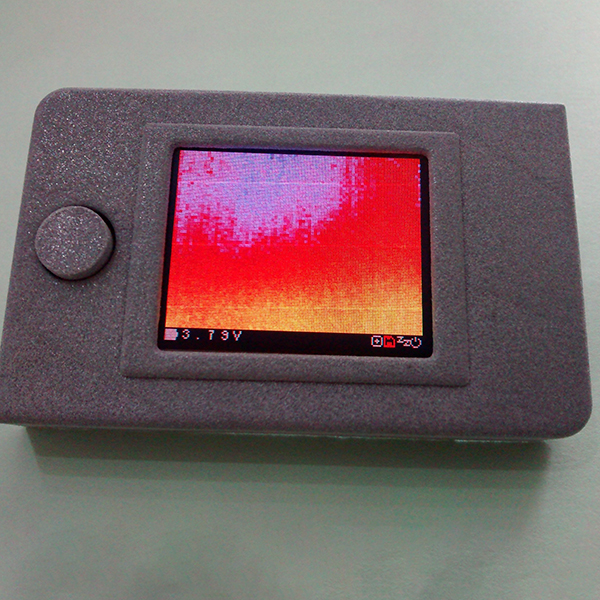
What we’ve mentioned so far isn’t out of the ordinary for any other entry in the Hackaday Prize. Building something for the Best Product competition is different, though: a lot of thought has to go into the manufacturability and the fit and finish of this device. So far, everything’s looking great for [x-labz]’s camera. There’s a 3D printed case that looks like it could be easily translated into an injection-moldable shell and at least some of the parts of the user interface are unbelievably satisfying. We’re looking forward to seeing the full Bill of Materials and a business plan (a new requirement this year). That’s an area where many hardware designers lack experience; being able to study the examples from Best Product entries will be a welcomed resource.

There’s a world of difference between building a project and building a product, and the entire goal of the Best Product portion of the Hackaday Prize is to reward those people who go the extra mile as aspiring entrepreneurs and show us how that’s done. $50k in cash prizes are set aside for Best Product; $30,000 for the winner as we mentioned before, but there is also $1000 for each of the twenty entries that make it to the finals in this category in addition to some much deserved notoriety from Hackaday’s community of hardware aficionados and early adopters.

Thermal Panorama One Pixel At A Time

Inspiration can strike from the strangest places. Unearthing a forgotten Melexis MLX90614 thermopile from his  ‘inbox,’ [Saulius Lukse] used it to build a panoramic thermal camera.

[Lukse] made use of an ATmega328 to control the thermal sensor, and used the project to test a pair of two rotary stage motors he designed for tilt and pan, with some slip rings to keep it in motion as it captures a scene. That said, taking a 720 x 360 panoramic image one pixel at a time takes over an hour, and compiling all that information into an intelligible picture is no small feat either. An occasional hiccup are dead pixels in the image, but those are quickly filled in by averaging the temperature of adjoining pixels.

The camera  rig works — and it does turn out a nice picture — but [Lukse]  says an upgraded infrared camera to captured larger images at a time and higher resolution would not be unwelcome.


Another clever use of a thermopile might take you the route of this thermal flashlight. if you don’t build your own thermal camera outright.

[Thanks for the tip, Imn!]

DIY Thermal Camera That’s Better And Cheaper Than A FLIR

A few years ago, FLIR unleashed a new line of handheld thermal imagers upon the world. In a manufacturing triumph, the cheapest of these thermal imaging cameras contained the same circuitry as the one that cost six times as much. Much hacking ensued. Once FLIR figured out the people who would be most likely to own a thermal imaging camera can figure out how to upload firmware, the party was over. That doesn’t mean we’re stuck with crippled thermal imaging cameras, though: we can build our own, with better specs than what the big boys are selling.

[Max] has been working on his DIY thermal imager for a while now. We first saw it about a year ago, and the results were impressive. This thermal camera is built around the FLIR Lepton sensor, providing thermal images with a resolution of 60 by 80 pixels. These thermal images were combined with a VGA resolution camera to produce the very cool enhanced imagery the commercial unit will get you. There’s also a 1/4-20 threaded insert on the bottom of [Max]’s version, making it far more useful in any experimental setup.

Now [Max] has unleashed his DIY Thermocam on the world of Open Hardware, and anyone can build their own for about €400 (about $425). The components required for this build include a FLIR Lepton sensor easily sourced from the Digikey or GroupGets, an Arducam Mini, a Teensy 3.6, and a mishmash of components that are probably kicking around your parts drawers.

If you want an overview of this project before digging in, [Max] has a project overview (PDF warning) going over the build. This is one of the better DIY projects we’ve seen recently, and the documentation is fantastic. If you’re thinking about buying one of those fancy thermal imaging cameras, here you go — this one is just as good and half off.

Build Your Own Thermal Camera

We have featured thermal camera projects by [Max Ritter] before, but [Max] has just taken the next step: he is offering the latest version as a build-it-yourself kit. The DIY Thermocam improves on his previous designs by capturing 60 by 80 pixel thermal images, which can be combined with visible light images from an accompanying  640 by 480 pixel camera to produce the final image. It is built around the FLIR Lepton module that has been used in many of the recent commercial thermal cameras that we have seen. Max has also added a battery and display, making the whole thing a standalone camera.

The firmware that runs all this is open-source and written in C++ for easy modification, so users can build their own thermal camera.”The approach is to offer people the self-assembly kit so that they can use it as a development platform to do whatever they want to achieve with thermal imaging”[Max] told us. The kit runs €429 (about $468), with free shipping worldwide.

Continue reading “Build Your Own Thermal Camera”

Thermal Vision HUD

Thermal Vision HUD Isn’t Only For Fighter-Jets!

In case you weren’t aware, thermal vision units have seen huge price reductions lately. There’s a few on the market for under $300! While that might still seem expensive, remember, it’s thermal-freaking-vision. [Tim] bought a Seek Thermal as soon as it was available, and just recently finished his first project with it — giving his car a thermal HUD for driving at night.

The Seek Thermal is a small thermal imaging unit that has a micro USB attachment for phones. Simply plug it in, and your phone becomes the preview window. But for mounting on your car, you can’t have it behind a window, because most glass is not transparent to heat wavelengths, so [Tim] had to get creative.

He designed and 3D printed a magnetic mount for it to sit on the hood of his car. But in the case any debris from the road hit it, he wanted to protect the lens. So he started looking up thermally transparent materials — turns out they’re really expensive.

Continue reading “Thermal Vision HUD Isn’t Only For Fighter-Jets!”

Hackaday Prize Entry: Synthetic Aperture Multispectral Imaging

[Conrad] was tasked with building a synthetic aperture multispectral imaging device by his professor. It’s an interesting challenge that touches on programming, graphics, and just a bit of electrical engineering.

Tucked inside a garish yellow box that looks like a dumb robot are five Raspberry Pis, a TP-Link Ethernet switch, three Raspberry Pi NOIR cameras, and a Flir Lepton thermal camera. With three cameras, different techniques can be used to change the focal length of whatever is being recorded – that’s the synthetic aperture part of the build. By adding different filters – IR pass, UV, visual, and thermal, this camera can record images in a huge range of wavelengths.

[Conrad] has come up with a completely modular toolbox that allows for a lot of imaging experiments. By removing the filters, he can track objects in 3D. With all the filters in place, he can narrow down what spectra  he can record. It’s a mobile lab that’s completely modular, and we can’t wait to see what this little box can really do.


The 2015 Hackaday Prize is sponsored by:

Long Exposure Thermal Photography

For apparently inexplicable reasons, the price of thermal imaging cameras has been dropping precipitously over the last few years, but there are still cool things you can do with infrared temperature sensors.

A few years ago – and while he was still writing for us – [Jeremy] came across an absurdly clever thermal imaging camera. Instead of expensive silicon, this thermal camera uses a flashlight with an RGB LED, a cheap IR temperature sensor, and a camera set up to take long exposures. By shining this flashlight/IR sensor around a dark room, a camera with a wide-open shutter can record color-coded thermal images of just about anything.

Since then, an interesting product appeared on the market. It’s the Black & Decker TLD100 Thermal Leak Detector, and it’s basically an infrared thermometer and LED flashlight stuffed into one neat package. In other words, it’s the exact same thing we saw two years ago. We’d like to thank at least one Black & Decker engineer for their readership.

[Jeremy] took this cheap, off-the-shelf leak detector and did what anyone would do after realizing where the idea behind it came from. He set up his camera, turned off the lights, and opened the shutter of his camera. The results, like the original post, don’t offer the same thermal resolution as a real thermal camera. That doesn’t mean it’s still not a great idea, though.