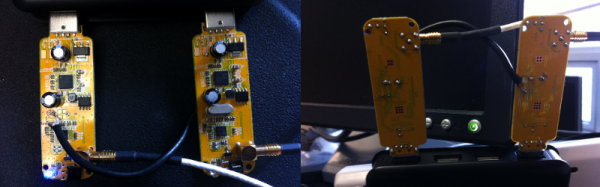
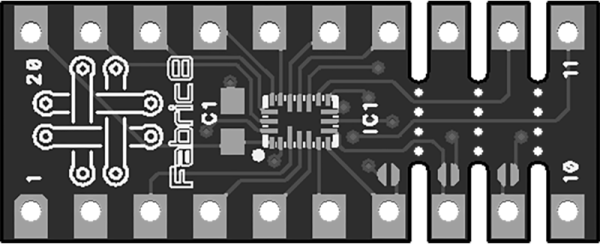
Fail Of The Week: Teddy Top And Fourteen Fails

Last summer, [Quinn] made the trip out to KansasFest, the annual Apple II convention in Kansas City, MO. There, she picked up the most modern Apple II system that wasn’t an architecturally weird IIGS: she lugged home an Apple IIc+, a weird little machine that looks like an old-school laptop without a screen.

Not content with letting an old computer just sit on a shelf looking pretty, [Quinn] is working on a project called the Teddy Top. ‘Teddy’ was one of the code names for the Apple IIc, and although add-ons to turn this book-sized computer into something like a laptop existed in the 80s, these solutions have not withstood the test of time. [Quinn] is building her own clamshell addition to her IIc+, and somehow failing at something she’s done hundreds of times before.

While the IIc+ has an NTSC composite output, the super-special video add-ons for the IIc+ used a DB15 expansion connector. Here, any add-on could access video sync signals, the a sound signal from the audio circuit, and even a +12V line that could drive loads up to 300 mA. It just so happened the display [Quinn] is using for this project runs at 12V, 200 mA. Everything was great, but as a worthy trustee of this computer’s Earthly existence, [Quinn] thought a bit of current limiting should be included in her addon. She designed a circuit around an NPN power transistor, that would allow the display to draw power until the load was around 250mA. After that, the transistor would start dumping excess power as heat. Yes, a fuse would be better. [Quinn] calls this Fail #1. There are thirteen more to go.

Continue reading “Fail Of The Week: Teddy Top And Fourteen Fails”

Reverse Engineering Super Animal Cards

If you don’t have a niece or nephew we encourage you to get one because they provide a great excuse to take apart kids’ toys.

[Sam] had just bought some animal-themed trading cards. These particular cards accompany a card-reader that uses barcodes to play some audio specific to each animal when swiped. So [Sam] convinces her niece that they should draw their own bar codes. Of course it’s not that easy: the barcodes end up having even and odd parity bits tacked on to verify a valid read. But after some solid reasoning plus trial-and-error, [Sam] convinces her niece that the world runs on science rather than magic.

But it can’t end there; [Sam] wants to hear all the animals. Printing out a bunch of cards is tedious, so [Sam] opens up the card reader and programs and Arduino to press a button and blink an IR LED to simulate a card swipe. (Kudos!) Now she can easily go through all 1023 possible values for the animal cards and play all the audio tracks, and her niece gets to hear more animal sounds than any child could desire.

Along the way, [Sam] found some interesting non-animal sounds that she thinks are Easter eggs but we would wager are for future use in a contest or promotional drawing or something similar. Either way, its great fun to get to listen in on more than you’re supposed to. And what better way to educate the next generation of little hackers than by spending some quality time together spoofing bar codes with pen and paper?

Front view of the portable HAM station

Building A Portable Ham Radio Station

Nowadays, you can get into ham radio on the cheap. A handheld radio can be had for less than $30, and licensing is cheap or free depending on where you live. However, like most hobbies, you tend to invest in better kit over time.

[Günther] just finished up building this portable ham station to meet his own requirements. It runs off 230 VAC, or a backup 12 V car battery for emergency purposes. The Yaesu FT897d transceiver can communicate on HF + 6m, 2m, and 70 cm bands.

This transceiver can be controlled using a Microham USB-3 interface, which provides both CAT control and a soundcard. This pre-built solution is a bit simpler than the DIY option. With the interface in place, the whole rig can be controlled by a laptop running Ubuntu and open-source HAM software.

With the parts chosen, [Günther] picked up a standard 5 U 19″ rack, which is typically used for audio gear. This case has the advantage of being durable, portable, and makes it easy to add shelves and drawers. With an automotive fuse block for power distribution and some power supplies, the portable rig is a fully self-contained HAM station.

The ERIC-1 Microcomputer

Everyone is having a go at building their own 8-bit 80s-era microcomputer now, and [Petri] thought he would throw his hat into the ring with ERIC-1, a homebrew, 6502-based computer that’s running at about 2MHz.

We’re about 30 or 40 years ahead of the game compared to the old-school 6502 designs, and [Petri] decided to capitalize on that. Instead of a separate ROM, VIA, and other peripherals, [Petri] is connecting a microcontroller directly to the data and address pins. This is a technique we’ve seen before, and [Petri] is doing it right: the micro and 6502 share 64k of RAM, with the ROM stored in the micro’s Flash. Video (PAL in this case) is handled by the ATMega, as is clocking and halting the CPU.

There were a few changes [Petri] made along the way to make this microcomputer a little more useful. One of the biggest changes was switching out the old NMOS Rockwell 6502 with the modern CMOS W65C02 from Western Design Center. The CMOS variant is a fully static design, keeping the registers alive even if the clock is stopped and making single-stepping and halting the CPU easier.

The CMOS variant also has a Bus Enable (BE) pin. Like similar pins on later, more advanced processors, this pin puts the address, data, and R/W pins into a high impedance state, giving other peripherals and microcontrollers the ability to write to RAM, peripherals, or anything else. It’s a handy feature to have if you’re using a microcontroller for everything except the CPU.

It’s already a great build, and since [Petri] has the skills to program this 8-bit ‘duino game, he’s sure to come up with something even better for this computer.

Oh, if you’re looking for something even cooler than a 3-chip 6502, there’s a bunch of stuff over on hackaday.io you should check out. Everything from 4-bit computers built from discrete components to dual AVR board can be found there.

Keurig

Dead Simple Hack Allows For “Rebel” Keurig K-Cups

If you haven’t actually used a Keurig coffee machine, then you’ve probably at least seen one. They are supposed to make brewing coffee simple. You just take one of the Keurig “k-cups” and place it into the machine. The machine will punch a hole in the foil top and run the water through the k-cup. Your flavored beverage of choice comes out the other side. It’s a simple idea, run by a more complex machine. A machine that is complicated enough to have a security vulnerability.

Unfortunately newer versions of these machines have a sort of DRM, or lockout chip. In order to prevent unofficial k-cups from being manufactured and sold, the Keurig machines have a way to detect which cups are legitimate and which are counterfeit. It appears as though the machine identifies the lid specifically as being genuine.

It turns out this “lockout” technology is very simple to defeat. All one needs to do is cut the lid off of a legitimate Keurig k-cup and place it on top of your counterfeit cup. The system will read the real lid and allow you to brew to your heart’s content. A more convenient solution involves cutting off just the small portion of the lid that contains the Keurig logo. This then gets taped directly to the Keurig machine itself. This way you can still easily replace the cups without having to fuss with the extra lid every time.

It’s a simple hack, but it’s interesting to see that even coffee machines are being sold with limiting technology these days. This is the kind of stuff we would have joked about five or ten years ago. Yet here we are, with a coffee machine security vulnerability. Check out the video demonstration below. Continue reading “Dead Simple Hack Allows For “Rebel” Keurig K-Cups”

How to cast rings

Casting Engagement Rings (Or Other Small Metal Parts!)

[Paul Williams] wrote in to tell us about his most recent and dangerous endeavor. Marriage.

As a masters student in Mechanical Engineering, he wanted to give his wife (to be) to be a completely unique engagement ring — but as you can imagine, custom engagement rings aren’t cheap. So he decided to learn how to make it himself.

During the learning process he kept good notes and has produced a most excellent Instructable explaining the entire process — How to make the tools you’ll need, using different techniques and common problems you might have. He even describes in detail how to make your own mini-kiln (complete with PID control), a vacuum chamber, a wax injector and even the process of centrifugal casting. Continue reading “Casting Engagement Rings (Or Other Small Metal Parts!)”

PeriUSBoost: A USB Battery Charger

PeriUSBoost: A DIY USB Battery Pack

If you travel often, use your mobile devices a lot, or run questionable ROMs on your phone, you likely have an external USB battery pack. These handy devices let you give a phone, tablet, or USB powered air humidifier (yes, those exist) some extra juice.

[Pedro]’s PeriUSBoost is a DIY phone charging solution. It’s a switching regulator that can boost battery voltages up to the 5 volt USB standard. This is accomplished using the LTC3426, a DC/DC converter with a built in switching element. The IC is a tiny SOT-23 package, and requires a few external passives work.

One interesting detail of USB charging is the resistor configuration on the USB data lines. These tell the device how much current can be drawn from the charger. For this device, the resistors are chosen to set the charge current to 0.5 A.

While a 0.5 A charge current isn’t exactly fast, it does allow for charging off AA batteries. [Pedro]’s testing resulted in a fully charged phone off of two AA batteries, but they did get a bit toasty while powering the device. It might not be the best device to stick in your pocket, but it gets the job done.