 Avid Hackaday reader [Matthias] told us he takes a lot of inspiration from our site. That’s quite a compliment, because his work is both inspiring and beautiful. [Matthias] wanted to build a UI using JavaFX, so he made a really nice-looking Raspberry Pi-based Internet radio. We featured his previous radio build a few months ago when he modified an old Bakelite unit.
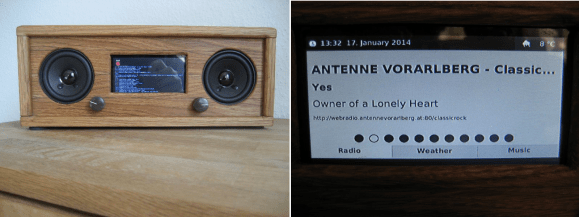
The Mephisto III is enclosed in a handsome oak cabinet built by [Matthias]’ father. Like his previous build, this one uses the Google Music interface to play MP3s and streams radio from the web. He also added weather and a clock, which is a nice touch. In addition to the Raspi and a USB WLAN stick, [Matthias] is using two relays. One relay powers the amplifier and the other enables the display. [Matthias] is impressed with the JavaFX API, but found that the performance of the Raspberry Pi is insufficient for smooth multithreading. He considered switching to a BeagleBone Black, but it has no component out.
If you want to be able to listen to vinyl, too, check out this killer media center. If you have lost your taste for Pi, build yourself a web radio from a tiny router.
[Thanks Matthias]