Vintage Portable TV Turned Retro Gaming System

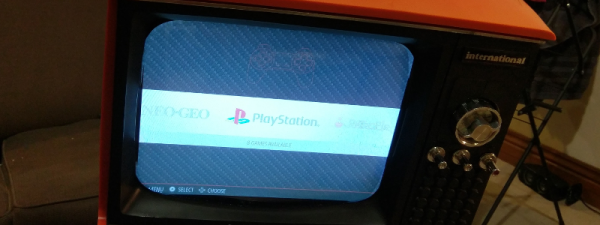
When [FinnAndersen] found an old TV set by the side of the road, he did what any self-respecting DIY/gaming enthusiast would do: He took it apart and installed a Raspberry Pi 3 running RetroPie in it in order to play retro games on a retro TV!

[Finn] took the CRT out of the TV before realizing that it actually worked. It was already too late, so [Finn] ordered a 12″ LCD screen to put in its place. He liked the idea of the curved screen the CRT had, though, so he molded a piece of acrylic around the CRT and, after some cutting and grinding, had it fitting in the screen’s space.

[Finn] also liked the idea of the TV still being able to view a television signal, so he bought a TV tuner card. After a couple of mods to it, he could control the card with the TV’s original channel changer. He used an Arduino to read the status of the rotary encoders the original TV used. After some trial and error, [Finn] was able to read the channel positions and the Arduino would send a signal to the channel up and down buttons on the tuner card in order to change the channel.

Next up was audio. [Finn] found a nicer speaker than came with the TV, so he swapped them and added an amplifier. The original volume knob is still used to control the volume. A USB Hub is hidden in the side of the TV at the bottom, to allow controllers to connect and finally, a power supply converts the mains voltage to 12V DC which runs both the Raspberry Pi and the TV Tuner.

[FinnAndersen] has built a great RetroPie cabinet reusing a great looking vintage TV. It’s unfortunate that he removed the CRT before figuring out that he could use it, but the replacement looks pretty darn good! And the added advantage? It’s portable, sort of. At least, without the CRT inside, it’s much lighter than it was. Here‘s another retro console inside an old TV, and this article is about connecting a Raspberry Pi to every display you can get your hands on.

Continue reading “Vintage Portable TV Turned Retro Gaming System”

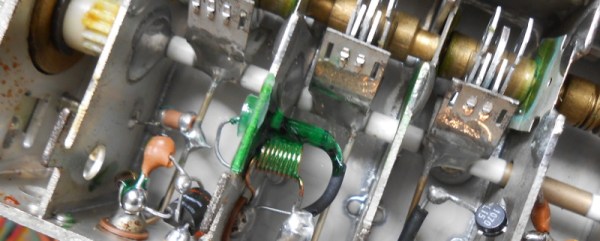
Not Quite 101 Uses For An Analog UHF TV Tuner

Young electronics hackers today are very fortunate to grow up in an era with both a plethora of capable devices to stimulate their imagination, and cheap and ready access to them. Less than the price of a hamburger meal can secure you a Linux computing platform such as the Raspberry Pi Zero, and a huge choice of sensors and peripherals are only an overnight postage envelope away.

Casing back a few decades to the 1980s, things were a little different for electronically inclined youth. We had the first generation of 8-bit microcomputers but they were expensive, and unless you had well-heeled parents prepared to buy you a top-end model they could be challenging to interface to. Other electronic parts were far more expensive, and mail order could take weeks to deliver the goods.

For some of us, this was not a problem. We simply cast around for other sources of parts, and one of the most convenient was the scrap CRT TV you’d find in nearly every dumpster in those days before electronic recycling. If you could make it from 1970s-era consumer-grade discrete components, we probably did so having carefully pored over a heap of large PCBs to seek out the right component values. Good training, you certainly end up knowing resistor colour codes by sight that way.

Continue reading “Not Quite 101 Uses For An Analog UHF TV Tuner”

RPiTX Turns Rasberry Pi Into Versatile Radio Transmitter

Since the discovery that some USB TV tuner dongles could be used to monitor radio waves across a huge amount of spectrum, the software-defined radio world has exploded with interest. The one limiting factor, though, has been that the dongles can only receive signals; they can’t transmit them. [Evariste Okcestbon, F5OEO] (if that is his real name! Ok c’est bon = Ok this is good) has written some software that will get you transmitting using SDR with only a Raspberry Pi and a wire.

There have been projects in the past that use a Pi to broadcast radio (PiFM), but this new software (RPiTX) takes it a couple steps further. Using just an appropriately-sized wire connected to one of the GPIO pins, the Raspberry Pi is capable of broadcasting using FM, AM, SSB, SSTV, or FSQ signals. This greatly increases the potential of this simple computer-turned-transmitter and anyone should be able to get a lot of use out of it. In the video demo below the break, [Evariste] records a wireless doorbell signal and then re-transmits it using just the Rasbperry Pi.

The RPiTX code is available on GitHub if you want to try it out. And it should go without saying that you will most likely need an amateur radio license of some sort to use most of these features, depending on your locale. If you don’t have a ham radio license yet, you don’t need one to listen if you want to get started in the world of SDR. But a ham license isn’t hard to get and at this point it shouldn’t take much convincing for you to get transmitting.

Continue reading “RPiTX Turns Rasberry Pi Into Versatile Radio Transmitter”

tv streaming

Custom Video Streaming Box

There are a lot of options out today for streaming video to your Internet-connected devices. Whether it’s Hulu, Netflix, Slingbox, or the late Aereo, there is no shortage of ways to get your TV fix. However, [Jaruzel] wasn’t happy with any of these services and wanted a more custom solution, so he built his own TV-streaming box out of hardware he had lying around.

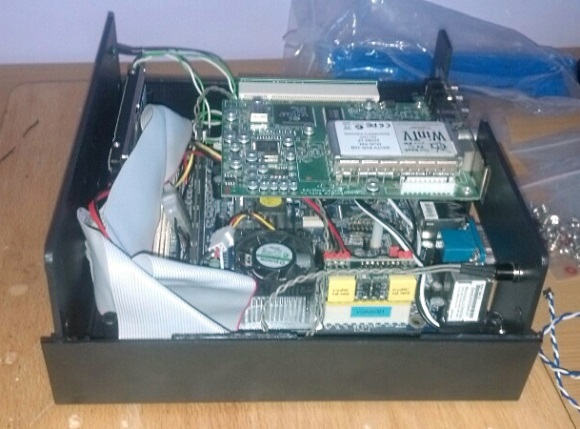
[Jaruzel] gets TV from a service called SkyTV, but wanted to be able to stream it to his tablet, laptop, and XBMC. While rummaging through his parts bin, he came up with a WinTV tuner card for capturing TV and a Mini-ITX board to process everything and stream it out over his network.

Once the computer was put in a custom enclosure, [Jaruzel] got to work installing Puppy Linux. He wrote a boot script that configures the WinTV card and then starts VLC to handle the streaming service which allows him to view the TV stream over HTTP on the network. This is a great hack that would presumably work for any TV stream you can find, even if it’s just an over-the-air source.

Mutant Kitchen TV Computer

In need of a kitchen entertainment system, [BoaSoft] headed to the parts bin and produced a project that can easily be called a mutant. That being said, we love the results!

Here’s the link to the original Russian language post. If your Russian is a bit rusty here’s a really awful machine translation. So let’s see if we can decipher this hack.

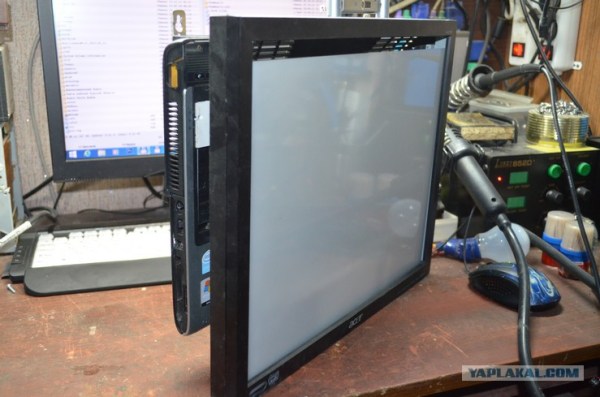
Sounds like [BoaSoft] had a broken Acer laptop on hand. Problem was the laptop can’t play over-the-air television (and similarly, a television can’t surf the net). The solution was to figure out how to utilized a TV tuner of unknown origin, combine that with the laptop and a computer monitor, then add back all the user interface you’d expect from an entertainment device.

The board shown in the first post of the thread is familiar to us. It seems to be based on the IgorPlug board which is a hack that goes waaaay back. This allows for the use of an IR media center remote and those input signals are easy to map to functions. The computer runs Windows Media Center which is already optimized for remote control but can use a wireless keyboard and mouse when more computer-centric functions are necessary.

With all on track the rest of the hack deals with hacking together a case. The laptop’s original body was ditched for some extended sides for the back of the monitor. [BoaSoft] did a great job of installing all the necessary ports in these extensions. Once in the kitchen everything is nice and neat and should stand the test of time.

[Thanks Dmitry]

Listening To Electromagnetic Interference With A RTLSDR Dongle

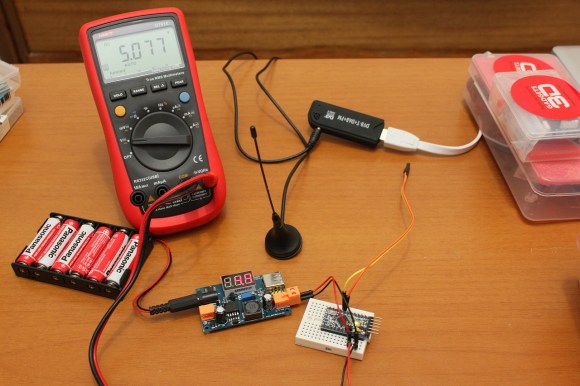
Being curious by nature, [Marios] decided to see what kind of radio-frequency emissions may be generated by an Arduino connected to a simple breadboard wire, and more importantly try to pick them up using a RTLSDR dongle. Electromagnetic interferences are disturbances that affect electrical circuits due to either electromagnetic induction or electromagnetic radiation. Before going into the market, all electrical devices are thoroughly checked for unwanted electromagnetic emissions so they usually aren’t obvious suspects when such problems arise.

Using the Arduino embedded PWM controller in fast PWM mode and by manipulating the duty cycle, he actually managed to create a primitive form of amplitude modulation and was able to transfer a very simple audible signal at several frequencies up to 1.75GHz. Embedded after the break here is video of the system at work.

As a side note, did you know that during the solar storm of 1859 the EMI were so strong that the telegraph operators received several shocks? Pipelines maintenance systems also have to be aware of such events, that can lead sensors to provide inaccurate results.

Continue reading “Listening To Electromagnetic Interference With A RTLSDR Dongle”

Custom HTPC And Home Media Server

[Benoit Frigon]’s builds are a tribute to tidiness: both his HTPC and media server are elegant creations packed full of features. He has quite the knack for clean builds in this form factor; his PBX server was met with high praise earlier this summer.

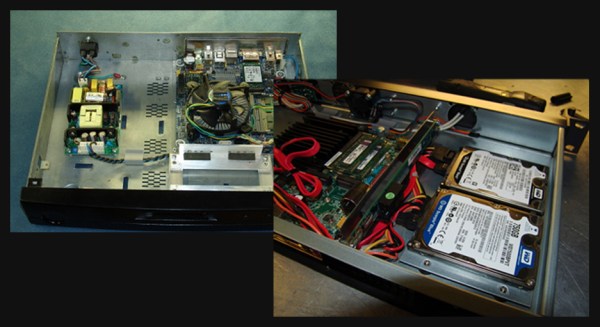
For the HTPC, [Benoit] gutted and cleaned an old DVR case and modified it to house a Mini-ITX board. He added standoff mounts to support the motherboard, then sketched up a template for the IO shield as a guide for cutting the back panel. The front of the DVR case originally had a 4-digit 7-segment display and a few simple buttons. Though he kept the original button layout, [Benoit] chose to replace the segment displays with a 20×2 character LCD. The new display is controlled via a python script on the HTPC, which runs an OpenElec Linux distro with XBMC 12.0.

The HTPC’s hard drive bay is a bit lighter these days, because [Benoit] decided to migrate his media storage to a separate server. Inside the new home media server is yet another Mini-ITX motherboard with an embedded Atom N2800 that runs Ubuntu Server. Live television streams via a WinTV HVR-2550 TV tuner and TVHeadend software. The case originally suspended the tuner from the IO bracket on the back (and nowhere else), which left the rest of the card dangerously unsupported inside. [Benoit] solved the problem by building an additional aluminum bracket that firmly holds both the PCIe riser and the tuner. Check out both builds’ pages for downloadable templates, software details and bill of materials.