Dedicated Pandora Player Plus AirPlay Built Around The Raspberry Pi

rpi-pandora-radio

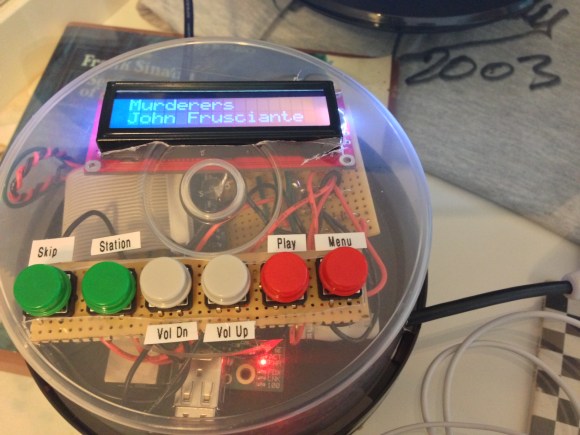
[Shaun Gehring] wanted an Internet radio player. Although he did have some troubles along the way, the final project turned out very well. Housed inside this case which used to house a spindle of bland CDs is a Raspberry Pi that plays Pandora radio and serves as an AirPlay receiver.

The GPIO header of the RPi makes this project a lot easier. [Shaun] used Adafruit’s breakout board to solder connections for the six buttons and the character LCD screen. Plug some speakers into the audio jack and the hardware end of the deal is finished. The software side of things is very similar to the BeagleBone Pandora player we looked at in September. It uses a Linux distribution (Rasbian Weezy) and the Pianobar package.

Pianobar is very versatile. You can control it using a First-In First-Out file. Once [Shaun] figured out how to use mkfifo to set up the file, he was able to control it from a script by monitor button presses and echoing the associated command to the FIFO. The finishing touch was to add AirPlay support via the shairport package.
Van De Graaff Generator Built For A Few Dollars

2-dollar-van-de-graaff-generator

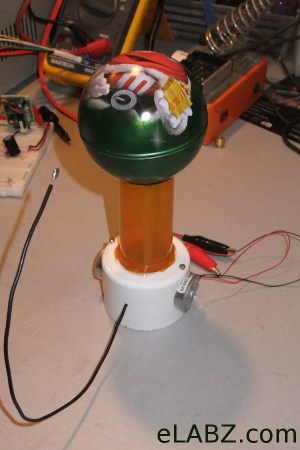
This Van de Graaf generator was built using mostly parts on hand. The only thing that was purchased for the project was the Christmas ornament shaped M&M candy tin that serves as the collecting sphere. We didn’t include the in-action shot in the banner because it’s so dark. But sure enough, this will generate the visible sparks that make the device famous.

The gist of the device is that it uses rotating belt to generate static electricity. This potential is stored in the metal collecting sphere on top until a path for discharge is provided. They’re an awful lot of fun in middle-school science class as long hair can be made to stand on end if you touch one while your body is insulated from ground. This build uses a long rubber band as the belt. The band is moved by the motor from a DVD drive tray which is housed in the PVC base. An empty prescription pill bottle bridges the gap between the base and the metal sphere.

If this one is too small for you consider moving to a 900,000 Volt version.

[via Hacked Gadgets]

Case Feeder Makes Your Ammo Reloading More Efficient

case-feed-ammo-reloader

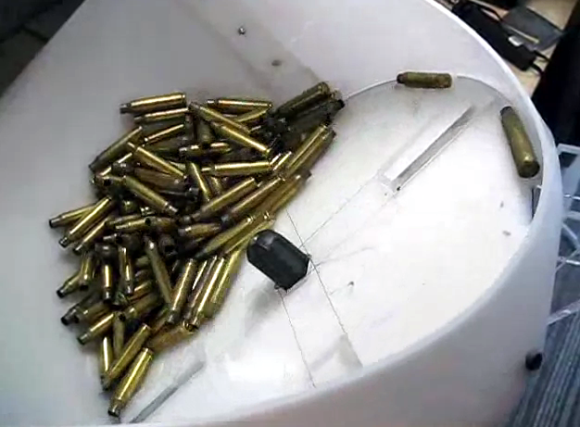
For those that are into reloading their own ammo you know that getting an efficient assembly line process figured out will make your sessions much more enjoyable and productive. [Msoejacobsk] knew that he could buy a case feeder for his system, but didn’t want to shell out two hundred bucks for it. After a bit of thought he was able to build this case feeder for around ten dollars.

The purpose of the rig is to orient each empty casing correctly and feed it to the reloading hardware. This is accomplished by first separating one casing at a time using this angled tumbler. The disc that makes up the floor has slots cut in it which are the size of one casing. When that slot gets to the highest point of its rotation there is an opening through which the casing falls. To ensure proper orientation a V-shaped piece of heavy wire has been place in the middle of the opening. This acts as a fulcrum, letting the heavier base pull the casing in that direction. You can see this happen in the clip after the break.

Continue reading “Case Feeder Makes Your Ammo Reloading More Efficient”

Pictures From Weather Satellites With A USB TV Tuner

europe

Several times a day, a NOAA weather satellite passes over your head, beaming down pictures of weather systems and cloud formations. These transmissions aren’t encrypted, and given the requisite hardware it’s possible for you to download these images from space as [Lovro] shows us in a tutorial video.

To get these near real-time satellite pictures, [Lovro] used one of those USB TV tuners we’ve grown so fond of. A somewhat specialized antenna is required to receive the right hand polarized transmissions from NOAA weather satellites, but with a few bits of wood and wire, [Lovro] made a helical antenna to listen in on the weather satellites transmitting around 137 MHz. After gathering a whole bunch of data from the satellites with SDRsharp, [Lovro] used an image decoder to turn an audio file into a picture taken from space just hours ago.

This isn’t the first time we’ve seen images from a NOAA weather satellite downloaded with a software defined radio; last year [hpux735] did just that with a somewhat inexpensive Softrock SDR. [Lovro]’s use of a USB TV tuner to receive the transmission from NOAA satellites is a lot easier on the pocketbook, though, with the largest expense being an investment in time to build a helical antenna.

Touchscreen Control For A Reprap

display

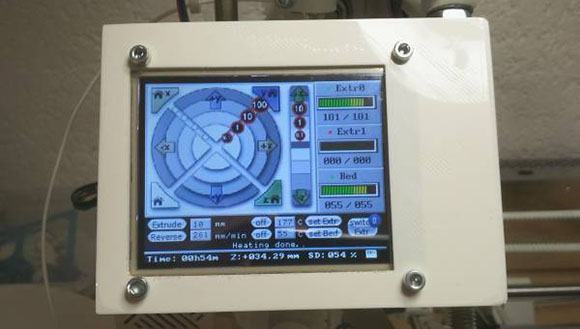
After you’ve got your Reprap running smoothly with acceptable resolution and good quality prints, the next order of business for any 3D printer hobbyist is headless printing. While the greatest and newest 3D printers come with controls to allow jogging, homing, temperature control, and printing from an SD card, the home-built versions will require an add-on attached to the electronics board. [Marco] has been spending his time improving the character LCD control panel projects we’ve seen for Repraps with an awesome graphical version that emulates the control interface found in the Pronterface control software.

The biggest problem with adding a control interface to a Reprap is the number of pins available on the electronics board. While an electronics board like RAMPS has enough spare I/O pins to drive a display, other boards such as the Sanguinololu and the Melzi are extremely limited in their expansibility. To get around this limitation, [Marco] used a 4D Systems serial touchscreen display.

This display only requires two pins to fully interact with a printer running the Marlin firmware; the graphical processing, communication, and SD card access is handled by the on-board PICASO micocontroller, leaving the ATMega on the electronics board free for important things like printing stuff out of plastic.

[Marco] has a git full of modified Marlin firmware and firmware for the 4D Systems display. There’s also a neat printed case for the display, making a very professional-looking standalone controller a weekend project instead of a months-long ordeal.

Thanks [Antonio] for sending this one in.

Turning A Raspberry Pi Into An SNES

snes

Back at the turn of the century, shoving MiniITX motherboards into just about everything was all the rage with the technologist crowd. [waterbury] had the idea of making a computer out of an SNES, but with the added ability of reading SNES cartridges. This idea had been floating around in [waterbury]’s head for years now, and with a Raspberry Pi he can finally make his project a reality.

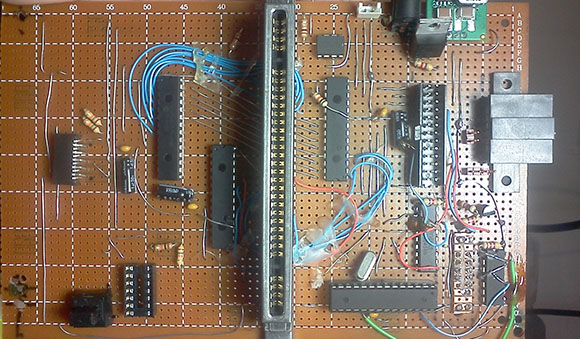
After desoldering a cartridge connector from an original SNES, [waterbury] plugged it in to a piece of perf board and started to figure out how to actually read the cartridge. An SNES cartridge need 16 address pins, 8 data pins, 8 bank control pins and 4 other control pins to be read; a total of 36 pins that [waterbury] accessed with the help of a neat I/O expander and a whole bunch of level converters.

[waterbury] accessed these data, address, and control lines via the Raspberry Pi’s I2C interface, a non-trivial task that took 70 minutes to read Donkey Kong Country before he found a way to speed up the Raspi by a factor of two. You can check out [waterbury]’s complete project – able to read cartridges and play roms with EmulationStation after the break. Also, the code for the cart reader is available on [waterbury]’s git
.

Continue reading “Turning A Raspberry Pi Into An SNES”

Arduino Using A Straight Key For Morse Code Assistance

arduino-morse-code-straight-key

For those unfamiliar with Ham Radio, there are lots of fancy tools these days to make it easier for the radio operator. But enthusiasts still like to get back to basics, and one way to do this is to participate in Straight Key Night. This is when you pull out your traditional Morse code keyer and have a chat with others around the world. The most recent event was on New Year’s Eve. The only drag is that it sometimes takes a while to find another Ham who’s listening, and this can mean repetitively keying the letters QC SKN for long periods of time (QC invites listeners to respond, and SKN is to inform them you’re participating in Straight Key Night). Sure, a programmable keyer will do this for you, but that is against the spirit of the event. [Mike Herr] found a grey area by mechanically interfacing an Arduino with a straight key.

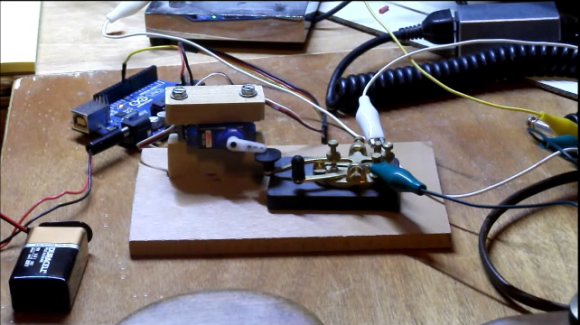
You can see the straight key being pressed by a hobby servo in the image above. The servo is driven by the Arduino, which will transmit the series of letters automatically. As you can see in the video after the break, once [Mike] hears back from a fellow operator he switches to a huge wooden straight key for the rest of the conversation.

Continue reading “Arduino Using A Straight Key For Morse Code Assistance”