These days, you can get a fully remote-control helicopter that you can fly around your house for about $30. Maybe less. Back in the day, kids had to make do with far simpler toys, like spinning discs that just flew up in the air. [JBV Creative] has built a toy just like that with his 3D printer. It may be simple, but it also looks pretty darn fun.
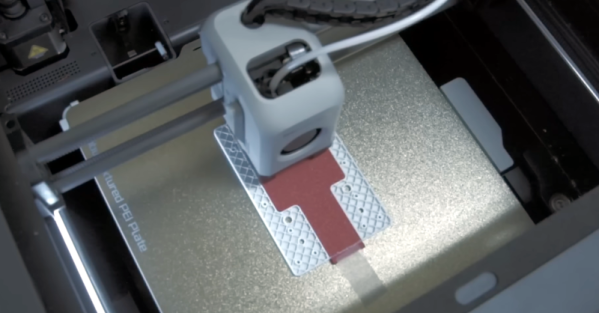
The design is straightforward. It uses a power drill to spin up a geartrain, which in turn drives a small disc propeller. Spin the propeller fast enough and it’ll launch high into the air. The geartrain mounts to the drill via the chuck, and it interfaces with the propeller with a simple toothed coupler. Alternatively, there’s also a hand-cranked version if you don’t have a power drill to hand.
Launching is easy. First, the drill spins the propeller up to speed. Then, when the drill’s trigger is released, it slows down, and the propeller spins free of the toothed coupler, with the lift it generates carrying it into the sky.
Files are available online for those interested. We could imagine this toy could make the basis for a great design competition. Students could compete to optimise the design with more effective gear ratios or better airfoils. We’ve seen similar designs before, too. Video after the break.
Continue reading “3D Print A Drill-Powered Helicopter Toy Because It’s Simply Fun”