
DIY ARM Prototyping Board

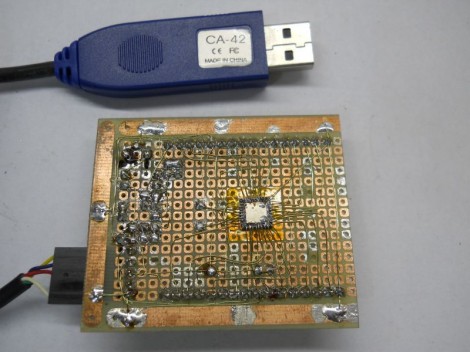
We’re impressed by the ARM prototyping board which [Danjovic] is showing off. He proves that in this day of ever shrinking packages it’s still possible to make your own development tools with protoboard and a soldering iron.

To tell you the truth, if he had designed and etched his own board we probably wouldn’t have featured it. But he didn’t need to spend time on the layout, etching, and reflow. Instead it’s just some enamel wire and a lot of patience. The patience is because the NXP ARM Cortex-M0 chip comes in a HVQFN package. We’re not entirely sure about the HV part (the package alphabet was not entirely clear on this) but QFN means Quad Flat No-Lead. That means no legs on the chip. So [Danjovic] glued it upside down and soldered point-to-point to break out all of the pins.

The top side of the board has a bootloader button, reset button, power regulation, and a crystal oscillator. He doesn’t mention what bootloader he’s using, but a Nokia USB cable gives him the connectivity to push his programs onto the chip.
Meet The Teensy 3.0

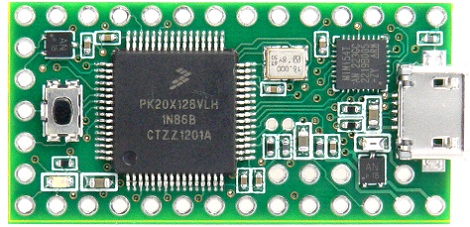
[Paul Stoffregen], the brains behind the popular and very capable Arduino-compatible Teensy development board, has offered his contribution to the explosion of ARM-powered boards with the Teensy 3.0.

The original Teensy is an AVR-based development board that goes far beyond the official Arduino offerings. The new and improved Teensy 3.0 improves upon an already wonderful platform with a 32 bit ARM Cortex-M4 microcontroller running at 48 MHz. There’s also a lot of pins available for whatever project you have in mind: the Teensy 3.0 supports 14 analog inputs, 10 PWM outputs, a USB host mode, and an I2S audio interface that will be very useful when accessing the microcontroller’s DSP functions.

There are a couple neat features on the Teensy 3.0 [Paul] somehow managed to work in. In addition to supporting a real-time clock, there are also a few extra IO pins in the middle of the board. [Paul] says the extra pins are due to Kinetis not releasing a 48 pin version of the microcontroller in time for production. It may not be what [Paul] originally had in mind, but we’ll take the upgraded board just the same.

Of course the Teensy 3.0 will be compatible with the Teensyduino Arduino IDE add-on, so if you’d like to run your Arduino sketches on a very powerful piece of hardware, this will be the board to use.

Building A PDA From Scratch

Extremely powerful ARM microcontrollers have been around for ages now, but only recently have they been available for just a few dollars with a good enough toolchain for some serious development work. [Jose] wanted to develop something awesome with an ARM chip he had lying around, so he built a PDA (Spanish, translation) that can be used as a game console, an oscilloscope, a clock, or a wristwatch. Basically, it’s a portable homebrew computer that can do just about anything.

The hardware is built around an ARM Cortex M4 chip clocked at 170MHz. Included on the PCB is an SD card slot, a JTAG interface, a USB port (only used for charging the battery at this point), and a touch screen LCD controller.

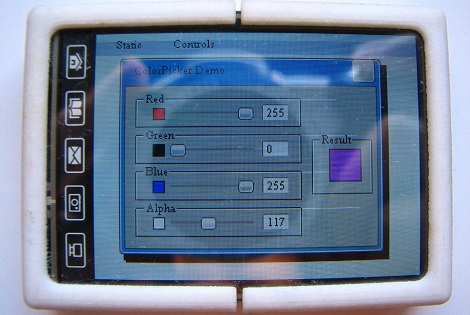
After designing the PCB and enclosure, [Jose] looked around the Internet for a decent GUI library without much success. He eventually found Gwen, a lightweight library for programming GUIs that is easily ported to [Jose]’s hardware.

So far, [Jose] has a few GUI demos up and running on his homebrew PDA, but nothing very useful yet. Still, the fact that [Jose] can get a full-featured ARM tablet-like piece of hardware off the ground without a team of developers brings a smile to our face. We can’t wait to see the state of homebrew ARM devices in a few years when everyone has the requisite hardware and software knowledge.








