Electronic Beer Pong Removes Beer From The Equation

You can take the guy out of the frat house, but you can’t take the frat house out of the guy. [Evan Flint] proves this with his incessant need to have a beer pong game at all of his parties. But now that he’s growing up, and living in nicer places, he doesn’t necessarily want to have the oft-messy game in his home. So he found an electronic solution to his problem. Electropong is like an electronic dart board for playing beer pong. You won’t find beer in the cups, but you’ll still find plenty of fun.

The game includes the triangle of cups that makes up a traditional playing area. In the bottom of each cup is an RGB LED that will keep track of each player’s hits by lighting the cup in that team’s color. Illuminated buttons provide a way to control the game, with an LED marquee to read out the score.

[Evan] mentions some difficulty in recreating the physics of a cup full of beer. He says he overcame the challenge, but alas, there are no details on how. We’ve asked him to update his post so check back for more info.

ProtoSynth, The Prototyping Synthesizer

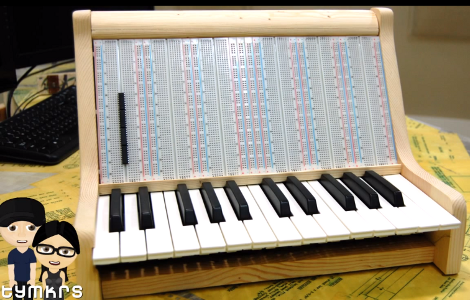
This project isn’t really a prototype, but a tool for prototyping. [Tymkrs] came up with a unique way to build this synthesizer prototyping tool. They actually patched into the underside of the breadboards in order to keep all of the permanent bits nice and tidy.

In the clip after the break you’ll see all of the build photos that lead up to this point. After cutting out and assembling the wooden pieces for the case they grab a soldering iron and get to work. Two octaves worth of keys were pulled out of an electric keyboard. Ribbon cable is soldered onto each key’s electrical connection, with an SIL pin header as a connector. This mates with another ribbon cable with a SIL socket on one end, and an IDC connector on the other. The real trick is getting that IDC connected to the breadboard. They cut back the adhesive tape on the underside of the board and soldered a surface mount pin header onto it. This way the inputs from the keys, as well as a few 1/4″ jacks from the back of the case are always available in a tidy way on the breadboards. The video goes on to show preliminary synthesizer work on the device.

Continue reading “ProtoSynth, The Prototyping Synthesizer”

2012 Open 7400 Logic Competition

The Open 7400 Logic Competition is being held again this year. Start thinking about your entries, they’ll need to be finished and submitted by October 31st. As motivation, Digilent has put up two of their Analog Discovery kits as prizes. They can be used as a dual channel oscilloscope, function generator, or 16-channel logic analyzer. Last year was the first time the competition was held. As hype for the event built, more and more prize sponsors signed on and we hope to see the same thing happen this year.

Your entry can be just about anything as long as you show your schematic, explain the project, and use logic. It can be 7400 TTL, 4000 CMOS, discrete gates, or even a CPLD. Last year’s entries spanned a wide range of themes from LED blinkers, to unorthodox 74xx chip hacking, to boards packed full of chips. Good luck and don’t forget to tip us off about your work!

[Thanks Adrian]

DIY ARM Prototyping Board

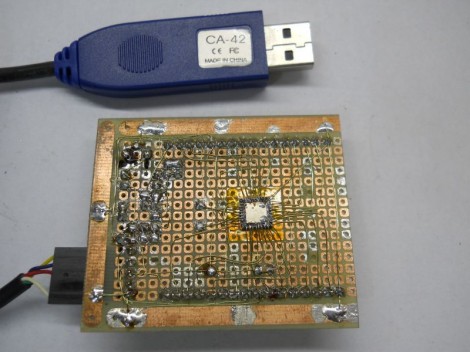
We’re impressed by the ARM prototyping board which [Danjovic] is showing off. He proves that in this day of ever shrinking packages it’s still possible to make your own development tools with protoboard and a soldering iron.

To tell you the truth, if he had designed and etched his own board we probably wouldn’t have featured it. But he didn’t need to spend time on the layout, etching, and reflow. Instead it’s just some enamel wire and a lot of patience. The patience is because the NXP ARM Cortex-M0 chip comes in a HVQFN package. We’re not entirely sure about the HV part (the package alphabet was not entirely clear on this) but QFN means Quad Flat No-Lead. That means no legs on the chip. So [Danjovic] glued it upside down and soldered point-to-point to break out all of the pins.

The top side of the board has a bootloader button, reset button, power regulation, and a crystal oscillator. He doesn’t mention what bootloader he’s using, but a Nokia USB cable gives him the connectivity to push his programs onto the chip.

Frequency Analyzer Built From The New Stellaris Launchpad

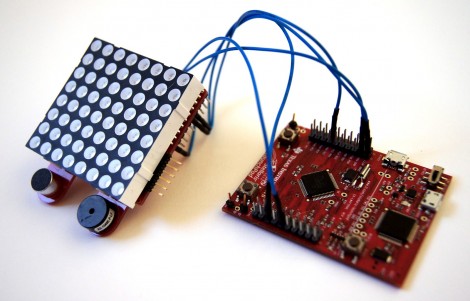
Here’s the first project we’ve seen for the new Stellaris Launchpad. It’s a frequency analyzer which displays a graph on an 8×8 LED module. What’s that you say? You haven’t received your new Launchpad board yet? Neither have we since they don’t start shipping until the end of the month. But [EuphonistiHack] works as a software dev for TI and snagged one of the early development units.

Hardware is rather simple. He uses an OpAmp to feed audio from his laptop to the ARM processor. The 8×8 LED module is an MSP430 booster pack that is addressed via SPI. On the software side of things he’s really taking advantage of hardware peripherals to simplify his work. A timer triggers each ADC reading which in turn writes the values using uDMA. Digital Signal Processing (available as a CMSIS library for many ARM chips) is then used to translate the ADC value to one that can be displayed on the LEDs. Check out the video after the break to see the final version.

The Hackaday writers are looking for an easier name for this hardware than “Stellaris Launchpad”. It doesn’t seem to lend itself to a shorter name, like RPi or Raspi does for the Raspberry Pi. If you’ve got a catchy nick name for the new board please share it in the comments.

5-keg Tap System Treats Your Home Brew Right

One of the biggest expenses when moving to a kegging system for your homebrew beer is finding a way to keep it cold. [Sanchmo] took a traditional route of using a chest freezer, but a bit of extra effort made the ordinary looking appliance into a 5 tap showpiece in his livingroom.

Home brewing is most often done in five gallon batches, so Cornelius kegs (for soda) work perfectly. The chest freezer used here has plenty of room for five of them and a canister of carbon dioxide.  A temperature controller (something along these lines) turns the freezer into a refrigerator. But to make it beautiful [Sanchmo] hit the wood shop pretty hard. He screwed a sheet of plywood to the lid and then trimmed it out, along with a tower to hold the taps. This was further accented with the inclusion of some LEDs for effect.

We did find one word of warning in the Reddit discussion. It’s possible that the original metal housing of the freezer is used as a heat sink which is now covered in wood paneling. We’re not sure if this is true of this particular model or not, but some investigation is warranted if you’re thinking of building your own.

Hacking Dog Collars To Save Money On Batteries.

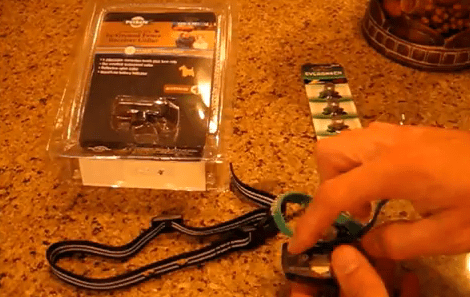
[Lou] sent in this amazingly simple hack that has been saving him money on special batteries for his dog collar. He uses an invisible fence system which gives the dog a shock if it passes beyond certain markers in his yard. The collars use special batteries so you’re not strapping multiple full sized cells to your dogs neck. This is especially necessary when you have a smaller dog that doesn’t weigh much to begin with.

What [Lou] found was that the $8 replacement batteries were simply a plastic shell on a battery he could buy for considerably less. All that was required were a few small cuts to the plastic casing to release the old battery, then he presses the new one into place. This tiny modification will be saving him a considerable amount since the unit burns through a battery in a few weeks.

Continue reading “Hacking Dog Collars To Save Money On Batteries.”