Programming An ARM With BASIC

For those of us old enough to remember the beginnings of the microcomputer revolution, we can look back fondly on ‘the programming environment is the OS,’ a ton of BASIC programs, and typing in small programs found in the backs of computer magazines. It’s a whole new world now with cell phones and Linux computers the size of credit cards, but some companies still remember the beginning.

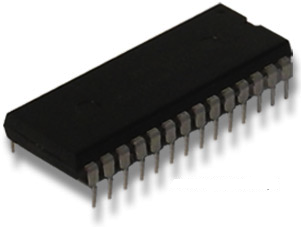
Coridium is releasing an ARM microcontroller in the vein of old fashioned microcomputers updated for the 21st century. Based on the LPC1114 Cortex M0 ARM microcontroller stuffed into a DIP28 package, the Coridium ARM BASIC provides a programming environment in the firmware.

The ARM BASIC is a complete system on a chip, with Rx and Tx connections to connect to a serial terminal. To get this BASIC microcontroller up and running, all you’ll have to do is connect 3.3 Volts of power. Then, it’s a simple matter of plugging in an FTDI cable and pretending it’s 1989.

Coridium is planning on giving away a few hundred of these ARM BASIC chips to makers in a few days. I’ll put up the announcement of free microcontrollers up in a few days, but [Bruce] at Coridium is sending me one very shortly. Hopefully I’ll be able to do a demo before the stock of free chips is completely depleted.

Help Create A Universal ARM Programmer

The new crop of ARM Cortex M0/M3/M4 microcontrollers have a lot of interesting features for developers. In addition to supporting drag and drop programming via USB, the same hardware can also be used as a debugger. Setting breakpoints and inspecting memory at any point in the code is a wonderful feature, but not all the new ARM dev boards we’ve seen support this feature.

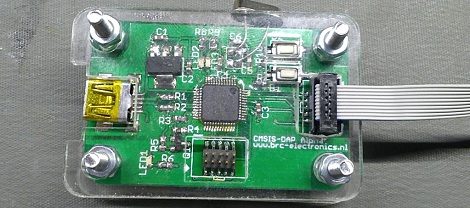
The folks over on SimpleCortex have a solution to this problem, but they need your help. To get their CMSIS-DAP hardware working with Open Source tools, they’re looking for a few good programmers and hardware developers to build a toolchain.

Right now, the hardware only works with Keil development tools. A closed source development environment is no good to anyone, so if you have some experience writing drivers and such, send the guys at SimpleCortex an email. They’ll give you a free board in return for a contribution to building an open source ARM toolchain.

Common sense requires us to mention that you should probably only send these guys an email if you actually plan on working on this problem. Still, it’s a great opportunity to contribute to open hardware.

Drag And Drop Code Onto This ARM Dev Board

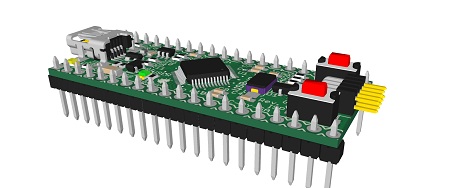
On the continuing list of homebrew ARM dev boards we’ve seen over the past few months, [Squonk42]’s USBug is one of the best we’ve seen. Like many other ARM boards, it breaks out a member of the Cortex M0/M3 family into a 40-pin DIP, but unlike all the others, [Squonk] designed it so you can drag and drop code onto the microcontroller just like a USB thumb drive.

[Squonk]’s trick relies on a certain breed of NXP LPC11xx/LPC13xx microcontrollers. These chips feature a ROM-based mass storage, meaning you can compile code on your desktop and simply shuffle it over to the USBug, no external programmer required. Here’s the relevant app note (PDF in a zip file. Double whammy).

Of course, the USBug features the I/O you’d generally expect from the current crop of Cortex-M3 devices, all while serving up 64 kB of Flash and 12 kB of RAM.

[Squonk] says he’d like to put the USBug on Kickstarter, but unfortunately he’s not a US citizen. In the spirit of Open Hardware, perhaps some maker-based electronics manufacturer will pick up where [Squonk] is forced to leave off.

Galago, The Latest In A Series Of Awesome ARM Boards

Long time Hackaday reader [Kuy] sent in a project he’s been working on for the last year and a half. It’s called Galago, and it wraps up all the features we’d like to see in the current crop of ARM microcontroller dev boards into one neat package.

The Galago features an AMR Cortex-M3 microcontroller running at72 MHz. Included on its pinout are 25 digital IO pins, 6 analog input pins, 10 PWM pins, and an I2C and SPI port.

The Galago isn’t simply an exercise in hardware development, though. [Kuy] spent a great deal of time writing proper libraries for his board, allowing you to get started with the Galago very quickly without having to rely on crippled tools.

A proper library isn’t Galago’s only significant developer feature: [Kuy] went as far as to create a browser-based IDE (no Internet connection required, thankfully) that has the ability to upload code directly to the board via a USB cable. Add in a hardware debugger, and the Galago might just be the perfect ARM board for tinkerers weaning themselves off the Arduino.

[Kuy] has released the Galago on a Kickstarter, with a single board costing $25. It’s a cool device, and something we’d really like to come to market.

The Easiest Way To Dive In To ARM Programming

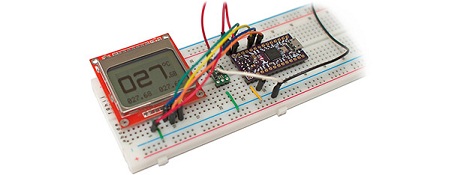
[Brad] has been very excited about an ARM Cortex-M0 chip released by NXP; it’s a fully featured ARM microcontroller, and is, quite amazingly, stuffed into a hobbyist and breadboard-friendly DIP-28 package. After finding a supplier for this chip, [Brad] dove in and put together a great tutorial for programming an ARM on the breadboard using open source tools.

The chip in question is NXP’s LPC1114FN28, a 28-pin breadboard friendly chip we’ve posted about before. After finding a single supplier for this microcontroller (only $1.26 for one chip!), [Brad] pulled out his breadboard and started wiring things up.

Because this microcontroller has an on-board oscillator, wiring up a breadboard and putting in a breakout for an FTDI cable was a snap. After configuring a toolchain and writing a bit of code, the only issue was uploading the code to the chip. This was handled by the lpc21isp programming tool, slightly modified and configured by [Brad] to support his favorite microcontroller.

The LPC1114FN28 is an impressive bit of kit, and with free tools to program the damn thing, we can’t wait for a homebrew ARM dev board to show up.

Programming A Propeller On An ARM

[Stefan] uses a small ARM-powered netbook for his development work, so when he tried to play around with the Parallax Propeller he ran into a few problems. The official tools from Parallax are Windows only, and the available 3rd party dev tools are only compiled for x86. After a lot of futzing about, [Stefan] was able to develop on his ARM netbook and wrote in to tell us how it’s done.

Luckily, Parallax released a GCC port for the Propeller, but unfortunately isn’t completely portable to ARM. The Propeller loader for this architecture ambivalent build uses a little bit of SPIN code, which can only be compiled on Intel machines.

To get around this problem, [Stefan] wrote an installer script to gather all the necessary bits of code to his computer. His ARM/Linux toolchain consists of the Propeller GCC, an open source SPIN compiler, and a Python script used to load code [Stefan] found on the Propeller forums.

Now that [Stefan] has a complete toolchain for programming the Propeller on an ARM device, it’s possible to develop for this very cool multi-core microcontroller on his netbook or even the Raspberry Pi.

DIY ARM Prototyping Board

We’re impressed by the ARM prototyping board which [Danjovic] is showing off. He proves that in this day of ever shrinking packages it’s still possible to make your own development tools with protoboard and a soldering iron.

To tell you the truth, if he had designed and etched his own board we probably wouldn’t have featured it. But he didn’t need to spend time on the layout, etching, and reflow. Instead it’s just some enamel wire and a lot of patience. The patience is because the NXP ARM Cortex-M0 chip comes in a HVQFN package. We’re not entirely sure about the HV part (the package alphabet was not entirely clear on this) but QFN means Quad Flat No-Lead. That means no legs on the chip. So [Danjovic] glued it upside down and soldered point-to-point to break out all of the pins.

The top side of the board has a bootloader button, reset button, power regulation, and a crystal oscillator. He doesn’t mention what bootloader he’s using, but a Nokia USB cable gives him the connectivity to push his programs onto the chip.