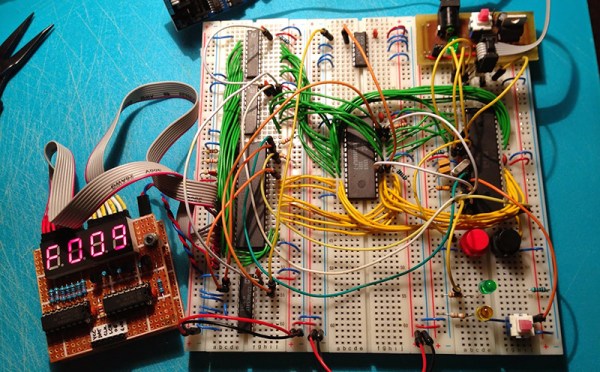
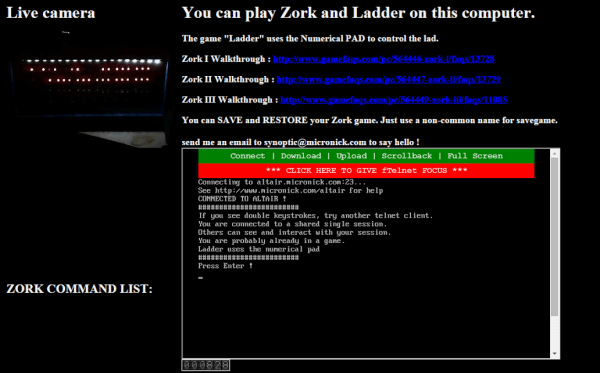
The 30th Anniversary Macintosh

It’s been just over thirty years since the original Macintosh was released, and [hudson] over at NYC Resistor thought it would be a good time to put some old hardware to use. He had found an all-in-one Mac SE “on the side of a road” a while ago (where exactly are these roads, we wonder), and the recent diamond anniversary for the original mac platform convinced him to do some major hardware hacking.

Inspired by a six-year-old project from a NYC Resistor founder aptly named the 24th anniversary Mac, [hudson] decided to replace the old hardware with more powerful components – in this case, a BeagleBone Black. Unlike the earlier build, though, the original CRT would be salvaged; the analog board on the Mac SE has pins for video, hsync, vsync, and power.

To get a picture on the old CRT, [hudson] needed to write a software video card that used the BeagleBone’s PRU. The CRT isn’t exactly “modern” tech, and everything must be clocked at exactly 60.1 Hz lest the CRT emit a terrible buzzing sound.

With a software video card written for the old CRT, the BeagleBone becomes the new brains of this beige box. It runs all the classic Linux GUI apps including XEyes and XScreenSaver, although flying toasters might be out of the question. He also managed to load up the Hackaday retro site with xterm, making this one of the best ways to make an old Mac SE useful.

DUO Portable: A Homebrew Computer With Keyboard And Display

duo

[Jack] is famous ’round these parts for his modern reinterpretations of very early computers. He’s created a computer entirely out of logic chips, a microcontroller-powered multicore box, and even a very odd one-instruction computer. For his latest project, he’s stepped up his game and made something that’s actually fairly useful: a microcontroller-powered system with an integrated keyboard and display.

The DUO Portable, as [Jack] calls his new toy, is built around an ATMega1284P microcontroller. Also on this board is a serial EEPROM that acts as a very small drive, a 102×64 pixel graphic display, and enough tact switches to create a QWERTY keyboard.

The DUO Portable boots to a primitive operating system where files can be created, edited, and saved. The programming language for this computer  is called DCPL – the DUO Portable Command Language – and can be used to create anything from a simple ‘Hello World’ program to a block-building game.

Like all of [Jack]’s homebrew computer projects, he’s written an emulator that can be run in a browser. There’s also video of [Jack] playing around with the DUO Portable available below.

Continue reading “DUO Portable: A Homebrew Computer With Keyboard And Display”

Ball Bearing Motor Rolls For Reasons Unknown

[RimstarOrg] has brought us an oldie but goodie this week. He’s built a ball bearing motor, a design which has been causing engineers and scientists to squabble for decades. [RimstarOrg] used a microwave oven transformer with a 70 turn primary coil and a single turn secondary coil to create a low voltage, high current AC power supply. Needless to say, there’s a real risk of fire or electrocution with a setup like this, so be careful if you try this one at home. [RimstarOrg] then built the motor itself. He de-greased two ball bearings then installed them on a metal shaft along with a wooden flywheel. The entire assembly was then mounted on a board so the wheel could spin freely. Two copper straps hold the bearings to the board. Finally, the transformer is wired into the copper straps. In this configuration, the current will flow through the outer race of one bearing, through the balls, and into the inner race. The current then passes down the axle and passes through the other bearing. There is very little resistance in this circuit, so it can only be powered on for a few seconds at a time before things start to melt down.

Continue reading “Ball Bearing Motor Rolls For Reasons Unknown”

A Deep Dive Into NES Tetris

Tetris AI

Back in 1989, Nintendo released Tetris for the NES. This detailed article first explains the mechanics of how Tetris works, then builds an AI to play the game.

To understand the mechanics of the game, the ROM source was explored. Since the NES was based of the MOS 6502 microprocessor, this involves looking at the 6502 assembly. The article details how the blocks (called Tetriminos) are created and how they move across the screen. The linear feedback shift register used for random number generation is examined. Even details of the legal screen and demo mode are explained.

After the tour through how Tetris works, an algorithm for the AI is presented. This AI is implemented in Lua inside of the FCEUX NES/Famicom emulator. It works by evaluating all of the possible places to put each new Tetrimino, and choosing the best based on a number of criteria. The weighting for each criterion was determined by using a particle swarm optimization.

The source for both the Lua version and a Java version of the code is available with the article. Everything you need to run the AI is available for free, except the Tetris ROM. If you’re interested in how 8 bit games were built, this dissection is a great read.

[via Reddit]

Flash Game Cartridge For The VIC-20

cart

[Petri]’s first computer was the venerable Commodore VIC-20, predecessor to the Commodore 64. With only 5kB of RAM, a very simple graphics chip, and BASIC, it’s a bare-bones system that’s perfect for a 7-year-old future programmer. [Petri] was trying to figure out something to do with this old computer, and realized the simple schematic would allow him to recreate those classic VIC-20 cartridges using modern hardware.

This project began by cracking open a few game cartridges to see what was inside. They’re very simple devices, consisting of a decoupling cap and a ROM chip wired directly to the data and address busses. [Petri] desoldered the ROM and replaced it with a ribbon cable that would give him a clean breadboard to VIC-20 expansion port interface.

Instead of finding a contemporary EEPROM chip to program, [Petri] decided on using a Flash chip. The original cartridge had a 16kB ROM chip, but the smallest parallel Flash chip he could find was 256k. No problem, then; just ignore a few address lines and everything worked out great.

After getting the VIC-20 reading the breadboarded Flash chip, [Petri] started work on a circuit that would program his Flash chip while still attached to the expansion port. With a few buffer chips and an ATMega32a loaded up with Arduino, he’s able to program the Flash chip and turn it over to the VIC-20.

A simple test that toggled the color of the screen as quickly as possible was all that was needed to test the new circuit. Now, [Petri] can finally start on programming some games for his first love.

Continue reading “Flash Game Cartridge For The VIC-20”

Hackaday Retro Edition And Retro Roundup

Retro-Roundup

About a year and a half ago, We launched the Hackaday retro edition, a small off-shoot of the main edition that is written in pure HTML, with no Javascript or any other Web 2.0 cruft. It’s designed so you can load this edition on any computer, from an Apple Newton to a Commodore 64. And people have done just that.

After a long period of neglect, we’re re-launching the retro edition with a new feature: every hour or so, five random Hackaday pages, going all the way back to the very first post will show up on the retro site. Yes, this was a feature we originally planned for the retro site, but now Hackaday has awesome devs working behind the scenes. I mean, they can set up a cron job! It’s amazing!

As always, you’re more than welcome to load our retro site with any vintage hardware, take a picture, and send it in. Odds are, we’ll plaster it up in one of these semi-frequent retro roundup posts.

No retro roundup post would be complete without a few examples of people loading the retro edition on old hardware. You can check a few out after the break.

Continue reading “Hackaday Retro Edition And Retro Roundup”

Minicomputers On Microcontrollers

Developed in the very late 60s and through the 70s, the PDP-11 series of minicomputers was quite possibly the single most important computer ever created. The first widely distributed versions of Unix and C were developed on the PDP-11, and it’s hardware influence can be found in everything from the Motorola 68000 to the MSP430.

When [Dave Cheney] saw the recent 8086 simulator written in 4kB of C code, he realized simulating entire computer systems doesn’t actually require a whole lot of resources outside a big chunk of memory. Armed with an Arduino Mega clone, he set out on one of the coolest projects we’ve seen in a while: simulating a PDP-11 on an AVR.

[Dave] used an ATMega2560-powered Arduino Mega clone with an Ethernet module for the hardware of this build. Attached to it is a shield filled up with a pair of RAM chips that expand relatively limited amount of RAM on the ‘Mega.

So far, [Dave] has his simulated system booting Unix V6 off an SD card. For PDP-11 storage, he’s also simulating an RK05 disk drive, a massive 14 inch platter containing 2.5 Megabytes of data. Compared to the original PDP-11/40, [Dave] estimates his machine is about 10 times slower. Still, an original 11/40 system fills multiple server racks, and the most common installations consume several kilowatts of power. The Arduino Mega can fit in a pocket and can be powered over USB.

Future developments for this system include improving the accuracy of the simulator, running more advanced operating systems and the DEC diagnostic programs, and possibly speeding up the simulation. We’d suggest adding some switches and blinkenlights on an additional shield, but that’s just us.

All the code can be found on [Dave]’s git, with a description of his SPI RAM shield coming shortly.