Adding Bluetooth Audio Playback To A Toyota Matrix

In this project [Ryan] shows how he added Bluetooth audio to the stock stereo of his Toyota Matrix. The work he did with his add-on hardware is quite good. And the installation was surprisingly easy. For example, the dashboard bezel which is hanging in the foreground of this picture simply pulls off without the need for any tools. Also, the CD changer input for the stereo is what he uses to patch into the system. It just happened to have a 0.1″ pin header so finding a connector that would work wasn’t a problem.

As for the add-on hardware, he built his own circuit board around an ATmega168 microcontroller and Bluegiga WT32 Bluetooth module. To connect to the car’s data system he went with an RS485 driver chip. It’s not quite the right part but it works well enough for his purposes. So far he can get audio playback working and plans to add support for hands free phone calls and displaying audio track information. Hey, maybe he’ll even add some extra shake-based automation; who knows?

Get a look at the install in the clip after the break.

Continue reading “Adding Bluetooth Audio Playback To A Toyota Matrix”

Ti Chronos Watch Controls Raspberry Pi

[Mike Field] was working on interfacing his TI Chronos eZ430 watch with the Raspberry Pi. As things were going pretty well, he took a side-trip from his intended hack and implemented watch-based control for an RPi audio player.

It really comes as no surprise that this is possible, and even easy. After all, the RPi board has native USB capability for hosting the watch‘s RF dongle, and it’s running Linux which we know already works well with the Chronos platform. But we still love the thought of having automation controls strapped to our wrist!

mpg321 is the audio playback program used for this hack. It plays MP3 files using ALSA for sound, which does have a few hiccups on the RPi. [Mike] found workarounds and included them in the C program he uses to gather everything into one nice code package. Control depends on keypresses sent from the watch (meant for use with PowerPoint) which are translated by his code and pushed to the audio/mp3 programs.

Noise Pollution Tit For Tat Uses The Baha Boys As A Weapon

Here [Matthew Br] explains the situation he’s in with the neighbors that share this wall of his apartment. When they listen to music they like it loud and so he gets to ‘enjoy’ the experience as well. But he can’t ignore it any longer, and has decided to use a sound volume detector to blast some tunes right back at them.

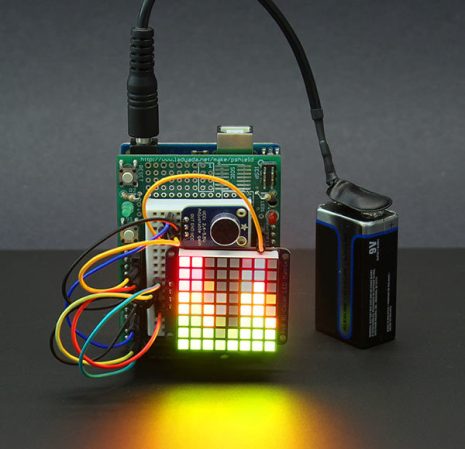
He taped a microphone to the wall and wired it up to his Arduino. It monitors incoming sound and, using an adjustable threshold, it will trigger when the neighbors are too loud. We think he was wise to include some time filtering that makes sure the loud noises are sustained and not just the result of someone bumping into the wall. When the system does detect loud music for a sustained period it triggers [Matthew’s] own CD player to pump out Who Let the Dogs Out? by the Baha Boys. It will play for a period of time, then shut off to listen and see if the neighbors are still rowdy.

He documents an actual run in the latter half of the clip after the break. We sure hope he’s living in a building with just two units, otherwise this will drive the rest of the neighbors batty as well!

Continue reading “Noise Pollution Tit For Tat Uses The Baha Boys As A Weapon”

Decoding RF Link Using A PC Soundcard

[Ray] wanted to use a microcontroller to send signals to some wireless power outlets. Instead of tapping into the buttons on the remote control he is using an RF board to mimic the signals. There are two hurdles to overcome with this method. The first is to make sure your RF module operates on the proper frequency. The second is to get your hands on the codes that are being sent from the remote control unit.

Now you could just hook your oscilloscope up to the transmitter and take a look at the timing of the signals. But most hobbyists don’t have that kind of high-end test equipment in their basement or garage shops. [Ray’s] approach uses something we all have available to us: a sound card and some open source software. He connected the data pin from his RF receiver to an audio plug and inserted it in the line-in jack of his computer. Using Audacity he recorded the signal as he pressed buttons on the transmitter.  This method not only captures the data, but the time stamps native to the audio editing program let him easily work out the timing for each signal.

It’s kind of amazing what you can do with this audio analyation technique. Earlier this year we saw it used to measure response time for DSLR cameras.

Continue reading “Decoding RF Link Using A PC Soundcard”

Chiptune Player Uses Preprocessed .MOD Files

[Kayvon] just finished building this chiptune player based on a PIC microcontroller. The hardware really couldn’t be any simpler. He chose to use a PIC18F2685 just because it’s big enough to store the music files directly and it let him get away with not using an external EEPROM for that purpose. The output pins feed a Digital to Analog Convert (DAC) chip, which in turn outputs analog audio to an LM386 OpAmp. The white trimpot sandwiched between the chips controls the volume.

The real work on this project went into coding a program which translates .MOD files into something the PIC will be able to play. Because of the memory limits of the chip it is unable to directly use all of the instrument samples from these files. [Kayvon] wrote a program with a nice GUI that lets him load in his music and page through each instrument to fine-tune how they are being re-encoded. The audio track from the video after the break doesn’t do the project justice, but you will get a nice look at the hardware and software.

Continue reading “Chiptune Player Uses Preprocessed .MOD Files”

Building A Boombox Where Tools Are Meant To Go

[Danman1453] is ready to face the rest of his summer thanks to this toolbox boombox he built for outside use. It’s always nice to have some tunes when laboring at those not-so-fun jobs (we’ve got some windows that need re-glazing and you can bet we’re not doing that in silence). But if you can’t really hear it what’s the point? The highest volume [Danman1453] could get out of the consumer options he tried just wasn’t cutting it, and that led him to this project.

The only thing he bought to complete the boombox was some black spray paint. He already had an old toolbox for the enclosure, a head unit and the larger speakers from an old car, and the small speakers came from a set of computer speakers. Those are cleverly mounted in the compartments on the lid of the toolbox, pointed down so that they’re oriented correctly when the lid is propped open. The faceplate was even recycled by using wood an old shipping pallet.

He would like a little bit of advice though. When he’s playing a CD and the bass really gets bumping the head unit tends to skip. Does anyone have an easy method of isolating it from the speakers while still keeping it safe and sound in the portable enclosure?

Outdoor Stereo Helps Your Neighbors Learn To Issue Noise Complaints

Backyard parties are going to rock over at [Effin_dead_again’s] house. That’s because he just finished building this outdoor stereo. It carries its own power supply so you can take it on the road with you, and we don’t think you’ll have trouble hearing it with the 240 Watt amplifier hidden inside.

He shared the equipment details in his Reddit conversation. A 12V lawn mower battery sits in the base of the wooden enclosure. One of the commenters mentioned the dangers of hydrogen off-gassing from that power source, but [Effin_dead_again] thought of that and included venting around the lid. The subwoofer is an 8″ Alpine, and speakers are out of a Hyundai car. The head unit has Bluetooth built in for easy connection to your smart phone. It of course has the ability to play CDs and MP3s too, and we’d bet you can tune the radio if there’s an antenna connected.

Need similar power but a bit more portability? Check out this stereo built into a cooler.