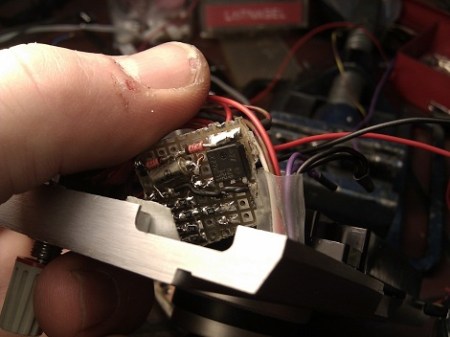
We saw this picture on Flickr this morning and started getting really curious. The caption says that [Steffanhh1] modified the Yashica Electro Shutter camera to be fully manual. We’re not camera experts so we had to do a little research to see what was going on here. The Yashika Electro got its name due to how the shutter speed is controlled. You have two little LEDs that light up depending on which direction you need to turn the dial (based on ambient light?). [Steffanhh1] really wanted full control, so they hacked in a dial with a knot of resistors under it. The first test photographs are downloading developing, so we’ll have to wait to see the results.
digital cameras hacks941 Articles
Photo Booth In Briefcase Form
Taking portability one step further [Marty Enerson] built a photo booth in a roll-away case. The Pelican mobile case houses an Elo Touchscreen, a Canon PIXMA iP3000 photo printer, and a Canon Powershot SD100 digital camera. Most of this, including a Lenovo laptop to run it, was purchased second-hand from eBay, with a copy of Photoboof (different from the wedding photo booth from last week) to tie up the software side of the project. He plans to add a folding stand later on to make it into a kiosk. For some reason that sparks the image of a voting booth in our minds.
DIY Night Vision Monocle
This interesting mashup shows it’s easy to make your own night vision goggles. It makes use of just a few parts; the viewfinder from an old camcorder, a low-light security camera module, and a collection of infrared LEDs.
The low-light camera is capable of detecting infrared light, which is invisible to our eyes. If you shine the right IR LEDs on an object, they will cast enough light for the camera to clearly view the objects around you. The camcorder viewfinder is nothing more than a compact way to display what the camera sees. This would be easy to accomplish with a wearable display. It is also beneficial to have a large IR light source so you may consider modifying that giant LED flashlight you’ve been meaning to build so that it operates in the infrared wavelengths.
This project comes from the same source as the Laser Microphone we looked in on last month. Just like that one, there’s plenty of extra information about this build. There’s suggestions for choosing and focusing a light source. This includes using lasers as the source, and binoculars for long-range viewing.
Photo Booth For A Wedding
[Joe Bain] built a portable photo booth for his wedding. We’ve looked in on photo booths before, both as a robust feature in your apartment and as a mobile option. But making it part of a wedding reception is the best reason we’ve found to build one. [Joe’s] electronics consist of a laptop, camera, screen, and a big pushbutton that interfaces via a serial cable and adapter. He found some software that was written for photo booths which takes care of almost everything including polling the “go” button.
The booth itself is a frame build from PVC pipe (another chance to use those fancy fittings) with fabric dividers hanging from it. This is fun for the wedding-goers and it produces a bit of nostalgia for your scrapbook.
From Cinema To Stills, Camera Lens Gets New Life
[Timur Civan], with a beautiful merge of past and present, has taken a 102 year old camera lens (a 35mm F5.0 from hand cranked cinema cameras) and attached it to his Canon EOS 5D. While this is not the first time we’ve seen someone custom make a camera lens or attach a lens to a different camera, such as when we brought you plumbing tilt shift or iPhone camera SLR or Pringles can macro photography, the merge of old tech with new warms our empty chest cavities hearts. Catch some additional shots of 1908/2010 New York City after the jump.
Continue reading “From Cinema To Stills, Camera Lens Gets New Life”
Full-featured AVR Time-lapse
This time-lapse photo trigger was built [Lukasz Goralczyk]. It is controlled by an ATmega168 and we were surprised to read that it uses about 12k of code. Curious about what takes up that much space, we were impressed to see all the features demonstrated in the video after the break. The small device, running on two AA batteries, has a well-designed user interface displayed on a 3V character LCD that is navigated with a clickable rotary encoder.
It isn’t the smallest intervalometer we’ve ever seen, but it deserves respect for the features packed into a diminutive form-factor.
3D Digital Light Art Using IPad And Camera Trickery
This light art is created by a moving display playing an animated image through several camera exposures. In this case the display they’re using is an iPad, but that really doesn’t matter as it’s just a high-quality screen and it’s portable. 3D animations are generated in software and then sliced into cross sections. As the camera rolls, the cross sections are displayed in order and the location of the screen is moved. Very much like light painting with an LED or a Roomba, the bright image remains and can be strung together for the 3D effect seen in the video after the break.
Using the cross sections of the video reminds us of what a three-dimensional object looks like to a two-dimensional being. If you have no idea what that means you should take a look at this video on imagining the tenth dimension.
Continue reading “3D Digital Light Art Using IPad And Camera Trickery”