Hacklet 86 – Time-lapse Projects

“If I could save time in a bottle…” it’s not just an old song, it’s a passion for many photography hackers. Time-lapse photography is a way to show the movement of time through still images. These images are animated into what essentially is a video recorded at a super low frame rate. We’re talking one frame per minute or slower in some cases! The camera doesn’t have to be still for all this, but any motion must be carefully controlled. This has led hackers, makers, and engineers to create a myriad of time-lapse rigs. This week’s Hacklet is all about some of the best time lapse projects on Hackaday.io!

rig-1We start with [Swisswilson] and the simply named Timelapse rig. To say this rig is beefy would be an understatement. All the aluminum parts, with the exception of the gears, were machined by [Swisswilson]. Two Nema-23 Nema-17 motors are controlled by Sparkfun Easy Stepper Drive boards, while an Arduino Micro serves as the controller. The electronics are all housed in a sturdy box which also serves as a remote control. A joystick allows pan and tilt to be manually controlled. The bombproof construction is definitely a help here, as [Swisswilson] is using this rig with DSLR cameras. Combined with a lens, these setups can reach a pound or two.


pilapseNext up is [minWi], who put their script-foo to work with raspilapse. Raspilapse automates the entire process of taking photos, assembling them into a movie, and uploading to YouTube. The hardware is a Raspberry Pi Model B, with a RasPi Camera. The Pi shoots images then uploads them to a Virtual Private Server (VPS). [minWi] used an external server to save wear and tear on the Pi’s SD storage card. At the end of the day, the VPS uses ffmpeg to assemble the images into a video, then uploads the whole thing to YouTube. We’re betting that with a few script mods, this entire process could be run on a Raspberry Pi 2. If you’re really worried about the SD card, a USB flash drive could be used.


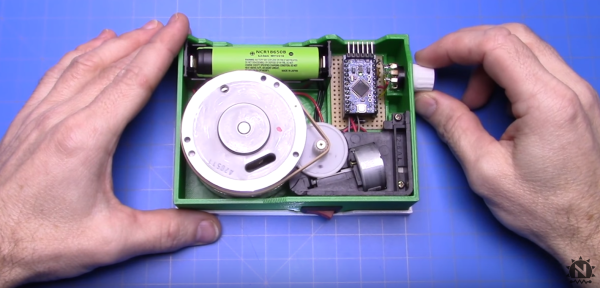
SunriseSunsetRig[Andyhull] takes us down to one frame per day with Sunset and Sunrise camera controller. [Andy] wanted to get shots of the sunrise every day. Once converted to a video, these shots are great for documenting the passing of the seasons. He used a Canon point and shoot camera along with the Canon Hack Devleoper’s Kit (CHDK) for his camera. The camera has its own real-time clock, and with CHDK, it can be programmed to shoot images at sunrise. The problem is power. Leaving the camera on all the time would quickly drain the batteries. Arduino to the rescue! [Andy] programmed an Arduino Pro Mini to turn the camera on just before sunrise, then shut it back down. The standby power of a sleeping ATmega328 is much lower than the camera’s, leading to battery life measured in weeks.


podFinally, we have [caramellcube] who added data to their time-lapse photos with Portable Observation Device (POD). POD was conceived as a device to aid paranormal investigators. The idea was to have a device that could take images and record data at a set interval from within a locked room. Sounds like a job for a Raspberry Pi! [caramellcube] started with Adafruit’s Raspberry Pi-based touchscreen camera kit. From there they added a second board controlled by an Arduino Nano. The Nano reads just about every sensor [caramellcube] could fit, including humidity, air pressure, magnetic field strength, acceleration, light (4 bands), sound, and static charge. The Nano allows [caramellcube] to connect all those sensors with a single USB port on the Pi. We’re not sure if [caramellcube] has found any ghosts, but we’re sure our readers can think of plenty of uses for a device like this!

If you want to see more time-lapse projects, check out our new time-lapse projects list! If I missed your project, don’t be shy, just drop me a message on Hackaday.io. That’s it for this week’s Hacklet. As always, see you next week. Same hack time, same hack channel, bringing you the best of Hackaday.io!

3D Printed Lens Gears For Pro-grade Focus Pulling

Key Grip, Gaffer, Best Boy – any of us who’ve sat through every last minute of a Marvel movie to get to the post-credits scene – mmm, schawarma! – have seen the obscure titles of folks involved in movie making. But “Focus Puller”? How hard can it be to focus a camera?

Turns out there’s a lot to the job, and in a many cases it makes sense to mechanize the task. Pro cinematic cameras have geared rings for just that reason, and now your DSLR lens can have them too with customized, 3D printed follow-focus gears.

Gear_Selection_01_full_render_preview_featuredUnwilling to permanently modify his DSLR camera lens and dissatisfied with after-market lens gearing solutions, [Jaymis Loveday] learned enough OpenSCAD to generate gears from 50mm to 100mm in diameter in 0.5mm increments for a snug friction fit. Teamed up with commercially available focus pulling equipment, these lens gears should really help [Jaymis] get professional results from consumer lenses. 

Unfortunately, [Jaymis] doesn’t include any video of the gears in action, but the demo footage shown below presumably has some shots that were enabled by his custom gears. And even if it doesn’t, there are some really cool shots in it worth watching.

And for the budding cinematographers out there without access to a 3D printer, there’s always this hardware store solution to focus pulling.

Continue reading “3D Printed Lens Gears For Pro-grade Focus Pulling”

Zombie Slap Results In Glorious Selfie

[Donnie Plumly] likes to spice things up at the office around holidays. This Halloween he decided to make an office photo booth — with a bit of a twist. He calls it the Zombie Selfie.

He cast his arm in silicone to make a gruesome zombie hand, which he set up with a vibration sensor. If you touch the arm (he encourages you to slap it), an Arduino picks up the vibration which initiates the picture taking sequence!

He’s using an IR LED with the Arduino to trigger the camera, and then an Eye-Fi card in it automatically transfers it to a computer in a DropBox. An IFTTT script then publishes it to Twitter for all to see under the account @ZombieSelfie! There are some pretty amusing ones already!

And so you can preview your Zombie Selfie, he also threw a monitor up — there’s no going back after the picture is taken though! It’ll be posted straight to Twitter.

When it comes to custom photo booths though, its hard to top this robotic artist who will actually paint your picture for you!

Frozen Time Photography With A 100W LED

High speed photography is fun. Ultra high frame rate video, even more so. But since not many of us have access to $10,000 HFR cameras… we have to make do with long exposure shots a perfectly timed camera flash. You can design a system to trigger the flash at just the right millisecond — but they’re still pretty expensive typically.

[Electronupdate] has a 100W LED module and penchant for Arduino Nanos — so he wondered if he could make an affordable high speed camera rig — and he did.

It’s a pretty slick little setup. He has a limit switch mounted to a nail on a piece of wood — when the water balloon drops on it, it triggers the mechanical switch. The Arduino then triggers the LED flash, which is quite a large load and requires a High Side Switch to operate. A small LCD and series of buttons allow him to dial in the time offset just right in order to get some awesome photos of a water balloon exploding.

Continue reading “Frozen Time Photography With A 100W LED”

3D Popup Cards From 3D Photos

The world of 3D printing is growing rapidly. Some might say it’s growing layer by layer. But there was one aspect that [Ken] wanted to improve upon, and that was in the area of 3D photos. Specifically, printing a 3D pop-up-style photograph that collapses to save space so you can easily carry it around.

It’s been possible to take 3D scans of objects and render a 3D print for a while now, but [Ken] wanted something a little more portable. His 3D pop-up photographs are similar to pop-up books for children, in that when the page is unfolded a three-dimensional shape distances itself from the background.

The process works by taking a normal 3D photo. With the help of some software, sets of points that are equidistant from the camera are grouped into layers. From there, they can be printed in the old 2-dimensional fashion and then connected to achieve the 3D effect. Using a Kinect or similar device would allow for any number of layers and ways of using this method. So we’re throwing down the gauntlet — we want to see an arms-race of pop-up photographs. Who will be the one to have the most layers, and who will find a photograph subject that makes the most sense in this medium? Remember how cool those vector-cut topographical maps were? There must be a similarly impressive application for this!

[Ken] isn’t a stranger around these parts. He was previously featured for his unique weather display and his semi-real-life Mario Kart, so be sure to check those out as well.

Smart Phone Camera Turns Laser Cutter Into Hi-Res Scanner

Getting decent macro photos always seems to be a chore. Some important detail always seems to be just outside of the depth of field, or you have to be zoomed in so close that you get great detail in one spot but miss the big picture. [Nate B] had such a problem while trying to document some PC boards, and he came up with a nifty hack that uses a laser cutter and a smart phone camera to do the job.

Pv150a-front
Click for detail.

Having first tried scanning the boards with a flat-bed scanner but finding the depth of field unsatisfactory, [Nate B] then went on to his Samsung phone’s camera. Set to panorama mode, he manually scanned across the boards and let the camera stitch the images together. The results were better, but the wobblies got the better of him and the images showed it. He then decided to use a laser cutter — with the laser disabled, of course — as an impromptu X-Y stage to raster his camera above the boards. In a slightly cringe-worthy move, he gingerly clamped the phone to the cutter gantry, started the panorama, and let the cutter move over the board. This results in a rock-solid pictures of his boards with a lot of detail – perfect for his documentation. As a bonus, the honeycomb laser cutter bed makes for an interesting background texture.

Obviously anything could be used to raster a camera and achieve similar results, but full points here for maximizing available resources and not over-complicating a simple job. Yet another reason you can use to justify that laser-cutter purchase.

Continue reading “Smart Phone Camera Turns Laser Cutter Into Hi-Res Scanner”

The IPad Controlled Camera Slider

[Daniel] and [Tobias] dabble in videography and while they would love a camera slider controlled by their favorite iDevice, commercial motorized camera sliders are expensive, and there’s no great open source alternative out there. They decided to build one for themselves that can be controlled either from a PS3 controller or from its own iPad app with the help of an ESP8266 WiFi module.

app_live_controlThe camera slider is a two-axis ordeal, with one axis sliding the camera along two solid rails, and the other panning the camera. The circuit board was milled by the guys and includes an ATMega328 controlling two Pololu stepper drivers. An ESP8266 is thrown into the mix, and is easily implemented on the device; it’s just an MAX232 chip listening to the Tx and Rx lines of the WiFi module and translating that to something the ATMega can understand.

By far the most impressive part of this project is the iPad app. This app can be controlled ‘live’ and the movements can be recorded for later playback. Alternatively, the app has a simple scripting function that performs various actions such as movement and rotation over time. The second mode is great for time lapse shots. Because this camera slider uses websockets for the connection, the guys should also be able to write a web client for the slider, just in case they wanted the ultimate webcam.

You can check out [Daniel] and [Tobias]’ demo reel for their camera slider below.

Continue reading “The IPad Controlled Camera Slider”