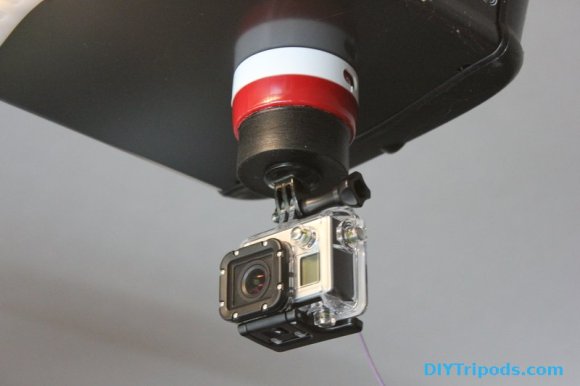
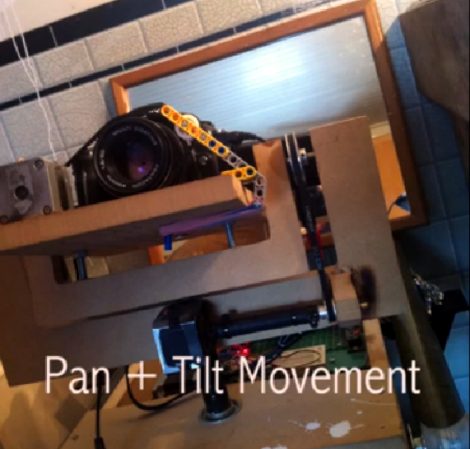
Finding 1s And 0s With A Microscope And Computer Vision

ROM

One day, [Adam] was asked if he would like to take part in a little project. A mad scientist come engineer at [Adam]’s job had just removed the plastic casing from a IC, and wanted a little help decoding the information on a masked ROM. These ROMs are basically just data etched directly into silicon, so the only way to actually read the data is with some nitric acid and a microscope. [Adam] was more than up for the challenge, but not wanting to count out thousands of 1s and 0s etched into a chip, he figured out a way to let a computer do it with some clever programming and computer vision.

[Adam] has used OpenCV before, but the macro image of the masked ROM had a lot of extraneous information; there were gaps in the columns of bits, and letting a computer do all the work would result in crap data. His solution was to semi-automate the process of counting 1s and 0s by selecting a grid by hand and letting image processing software do the rest of the work.

This work resulted in rompar, a tool to decode the data on de-packaged ROMs. It works very well – [Adam] was able to successfully decode the ROM and netted the machine codes for the object of his reverse engineering.

Flatbed Scanner Eliminates The Perils Of Macro Photography

IMG_7728

If you have ever played around with macro photography, you’ll know how hard it is to get a focused image of something that isn’t two-dimensional. For virtually every 3D object, you’ll have to deal with the depth of field – the small region where things are actually in focus. [David] came up with a neat homebrew solution for making sure everything in his macro photos is in focus using a discarded flatbed scanner and a Raspberry Pi.

[David]’s technique relies on focus stacking. Basically, [David] takes dozens of images of the same object, moving the camera closer by a fraction of an inch before snapping each frame. These pictures are stitched together with CombineZ, a piece of software used for extending the depth of field in images.

The hardware part of the build is a Raspberry Pi hooked up to a stepper motor driver and the shutter button of [David]’s camera. By attaching his camera to the carriage of a flatbed scanner, [David] can inch his camera ever closer to his object of study while grabbing the images for CombineZ.

The results are impressive, and would be nearly impossible to replicate any other way without tens of thousands of dollars in camera equipment.

12secbeforehit-thumb

Operation StratoSphere

12secbeforehit-thumb

Panoramic photos are nice, however a full 360 degree x 180 degree, or spherical panorama would be even better. [Caleb Anderson] decided to take this concept much further, attempting to extract panoramic photos from video taken at 100,000 feet using a high-altitude balloon and six GoPro cameras.

The overview of this project can be found here, and gives some background. The first task was to start prototyping some payload containers, which for a device that you have little control over once out of your hands is quite critical. As well as some background, there’s a cool interactive panorama of the first test results on this page, so be sure to check it out.

The “real” hacking in this experiment wasn’t a matter of putting a balloon into the stratosphere or recovering it, however. Chaining these images together into pictures was a huge challenge, and involved a diverse set of skills and software knowledge that most of our readers would be proud to possess. There are several videos in the explanation, but we’ve embedded one with the cameras falling out of the sky. Be sure to at least watch until (or skip to) just after 1:05 where all the cameras impressively survive impact! Continue reading “Operation StratoSphere”

Polaroid Catcher Make Print Screen Do What It Says

polaroidcacher_2

As part of their coursework at ITP New York a group of students developed the Polaroid Catcher. It’s a way to make your digital experiences more permanent. When you have something on-screen that you’d like to keep as a memory you can print the screen on this old Polaroid camera. Of course you’re not going to get the chemical-filled container you may remember from ages past. But we thing you’d agree the nostalgic camera makes a nice enclosure for a modern image printer.

The workings of the system are shown off quite well in the clip after the break. But we’re always interested in the particulars of how they pulled it off. The system uses a Google Chrome extension to capture what is being displayed in the browser. Before the image is sent to the printer the user has the opportunity to frame up the subject of the photo. Once decided, the image is pushed to a Bluetooth photo printer using some scripts written by the team.

Continue reading “Polaroid Catcher Make Print Screen Do What It Says”

Adapting Modern Cameras To Use Old Flash Units

using-old-time-flash-modules-with-modern-cameras

We don’t think this one is going to bring back the days of one-time-use flash bulbs. But for camera enthusiasts who do have old flash units lying around this will be quite interesting. [Sven] worked out a method of interfacing this vintage flash with a modern camera.

The trick is to map the trigger signal from the camera to the flash module. Instead of patching into an electrical signal from the camera he’s using the light from the stock flash. He cut an optocoupler in half, keeping the receiving side of the part. This is molded in plastic that was shaped to surround the original flash unit. When that flash goes off the triac in the remaining half of the IC is activated. This is connected to a hot shoe mounted on an extension arm that is attached to the camera’s tripod mount. The shoe can be used to interface a few different styles of flash modules.

We don’t have an alternative use in mind right now. But chopping an optocoupler in half could come in handy for other applications that use a bright light as a trigger event.

Continue reading “Adapting Modern Cameras To Use Old Flash Units”

Automating A Key Fob Camera For Time Lapse

808-2

If you’re lofting a digital camera high into the stratosphere with a helium balloon, you really can’t do better than one of those key fob spy cameras. Being extremely lightweight with decent resolution, they’re the perfect camera to take to near space. If you’re bringing someone along to snap the pictures, that is.

[Román] wanted to take his 808 spy camera to new heights, but not wanting to manually reset the thing when it’s 100,000 feet in the air decided to use a microcontroller instead. An 8-pin PIC12F675 takes care of taking 60 pictures with a 4-second interval, then switching to movie mode and recording a 20-second video.

The entire device can be powered by 6 to 9 volts with the help of a voltage regulator. [Román] found the camera hangs after taking about 1600 photos, so a connection from the microcontroller to the reset switch was added. Everything works on the ground, so we can’t wait to see what happens miles above the Earth’s surface.

Unwrapping Images Of Cylindrical Objects

unwrapping-images-of-cylindrical-objects

Here’s an automated setup that lets you create flat images of cylindrical objects. The example shown above takes a creamer and lets you see what the painted pattern looks like when viewed continuously.

The image capture rig is similar to turntable photography setups that allow you to construct animated GIF files or 3D models of objects. The subject is places on a stepper motor which allows precise control when rotating the object between frames. The EiBotBoard (which we’ve seen in at least one other project) is designed for the EggBot printer. But it is used here to interface the motor and capture equipment with the Raspberry Pi.

We’re a little uncertain if the RPi actually handles the image manipulation. The project uses ImageMagick, which will certainly run on the RPi. There is a mention of the Raspberry Pi camera joing the rig as a future improvement so we do expect to see a fully-automatic revision at some point.

[via Adafruit via EMSL]