Linear Motor Can Be Built From Trash

[Raul] built a cheap linear actuator out of a drawer slide and a surplus flatbed scanner.

A few builds we’ve seen, like the PCB drill press or the horribly inefficient thermostat, used linear actuators as key components of their builds. These linear actuators are fairly expensive compared to other parts we usually have lying around so going the homebrew route to reduce costs is always a welcome idea.

The first step of [Raul]’s build is to mount a drawer slide to a piece of wood. A stepper motor is attached to one end of the actuator and a timing belt is strung along the length of the assemblage. After a bracket is connected the drawer slide and the belt, you’ve got a very inexpensive linear motor.

In our days of dumpster diving, we can’t count the number of times we’ve passed up on drawer slides in unwanted furniture. Stepper motors, gear trains and timing belts from old ScanJets can be found for pocket change any day of the week. For cheap and accurate linear motion, we couldn’t come up with a build that does better than [Raul]’s.

Laser Etched PCB Production

Like most of us, [reonarudo] isn’t satisfied with the current methods of homebrew PCBs, so he put a laser on a reprap and started burning some boards.

The basic procedure is to cover a copper clad board with matte black spray paint. A laser was installed on the X carriage of the reprap. [reonarudo] used cad.py to convert the board files into g-code and fired up his laser. The quality of the boards is highly dependent on the accuracy of the laser so after working through some mechanical problems [reonarudo] managed to make some passable boards.

We’ve seen just about every manufacturing method imaginable applied to PCB production. Etch resist and toner transfer do the job and a reprap milling machine is pretty neat, but lasers are so much cooler. While it may not be perfect (yet), printing PCBs with a laser shows a lot of potential. Check out a video of [reonarudo]’s bot burning some copper after the break.

Continue reading “Laser Etched PCB Production”

Putting Laptop LCDs To Use With An FPGA

We’re always impressed with the number of laptop displays we’re able to pick out of the trash. Most of the time the computer is borked beyond repair so we end up with a lot of functional but unusable LCD panels. As a service to us all, [EiNSTeiN_] figured out how to control an LCD panel using a cheap homebrew FPGA board.

LCD panels don’t use a simple protocol like VGA for turning pixels on and off. Instead, the very high-speed LVDS is used. LVDS is beyond the capabilities of simple microprocessors, so [EiNSTeiN_] built himself a clone of an XuLA FPGA prototyping board and set to work. After figuring out the signal lines to the panel, [EiNSTeiN_] pored over the timing diagrams for the LVDS controller and the LCD panel. From the data sheets, he figured out data is usually sent to the panel at about 500 MHz. The homebrew FPGA board couldn’t manage that speed so [EiNSTeiN_] cut the FPGA clock in half.

While LCD’s 60 fps refresh rate was reduced to 30 fps, [EiNSTeiN_] says there’s only a little flicker. Not bad for something that could have easily been trashed.

Controlling Samplers And Sequencers With Multitouch

When we see artists like Daft Punk or Madeon working their magic in a live setting, we’re always impressed with their controllers. Sample-based artist use controllers like the Monome and Kaoss Pad a lot, but these devices are fairly expensive. Thankfully, we live in an age of multitouch displays, so [Graham Comerford] came up with his own multitouch controller that does just about anything.

The build is based on the Kivy framework and includes a Monome emulator, MIDI drum pads, mixer, and a whole bunch of other sliders and buttons. There’s no word on how [Graham]’s multitouch display was constructed, but if you’re looking to build your own gigantic audio control setup there’s a lot of info on building Microsoft Surface clones, adapting computer monitors, and spherical multitouch rigs.

We’re not sure if [Graham]’s virtual drum kit is velocity sensitive but even if it’s not, it’s an interesting bit of kit. Check out an earlier version of his setup after the break.

Continue reading “Controlling Samplers And Sequencers With Multitouch”

High Voltage Hacks Finale: Do Not Try This Under Any Circumstances

Over the last two weeks, we’ve seen some pretty crazy and potentially dangerous stuff, like a stun glove and modern day alchemy. For our high voltage theme finale, we couldn’t pass up [Photonicinduction]’s YouTube channel.

Best known for his self-destructing washing machine (the source of this animated .gif), [Photonicinduction] is also the brainchild behind the hair dryer flame thrower and his homemade fifty thousand amp transformer.

While we do like his Not Safe For Work ammeter (yes, it really is NSFW), some of [Photonicinduction]’s videos – charging a car battery in 4 minutes, making a kettle boil without a heater element, pressurizing coconuts to over 200 psi, and exploding rabbits – are hilariously dangerous and should not be attempted by anyone.

We need to say you should not attempt to emulate [Photonicinduction]’s hijinks under any circumstances. Cleaning up a puddle of burning gasoline with a vacuum cleaner may sound like fun, but copying [Photonicinduction] will eventually get you killed. This man must know his stuff, because we’re honestly shocked he hasn’t exploded yet. The best way to enjoy three hundred thousand volts is probably grabbing a coffee and watching [Photonicinduction]’s YouTube channel.

Dev Board From An AVR Programmer

[jethomson] sent in a build he’s been working on that turns an inexpensive AVR programmer into a development board. The build is based on the very affordable USBasp programmer that’s based on an ATmega8. With hundreds of these boards available from China for less than a Hamilton, we’re wondering how soon it will be before we see these boards end up in other projects.

After fiddling with the AVR fuse settings, [jethomson] managed to burn some code to the microcontroller. After that, all that was required to upload software to the programmer is a bit of solder, a push button, and an external programmer. [jethomson] also managed to make this little AVR programmer compatible with the Arduino environment with a small addition to the boards.txt file.

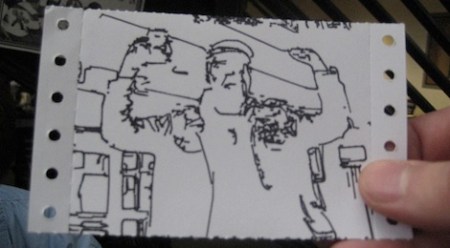
[jethomson] included a few bits of software as an example – he ported the haunted USB cable and adapted the USB business card to print out, “All work and no play makes Jack a dull boy.” Nice work, and we can’t wait to see it in future projects.

High Voltage Hacks: A 1000 Watt Tube Amp

Normally when we hear of a Champ guitar amp, we think of a sweet-sounding rig that puts out 6 Watts through an 8-inch speaker. [John Chambers] of Champ Electronics wanted to build a true champion for the field of battle and came up with The Champ 1000 Watt Tube Amp, an amplifier that probably puts out enough heat to keep an igloo warm.

The amp is based on 807 valves. With some clever engineering [John] managed to coax 100 watts out of a pair of 807s, so the entire amp “only” requires 20 power tubes. The build log shows some pretty impressive examples of electrical prowess. We can’t recall the last time we featured a build with point-to-point wiring on tagboard, and [John]’s work is some of the best we’ve ever seen.

[John] has been working on this amp off and on for a few years now, but he should be wrapping up the build sometime soon. We haven’t seen this amp in action, but we imagine it would look something like this 36×10 monstrosity. Send us a message or post a comment if you can find a video and we’ll put it up.