netcast_hack

Hacking LG’s Netcast

LG released a line of Internet-connected TVs in both the US and Europe that utilize Yahoo TV widgets to bring interactive content to the living room. While it sounds like a great idea in theory, users have been disappointed to find that LG has approved a measly 15 widgets since the TVs were released.

OpenLGTV.org.ru user [xeros] has started working on a project that aims to enable more useful content as well as homebrew widgets. The project is known as OpenLGTV BCM, and not only covers LG television sets, but all sets based on the Broadcom platform.

A ton of progress has been made already, as they have been able to install their own busybox environment as well as open the sets to accept more widgets via some clever signature spoofing. The ultimate goal for the project is to completely divorce the sets from the Yahoo platform and replace it with their own open marketplace.

It’s a great start, and we can’t wait to see what sort of progress they make as time goes on.

[Thanks, T]

IR Remote Control Jammer Makes You Lord Of The Livingroom

Bring communications jamming technology into your TV viewing experience by building this infrared LED driver circuit. You’re probably familiar with the TV-B-Gone, which let’s you turn off any television at the touch of a button. But what if you actually want to watch the program that’s currently on the screen when the person with remote-in-hand doesn’t? That’s where this little marvel comes in.

[KipKay’s] IR jammer uses a 555 timer to constantly transmit infrared traffic. The signals it’s sending out don’t correspond to commands the TV (or any other IR remote-controlled device) will respond to. But if the light intensity is strong enough, they will interfere with any signals coming in from a remote or even from a TV-B-Gone. [KipKay] wisely hides this circuit inside of another remote control so that the other couch potatoes you are thwarting won’t get wise to what’s happening. If they want to watch something else they’ll have to get up and walk over to the entertainment center to do something about it, and what’s the chance that’s going to happen?

Don’t miss [KipKay’s] infomercial-esque presentation of this gadget after the break.

Continue reading “IR Remote Control Jammer Makes You Lord Of The Livingroom”

Cocktail Cabinet To Be Proud Of

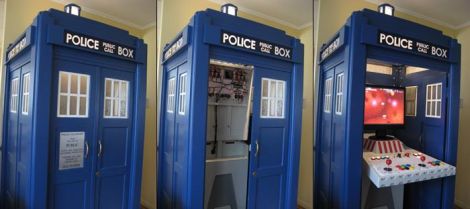
At a glance you might think it’s the real thing, but if you look closer you’ll see that The Distraction Contraption is an extremely well-executed cocktail cabinet recreation that hosts a MAME setup. [Sam Freeman] took pictures of the entire build process and has posted them, along with captions, as a Flickr collection.

The project started after some inspiration from this diminutive cocktail cabinet. He wanted his own version that was closer in scale to the coin-op versions that would have been found in bars a few decades ago. He designed the case to fit a 17″ LCD screen using Google Sketchup. From there, he cut out the parts and routed the edges. The controls feature buttons and joysticks, as you’d expect, but that red cap on the end works as a spinner. He tried out a few different ideas for this auxiliary control. He found that using LEGO gears to map the spinner’s motion to the axle of a mouse worked best. To give the plastic knob a better feel he loaded it with pennies to increase the mass, bringing momentum into play. The final look was achieved using wood-grain contact paper, and custom printed skins.

Retrofitting LCD Projectors With High-powered LEDs

highpower_led

[Devon] recently repaired a handful of Phillips LCD projectors which he was quite excited to use. The only problem is that he didn’t want to mess with replacing the bulbs after every 2000 hours of use at $100 apiece. He was pretty confident that he could find a better way to drive the projectors, so he disassembled them once more and started looking around for bulb replacements.

He figured that a high-powered LED would do the trick, so he ordered a handful of parts and went about his first retrofit. Using his oscilloscope, he found that the control board pulses the high voltage board when the projector is powered on, and continues to pulse a signal until the machine is turned off. At this point, the HV board powers down the bulb.

He created a small circuit using a PIC that is used to interpret the initial pulse from the control board as well as watch for the steady “heartbeat” pulses that occur while the projector is powered on. This board is used to control the driver board for the high-powered LED he purchased.

His bulb replacement works well as far as color fidelity is concerned, but is not nearly as bright as he hoped for. He has plans to source some far brighter LEDs or automobile HID lighting in the very near future, and we look forward to seeing if he can match the brightness of the original bulbs.

Gun Turret Built Into A Cake Box

Couch potatoes have a new line of defense thanks to this remote-controlled turret. The gun itself is a hacked down airsoft model. The mount started with a servo motor in the center of a plastic cake box. A thin strip of plywood was added, along with a couple of sliding furniture feet to stabilize the platform as it rotates. A second servo mounts to that platform, which allows the trajectory of the projectile to be adjusted up or down. A PIC 18F4520 controls both of the motors, as well as the firing of the airsoft module, all while listening for commands from an IR receiver. Just adjust the firmware to match an unused device on your universal remote and the power to annoy your roommates will be at the tips of your fingers.

You can see an overview of the build process, as well as a demonstration of the final project in the video after the break. The page linked at the top has a very detailed build log but some of the ‘next’ buttons on that page don’t work for us. Luckily you’ll see a table of contents in the right column which lets you navigate around these bad links.

Continue reading “Gun Turret Built Into A Cake Box”

Mame Cabinet Springs To Life From Ikea Furniture

[Jed] built a MAME cabinet into some flat pack furniture (translated). For the housing he chose an Ikea Ramvik side table. This is a perfect piece of furniture for the project for several reasons; it’s cheap, coming in at under $70, it’s a reasonable height to use while sitting on the sofa, it has a built-in drawer that will hide the guts of the system, and it was designed to use a piece of glass as the table surface.

The electronics are pretty straight forward. A notebook computer runs the MAME frontend, with an auxiliary screen which is framed nicely under the glass. Controls are standard coin-op type buttons soldered to the contacts on the PCB from a USB joystick. The brushed aluminum bezel added to the surface of the table keeps the modern finished look that one would want with a showpiece like this one.

We always like to keep our eyes open for hackable items when visiting Ikea. Make sure to check out their As-Is department (preferably as soon as they open) to find hackable furniture on the cheap.

Don’t Buy An Amp, Build One To Suit

In need of an amplifier for his home entertainment system [Afroman] decided to build an amp rather than buying one. If nothing else, doing it himself allowed for a form factor that can’t just go out and buy.

He designed the project on two separate boards, one for the power supply and the other for the amplifier circuit. Both are of his own design, and although he doesn’t share the schematic, we know he’s based his work on a National Semiconductor reference design for the LM4780 audio amplifier chip. There’s a few other clues, like his mention of the toroidal transformer seen at the left in the image above and hi-res photos of the unpopulated board that has component values printed in the silk screen.

The final design allows him to get great performance out of his speakers with a very clean look. You’ll need to be logged to the forum linked above to view all of the images, but we’ve embedded three more of them after the break to whet your appetite.

Oh, and cost? This gets up there, just sneaking past the $500 mark.

Continue reading “Don’t Buy An Amp, Build One To Suit”