Reverse Engineering Apple’s Lightning Connector

Introduced with the iPhone 5 nearly two and a half years ago, Apple’s Lightning connector has stymied the incredible homebrew electronics scene that was previously accustomed to the larger, older, better documented, and more open 30-pin connector. Now, finally, the protocols inside the Apple Lightning connector have been broken. We’re still a ways off from a Lightning breakout board, but this is the first proof that a serial console can be obtained through a Lightning connector. That’s the first step to totally owning an iDevice, and this is how all those exploits will start.

[Ramtin Amin] began the teardown of the Lightning connector began as most reverse engineering tasks should – looking at the patents, finding a source for the connectors, and any other products that use similar hardware. [Ramtin] found a Lightning to Serial converter powered by an STM32 microcontroller. Disassembling the firmware and looking at the output on a logic analyzer, [Ramtin] figured out part of the protocol, most of the wiring, and after some research, schematics for how an until-now unidentified chip in Lightning-enabled iProducts was wired.

The chip in question is colloquially known as the Tristar, and more accurately as a CBTL1608A1. During the teardown craze of the iPhone 5 launch, this chip was frequently identified as a DisplayPort Multiplexer. It is a mux, but not for DisplayPort – it’s only to connect the accessory (Lightning) UART, debug UART, baseband, SoC, and JTAG. This is the key to the castle, and being able to get through this chip means we can now own our iDevices.

The chip is an incredibly small BGA affair that [Ramtin] desoldered, reflowed onto a breakout board, and connected to an STM32 Discovery board. Using the techniques he used with other Lightning-enabled hardware, [Ramtin] was able to connect his iPhone and ever so slightly peek his head into the inner workings of his device.

It’s not complete control of an iDevice yet, but this is how all those future exploits will start. [Ramtin] uploaded a short video as a proof of concept, you can check that out below.

Continue reading “Reverse Engineering Apple’s Lightning Connector”

The Bluetooth IPod Controller For Android

iDuinoid

By now, just about everyone in the industrialized world has a broken iPod with a cracked screen, a battery that won’t charge, or one that’s simply sitting in a drawer somewhere. The iPod is still a great way to store music, though, and [Trevor] came up with a way to control its playback with an Android device, showing the song name, playlists, and everything else with an Arduino and a cheap Bluetooth adapter

With the right resistance on a specific pin on the 30-pin dock connector, iPods will send the track name, and playlists over a serial connection, as well as respond to play, pause, skip, and volume commands. There hasn’t been much work towards implementing the copious amount of documentation of this iPod accessory mode in small microcontroller projects, but with a little bit of work, [Trevor] managed to replicate the usual iPod dock commands with an Arduino.

Using an HC-05 Bluetooth module, it’s possible to get this iPod-connected Arduino to relay data to and from an Android device with a small app. The circuit is simple, the app is free, and if you have an iPod with an old battery or cracked screen, it can still work as a music storage device. Not bad, [Trevor].

Counterfeit Apple Charger

More Counterfeit Apple Chargers Than You Can Shake An IPod At

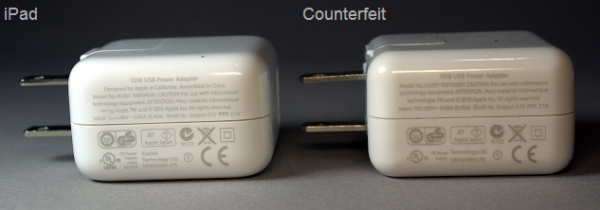
Phones, MP3 players, designer bags, artwork, money…. anything with value will bring out the counterfeiters looking to make a quick buck. Sometimes the product being counterfeited isn’t even necessarily expensive. For example, an Apple iPad Charger. [Ken Shirriff] got a hold of a counterfeit iPad Charger, took it apart, and did some testing.

So why would someone buy a counterfeit product? To save some money! The counterfeits are usually cheaper to reel the potential buyer in thinking they are getting a deal. In this case, the Apple product costs $19 and the knock-off is $3, that’s a huge difference.

Continue reading “More Counterfeit Apple Chargers Than You Can Shake An IPod At”

Reverse Engineering An LCD Display

ipod

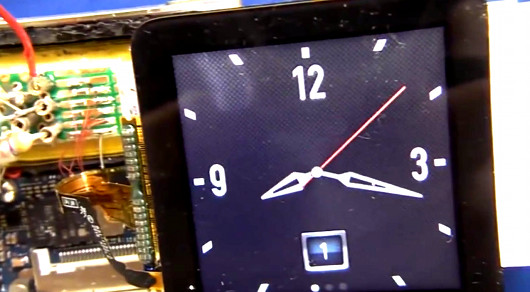
The current marketplace allows hobbyists to easily find inexpensive, well-documented displays, but what if you wanted to interface with something more complicated, such as the screen on an iPod Nano 6? [Mike] has given us a detailed and insightful video showing his process for reverse engineering a device with little-to-no documentation. Here he covers the initial investigation, where one scours the web in search of any available information. In [Mike’s] example, the display uses an MIPI D-PHY interface, which he has never worked with. He learns that the MIPI Alliance will provide design specs in exchange for a signed NDA (Non-Disclosure Agreement) and a modest $8000 fee. Nice.

[Mike] shows off some serious hardware hackery, tackling some extremely difficult soldering in order to set up a proper test platform. He then demonstrates how to use a rather awesome oscilloscope to better understand the display protocol. We found it fascinating to see the video signals displayed as waveforms, especially when he shows how it is possible to count the individual binary values. The amount of information he uncovers with the oscilloscope is nothing short of amazing, proving these little devices are more complex than they seem.

[via Hacked Gadgets]

Continue reading “Reverse Engineering An LCD Display”

AuPod, The Solid Gold IPod Nano Watch

aupod


The 6th generation iPod nano makes a wonderful watch, but something milled out of aluminum doesn’t lend itself to more formal events. [Ted] liked the idea of an iPod nano watch, but wanted to kick things up a notch and fabricate an 18k gold iPod nano. It took 500 hours and $2500 in materials, but we’d say it’s worth it.

The new 18k gold enclosure for the watch was fabricated using the lost wax casting method. First, all the electronics and buttons were removed from the iPod, then a negative mold was made in silicone rubber. A positive wax mold was made with the silicon mold, and finally another negative mold – this time in plaster – was made by vaporizing the positive wax mold in a furnace.

[Ted] used two one-ounce coins as the source of gold for his nano enclosure, spun into the plaster mold. From there, it’s just a simple but tedious matter of cutting the sprues off, shaping, filing, buffing, and polishing. With a new leather strap, the iPod is reassembled in its new enclosure.

Wonderful work, and amazingly impressive from someone who doesn’t consider himself a jeweler.

Pinoccio Web Rover

web-rover

Before assuming that the title should be “web crawler,” just shush your shussins’ and check out the video after the break. The Pinoccio, as previously noted, is a board in development as a sort of web-enabled by default Arduino. This makes it perfect for a project like this one where a little rover is controlled from 10,000 Kilometers away, or around 6000 Miles for those of us that dwell in the US.

This setup uses a cell-phone accelerometer in Brazil to allow control of this robot in Nevada. Although close, the control isn’t quite real time, so that has to be accounted for. Something like this could be easily used for a telepresence ‘bot.

If you want to build your own, the assembly time is estimated at 1 hour. Instructions, as well as source code can be found on their page after the video. Although the Pinoccio board won’t be available until at least this summer, maybe this will give someone inspiration to try something similar in the mean time! Continue reading “Pinoccio Web Rover”

Adding Charging Back To Old Apple Accessories

From time-to-time we’ve been frustrated by the lack of backwards compatibility for Apple accessories. We have a great Monster FM transmitter that used the screen of the original iPod to select a channel. That was a feature we just loved which it never worked with any future hardware. We may not be able to get that back, but perhaps this hack can help us implement the ability to charge newer Apple devices using older accessories.

Seen above is the mounting dock from the iPod Hi-Fi speakers released back in 2006. Apparently the sound out of this set of speakers is just great, but you won’t be able to charge your modern device while it’s playing music. That is unless you’re not afraid to solder on a few simple components and roll in a switching regulator which can source at least one Amp of current. As we’ve seen in the past, Apple uses a couple of voltage dividers to identify modern chargers. These are installed on the D+ and D- lines of the USB connector and are pretty easy to recreate if you know the voltage levels the device is looking for. In this case a 39K, two 51k, and one 75k surface mount resistors are free-formed right next to the connector on the Hi-Fi’s dock PCB. The regulator on the right supplies the juice for charging. It’ll charge modern devices now, and even work with the iPhone five if you use a simple dock connector adapter.