LED Matrix Earrings Show Off SMD Skills

We’ll be honest with you: we’re not sure if the use of “LED stud” in [mitxela]’s new project refers to the incomprehensibly tiny LED matrix earrings he made, or to himself for attempting the build. We’re leaning toward the latter, but both seem equally likely.

This build is sort of a mash-up of two recent [mitxela] projects — his LED industrial piercing, which contributes the concept of light-up jewelry in general as well as the power supply and enclosure, and his tiny volumetric persistence-of-vision display, which inspired the (greatly downsized) LED matrix. The matrix is the star of the show, coming in at only 9 mm in diameter and adorned with 0201 LEDs, 52 in total on a 1 mm pitch. Rather than incur the budget-busting expense of a high-density PCB with many layers and lots of blind vias, [mitexla] came up with a clever workaround: two separate boards, one for the LEDs and one for everything else. The boards were soldered together first and then populated with the LEDs (via a pick-and-place machine, mercifully) and the CH32V003 microcontroller before being wired to the power source and set in the stud.

Even though most of us will probably never attempt a build on this scale, there are still quite a few clever hacks on display here. Our favorite is the micro-soldering iron [mitxela] whipped up to repair one LED that went missing from the array. He simply wrapped a length of 21-gauge solid copper wire around his iron’s tip and shaped a tiny chisel point into it with a file. We’ll be keeping that one in mind for the future.

Continue reading “LED Matrix Earrings Show Off SMD Skills”

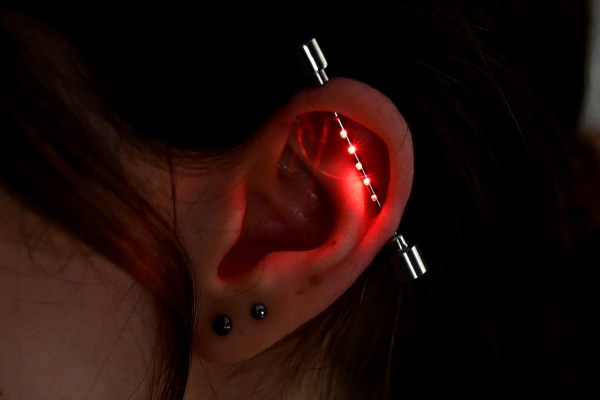
Spice Up Your Earrings With Microelectronics

We’ve covered [mitxela] in the past and if you know him, you’ll likely know him for putting the micro in microelectronics. This year, he’s at it again with his LED Industrial Piercing.

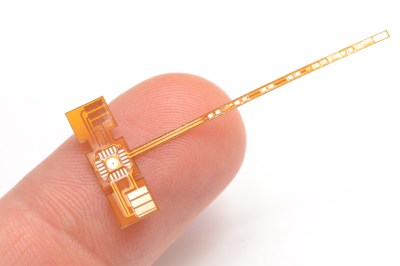
A T-shaped flexible PCB that is smaller than an index finger
This tiny PCB is really pushing the limits of fabrication

Inspired by the absolutely tiny 0402 LEDs and industrial piercings, [mitxela] started thinking of a way to construct the 5cm long device. He found some normal LED earrings to steal the battery compartment from. Then, with a tick needle and some more steel, he created a new industrial earring with some holes.

Of course, no [mitxela] project is complete without comically tiny microsoldering and this project makes the VQFN ATTiny he used look large. He puts his PCB suppliers to the test with a merely 1mm wide flex PCB for the LEDs to be mounted on. Finally, he combines the flex PCB, the earring and some epoxy to create yet another piece of LED jewelry.

Video after the break.
Continue reading “Spice Up Your Earrings With Microelectronics”

Hack A Soda Can Into Jewelry

If you’ve ever needed some aluminum for a project, you might have noticed you have easy access to aluminum cans. If you need a cylinder, fine. But what if you don’t? [ThescientistformerlyknownasNaegeli] shows how to create an attractive necklace from two soda cans, and we think the techniques might be usable for other cases where you might need aluminum. If you care more about the necklace, it looks good. You only have to add a 3D-printed clasp or, if you prefer, you can buy a clasp and use that. For the Hackaday crowd, you can also use the resulting structure as an aluminum cable shield, which might better suit you.

The post gives more details and points to other posts for even deeper dives into many of the steps. But the basic idea is you strip the ink from the outside of the can and then cut the can into a strip. The mechanism for that looks a lot like a machine to cut plastic bottles into strips, but that method isn’t feasible without special blades.

Continue reading “Hack A Soda Can Into Jewelry”

OpenJewelry, No Pliers Required

They say that if you want something done right, you gotta do it yourself. Oftentimes, that goes double for getting something done at all. Whereas some people might simply lament the lack of a (stable) Thingiverse-type site for, say, jewelry designs, those people aren’t Hackaday’s own [Adam Zeloof]. With nowhere to share designs among engineering-oriented friends, [Adam] took the initiative and created OpenJewelry, a site for posting open-source jewelry and wearable art designs as well as knowledge about techniques, materials, and processes.

[Adam] has seeded the site with a handful of his own beautiful designs, which run the gamut from traditional silversmithing techniques to 3D printing to fancy PCBs with working blinkenlights. You really should check it out, and definitely consider contributing.

Even if you don’t have any jewelry designs to share, the code is open as well, or you could even edit the wiki. Just be sure to read through the contribution guidelines first. If you don’t have the time for any of that, donations are welcome as well to help maintain the site.

We love wearable art around here, especially when it serves another purpose like this UV-sensing talisman, or this air quality necklace.

UV sensing amulet

Tiny Talisman Warns Wearer About UV Exposure

Given how important our Sun is, our ancestors can be forgiven for seeing it as a god. And even now that we know what it actually is and how it works, it’s not much of a reach to think that the Sun pours forth evil spirits that can visit disease and death on those who bask too long in its rays. So an amulet of protection against the evil UV rays is a totally reasonable project, right?

As is often the case with [mitxela]’s projects, especially the more bedazzled ones, this one is approximately equal parts electronics and fine metalworking. The bulk of the video below focuses on the metalwork, which is pretty fascinating stuff. The case for the amulet was made from brass and sized to fit a CR2032 coin cell. The back of the amulet is threaded to act as a battery cover, and some fancy lathe work was needed there. The case was also electroplated in gold to prevent tarnishing, and lends a nice look when paired up with the black solder mask of the PCB.

On the electronics side, [mitxela] took pains to keep battery drain as low as possible and to make the best use of the available space, choosing an ATtiny84 to support a TTP223 capacitive sensing chip and a VEML6075 UV sensor. The touch sensor allows the wearer to wake the amulet and cycles through UV modes, which [mitxela] learned were not exactly what the sensor datasheet said they were. This required a few software hacks, but in the end, the amulet does a decent job of reporting the UV index and looks fantastic while doing it.

Continue reading “Tiny Talisman Warns Wearer About UV Exposure”

How To Make Resin Prints Crystal Clear

[Matou] has always been entranced by the beauty of natural crystal formations [and has long wished for a glowing crystal pendant]. Once he got a resin-based 3D printer, he was majorly disappointed to find out that although transparent resin prints look like delicious candy when they’re still wet, they turn cloudy and dull after being washed in an isopropyl bath and cured with UV light. There must be a way to either polish pieces back to clear, or keep them clear in the first place, [Matou] thought, and set about experimenting with some test crystals (video, embedded below).

As [Matou] found out, the dullness is caused by surface imperfections. Resin prints have layer lines, too, and although they may be super fine and invisible to the naked eye, they will still scatter light. The choices seem obvious — either polish the proud parts down with many grits of sandpaper, or fill the valleys with something to smooth everything out. As you’ll see in the video after the break, [Matou] tried it all, including a coat of the same resin that made the print. It’s an interesting look at the different ways to smooth out resin prints, though you may not be surprised to find that the one with the most work put into it looks the best.

We were hoping to see [Matou] try a green LED in the pendant, but it didn’t happen. If you’re dying to know what that looks like, you can get one of these pendants for yourself by supporting [Matou] on Patreon.

We think crystals are pretty cool, too — especially crystal radios. Here’s the hack-iest one of those we’ve ever seen, free of charge.

Continue reading “How To Make Resin Prints Crystal Clear”

Remoticon Video: How To 3D Print Onto Fabric With Billie Ruben

We’re impressed to see the continued flow of new and interesting ways to utilize 3D printing despite its years in the hacker limelight. At the 2020 Hackaday Remoticon [Billie Ruben] came to us from across the sea to demonstrate how to use 3D printing and fabric, or other flexible materials, to fabricate new and interesting creations. Check out her workshop below, and read on for more detail about what you’ll find.

The workshop is divided into two parts, a hands-on portion where participants execute a fabric print at home on their own printer, and a lecture while the printers whirr away describing ways this technique can be used to produce strong, flexible structures.

The technique described in the hands on portion can be clumsily summarized as “print a few layers, add the flexible material, then resume the printing process”. Of course the actual explanation and discussion of how to know when to insert the material, configure your slicer, and select material is significantly more complex! For the entire process make sure to follow along with [Billie]’s clear instructions in the video.

The lecture portion of the workshop was a whirlwind tour of the ways which embedded materials can be used to enhance your prints. The most glamourous examples might be printing scales, spikes, and other accoutrement for cosplay, but beyond that it has a variety of other uses both practical and fashionable. Embedded fabric can add composite strength to large structural elements, durable flexibility to a living hinge, or a substrate for new kinds of jewelry. [Billie] has deep experience in this realm and she brings it to bear in a comprehensive exposition of the possibilities. We’re looking forward to seeing a flurry of new composite prints!