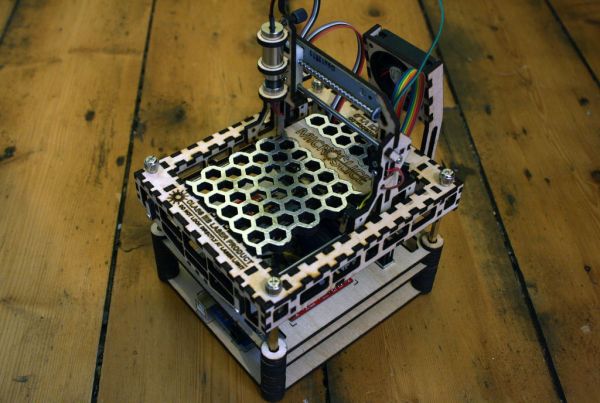
If you’ve got a lot of spare parts lying around, you may be able to cobble together your own laser engraver without too much trouble. We’ve already seen small engraver builds that use an Arduino, but [Jeremy] tipped us off to [Xiang Zhai’s] version, which provides an in-depth guide to building one with a Raspberry Pi.
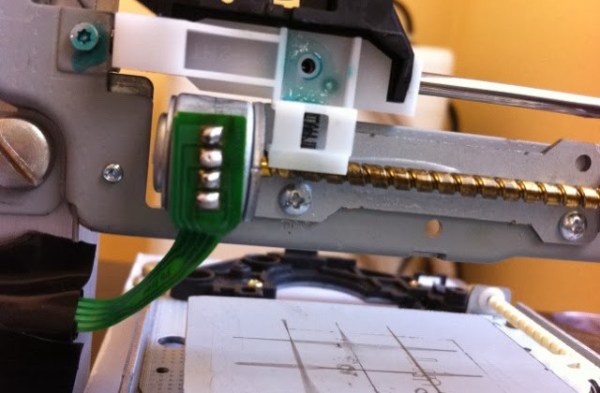
[Xiang] began by opening up two spare DVD writeable drives, salvaging not only their laser diodes but the stepper motors and their accompanying hardware, as well as a handful of small magnets near each diode. To assemble the laser, he sourced an inexpensive laser diode module from eBay and used a vise to push the diode into the head of the housing. With the laser snugly in place and the appropriate connecting wires soldered on, [Xiang] whipped up a laser driver circuit, which the Raspi will later control. [Xiang] worked out the stepper motors’ configuration by following [Groover’s] engraver build-(we featured it a few years back)-attaching the plate that holds the material to be engraved onto one axis and the laser assembly to the other.
Check out [Xiang’s] project blog for details explaining the h-bridge circuits as well as the Python code for the Raspi. As always, if you’re attempting any build involving a laser, please use all necessary precautions! And if you need more information on using DVD burners for their diodes, check out this hack from earlier in the summer