Save Boatloads Of Cash By Building Your Own Laser Cutter

diy_laser_build

Have a bunch of time on your hands, and about $2,500 sitting around? Why not settle in and build yourself a laser cutter?

That’s exactly what Buildlog forum member [r691175002] did, and he told us about it in our comments just a few moments ago. Laser cutters can be pretty cost prohibitive depending on what you are thinking of picking up. The cheapest Epilog laser we could find costs $8,000, and you know what can happen when you try buying a cheap laser online.

Instead of going for a ready-made cutter, he purchased an open-source kit from Buildlog, documenting the highlights of the build process online. The build log walks through a good portion of the construction starting with the frame and motor mounts, continuing through wiring up the electronics as well as some of the finishing touches. If you happen to head over to take a look around, you will find that there are plenty of pictures from various stages of the construction process to keep you busy for awhile.

With everything said and done, [Ryan] is quite happy with his laser. After going through the build process, he offers up some useful construction advice, as well as tips on sourcing cheaper hardware. He estimates that if he built the laser today, he could probably cut the costs nearly in half.

There’s no doubt about it – a $1300 laser cutter sounds pretty darn good to us.

Analog Scope Stands In To For Laser Light Show

[Joey] likes to dabble in laser projection, building his own hardware and writing the software that drives it. One way that he tests his setup is by replacing the laser assembly with an analog oscilloscope. This allows him to ensure that the driver board is receiving data from the software, and translating it into the correct electrical signals to drive the motors controlling the mirrored redirection of the laser beam.

In the video linked above [Joey] walks us through this process. It starts by connecting scope probes to the digital-analog-converter card that outputs image data for the projector. From there the XY mode is used to map the two channels perpendicular to each other; the motors that these signals are meant to control have mirrors that also move perpendicular to one another. After adjusting the scale and the timebase you will see the pattern the laser dot is meant to trace.

[Joey] entered this in a Tectronix contest. There’s plenty of other interesting entries to browse though. If have an entry that you’d like to see featured, or if you come across any other interesting stuff, don’t forget to tip us off.

Blu-ray Laser Plotter Writes On Glow-in-the-dark Screen

This laser display is persistent thanks to a glow-in-the-dark screen. [Daniel] built it using a Blu-ray laser diode. As the laser dot traverses the screen, it charges the phosphors in the glow material, which stay charged long enough to show a full image.

The laser head is simple enough, two servo motors allow for X and Y axis control. A Micro Maestro 6-channel USB servo controller from Pololu drives the motors, and switches the diode on and off. This board offers .NET control, which [Daniel] uses to feed the graphics data to the unit. Check out the video demonstration below the fold to see a few different images being plotted. It’s shot using a night-vision camera so that you can really see where the laser dot is on the display. It takes time to charge the glow material so speeding up the plotting process could actually reduce the persistent image quality.

This is yet another project that makes you use those geometry and trigonometry skills.

Continue reading “Blu-ray Laser Plotter Writes On Glow-in-the-dark Screen”

Laser Light Show Features Full XY Control Via Homemade Galvanometers

[Rich] over at NothingLabs has put together a really cool laser light show that you really must see in an effort to win a laser cutter from Instructables.

His walkthrough discusses the mechanics of laser light shows – specifically how galvanometers are typically used to precisely aim mirrors in order to draw images and write text. Commercial galvanometers tend to be pretty expensive, so he opted to build his own, using relatively cheap and easy to find parts.

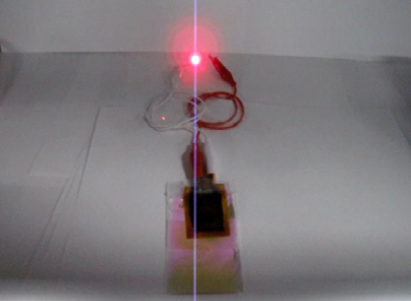
The galvanometers were constructed using a pair of old speaker woofers, a few Lego bricks, and some acrylic mirror squares. The mirrors were mounted on the speakers, which were then wired to an Arduino. He removed the batteries from a cheap red laser pointer and permanently wired it to the Arduino, which it now uses as a pulsed power source. Once he had everything built, he positioned the laser using a fog machine for guidance.

As you can see in the video below, the laser show is quite impressive. His homemade galvos provide a somewhat rough quality to the final projected image, and we like that a lot. It looks almost as if all of the text and images were hand drawn, which is a pretty cool effect.

Just as [Rich] mentions, we hope to see some cool hacks based off his work in the future.

If you are interested in some of our previous laser features, check these out.

Continue reading “Laser Light Show Features Full XY Control Via Homemade Galvanometers”

DIY Laser Light Show Is Sure To Please

cigarbox_laserlightshow

[Pete] had some spare time on his hands over his spring break, and he was itching to build something. He settled on a laser light show since, after all it was spring break, and what says “Party” better than a laser light show?

He glued three hobby mirrors to three small motors, mounting the motor assemblies on the lid of a wooden cigar box he bought for next to nothing. When the laser is pointed at the mirrors, they reflect the beam off one another, and finally against a projection surface, creating interesting shapes and motion. He programmed an Atmega328 to control the laser light show when in automatic mode, and added 4 pots to control the mirrors’ spin rate when set in manual mode.

The visuals are pretty cool, as you can see in the videos below. We love the laser light show concept, and [Pete] definitely gets extra points for his cigar-box casing as well.

Continue reading “DIY Laser Light Show Is Sure To Please”

Passcode Protected Laser Tripwire Alarm System

laser_tripwire

Sometimes security doesn’t need to be overly complex to be effective. Instructables user [1234itouch] recently built a simple laser tripwire alarm that can be mounted virtually anywhere, complete with a keypad for disarming the device.

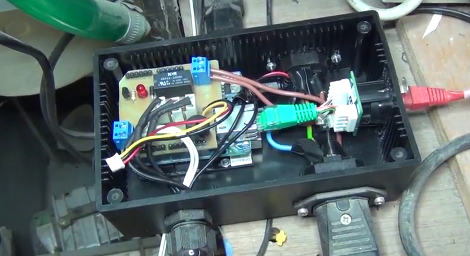
He mounted a photo cell in a project box, along with an Arduino and a 12-button key pad. A laser pointer is aimed at the photo cell from across a gap, which results in a steady voltage being read by the Arduino. When the laser beam is broken, a drop in voltage is detected, and the alarm sounds until you enter the proper pre-configured passcode. Entering the passcode triggers a 15 second grace period during which the the alarm cannot be tripped again.

It might not be built with triple-thick steel doors and thermo-sensors, but it’s a simple device for simple needs. In its current form it could be pretty useful, and with a little reworking, there are a wide range of things it could be used for.

Continue reading to see a demo video of the tripwire alarm, and be sure to check out these other tripwire-based security systems.

Continue reading “Passcode Protected Laser Tripwire Alarm System”

Bench-top Laser Engraver Does Some Cutting Too

Grab that stack of old optical drives you have in the corner and get to work building this laser engraver. [Groover] is taking a no-nonsense approach to the build and we think it is just simple enough to be accessible to a very wide audience.

The physical assembly uses sleds from two optical drives. These are mounted some angle bracket. Since lasers cut at one specific focal length, there is not need for a Z axis (simplifying the build greatly). In fact, we think the hardest part of the assembly is retrieving the laser diode from a DVD-R drive and packaging it for use with this setup.

The electronics are a combination of a couple of consumer products. Two pre-fab motor drivers are used to command the stepper motors on the optical sleds. These receive their commands from an Arduino. A package called GRBL reads in G-code ([Groover] shows how to generate this from Inkscape) and in turn sends commands to the Arduino.

The results are quite remarkable. It can engrave wood with great resolution and contrast. The video after the break even shows it cutting out shapes from construction paper. Now we still want our own full-size laser cutter, but this project is much more fiscally possible for us.

Continue reading “Bench-top Laser Engraver Does Some Cutting Too”