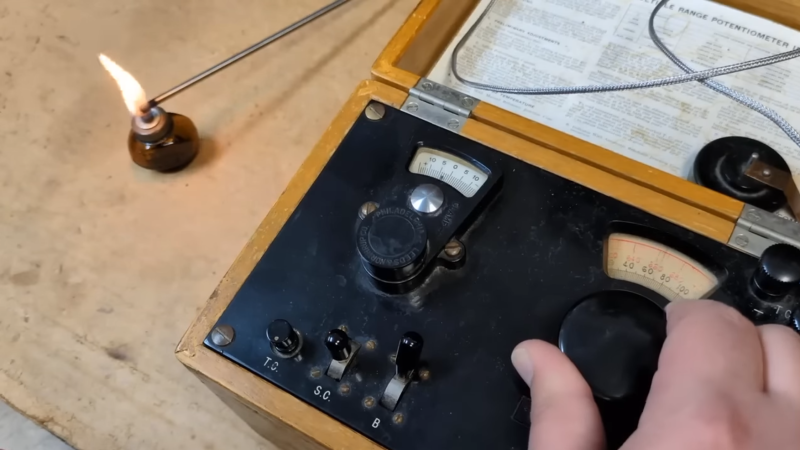
A man's hand is shown adjusting a black Bakelite dial on the front panel of an instrument. The instrument is contained in a wooden box, and to the left of the box, a thermocouple is inserted into the flame of an alcohol burner.

Reading A Thermocouple With Mercury And A Potentiometer

If you’ve ever thought about the nomenclature of electrical components, potentiometer stands out as a strange name, etymologically suggesting something like a voltmeter. In fact, the component took its name from a voltage-measuring instrument also named the potentiometer. [Alnwlsn] recently took a look at one such device, which was integrated into a thermometer, and the Weston cell used to calibrate it.

The potentiometer (instrument) has a galvanometer at its heart. One side of the galvanometer is connected to the center lead of a potentiometer (component) which spans a voltage source; the other side is connected to a reference voltage. The potentiometer can be adjusted until no current flows through the galvanometer, at which point both sides match the reference voltage. The reference voltage source can then be replaced with some other source, which can then be measured relative to the reference by adjusting the potentiometer until both the voltages match. The reference voltage source is a Weston cell, which uses two mercury electrodes, one amalgamated with cadmium, to produce a stable 1.018 volt reference; despite being 74 years old, this particular cell still measured at 1.017 volts.

In this case, the potentiometer was made to measure the voltage produced by a thermocouple. After calibrating the potentiometer and connecting an iron-constantan thermocouple, [Alnwlsn] tested it with ice and boiling water, and in each case it proved accurate. In a more extreme test, it captured the temperature difference between the base and the tip of an alcohol flame.

For a bit more on the history of similar devices, check out the history of Weston Electrical Instruments.

Continue reading “Reading A Thermocouple With Mercury And A Potentiometer”
Laser Fault Injection On The Cheap

One can only imagine the wonders held within the crypto labs of organizations like the CIA or NSA. Therein must be machines of such sophistication that no electronic device could resist their attempts to defeat whatever security is baked into their silicon. Machines such as these no doubt bear price tags that only a no-questions-asked budget could support, making their techniques firmly out of reach of even the most ambitious home gamer.

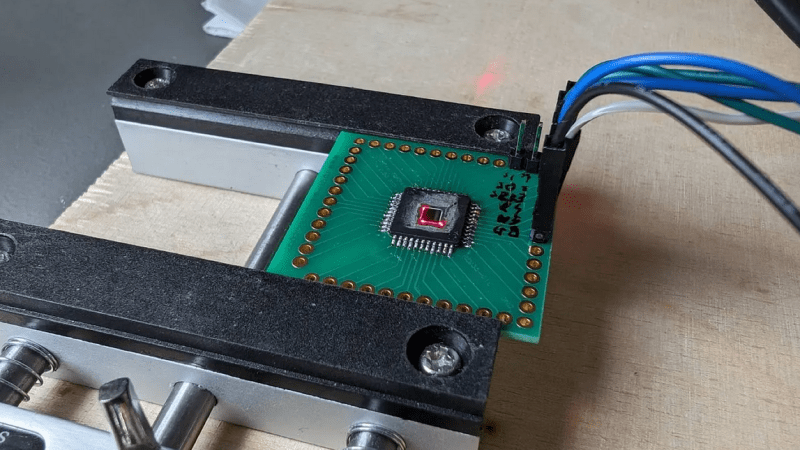
That might be changing, though, with this $500 DIY laser fault injection setup. It comes to us from Finnish cybersecurity group [Fraktal], who have started a series of blog posts detailing how they built their open-source reverse-engineering rig. LFI is similar to other “glitching” attacks we’ve covered before, such as EMP fault injection, except that a laser shining directly on a silicon die is used to disrupt its operation rather than a burst of electromagnetic energy.

Since LFI requires shining the laser very precisely on nanometer-scale elements of a bare silicon die, nanopositioning is the biggest challenge. Rather than moving the device under attack, the [Fraktal] rig uses a modified laser galvanometer to scan an IR laser over the device. The galvo and the optical components are all easily available online, and they’ve started a repo to document the modifications needed and the code to tire everything together.

Of course, this technique requires the die in the device under study to be exposed, but [Fraktal] has made that pretty approachable too. They include instructions for milling away the epoxy from the lead-frame side of a chip, which is safer for the delicate structures etched into the top of the die. The laser can then shine directly through the die from the bottom. For “flip-chip” packages like BGAs, the same milling technique would be done from the top of the package. Either way, we can imagine a small CNC mill making the process safer and quicker, even though they seem to have done pretty well with a Dremel.

This looks like a fantastic reverse engineering tool, and we’re really looking forward to the rest of the story.
Continue reading “Laser Fault Injection On The Cheap”

Portable ESP32 RGB Lasershow Has All The Trimmings

Perhaps there was a time when fancy laser effects were beyond those without the largest of bank accounts, but today they can be created surprisingly easily. [Corebb] shows us how with a neat unit using an off the shelf RGB laser module and mirror module, driven by a ESP32 with software designed to make it as easy as possible to use.

The video below the break is in Chinese so you’ll have to turn on the subtitles if you’re an Anglophone, and it takes us through the whole process. It’s mounted in an SLA 3D printed enclosure which neatly holds all the parts. The ESP32 module drives a couple of DACs which in turn drive the galvanometer motors through a pair of amplifiers.

Then the software allows all sorts of custom displays for your creative expression, including uploading quick sketches over WiFi. Beyond pretty patterns we see it mounted on a bicycle for a head-up display of speed and navigation info. Even if it does fall off and break at one point we can see that could be an extremely useful accessory.

All the code can be found in a GitHub repository should you wish to try for yourself. Meanwhile we’ve covered a lot of laser projector projects here in the past, including most recently this one using stepper motors in place of galvanometers.

Continue reading “Portable ESP32 RGB Lasershow Has All The Trimmings”

Collaborative Effort Gets Laser Galvos Talking G-Code

Everyone should know by now that we love to follow up on projects when they make progress. It’s great to be able to celebrate accomplishments and see how a project has changed over time. But it’s especially great to highlight a project that not only progresses, but also gives back a little to the community.

That’s what we’re seeing with [Les Wright]’s continuing work with a second-hand laser engraver. It was only a few weeks ago that we featured his initial experiments with the eBay find, a powerful CO2 laser originally used for industrial marking applications. It originally looked like [Les] was going to have to settle for a nice teardown and harvesting a few parts, but the eleven-year-old tube and the marking head’s galvanometers actually turned out to be working just fine.

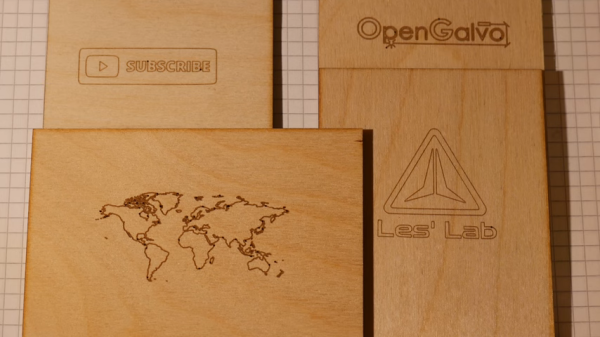
The current work, which is also featured in the video below, mainly concerns those galvos, specifically getting them working with G-code to turn the unit into a bit of an ad hoc laser engraver. Luckily, he stumbled upon the OPAL Open Galvo project on GitHub, which can turn G-code into the XY2-100 protocol used by his laser. While [Les] has nothing but praise for the software side of OPAL, he saw a hardware hole he could fill, and contributed his design for a PCB that hosts the Teensy the code runs on as well as the buffer and line driver needed to run the galvos and laser. The video shows the whole thing in use with simple designs on wood and acrylic, as well as interesting results on glass.

Of course, these were only tests — we’re sure [Les] would address the obvious safety concerns in a more complete engraver. But for now, we’ll just applaud the collaboration shown here and wait for more updates.

Continue reading “Collaborative Effort Gets Laser Galvos Talking G-Code”

Inside An EBay Marking Laser

When it comes to trolling eBay for cool stuff, some people have all the luck. Whereas all we ever seem to come across is counterfeit chips and obviously broken gear listed as, “good condition, powers on”, [Les Wright] actually managed to get more than he bargained for with one of his recent eBay purchases.

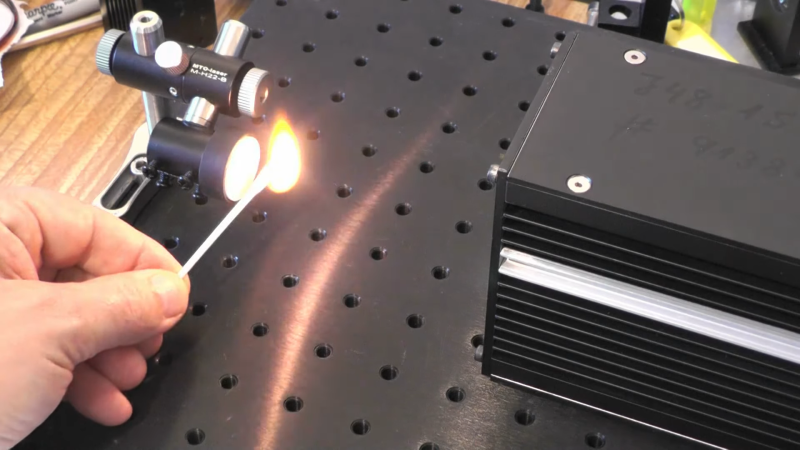
In his video teardown and tour of an industrial marking laser, [Les] suggests that he was really just in it for the optics — which is not a surprise, given his interest in optics in general and lasers in particular. The 20-W CO2 laser once etched barcodes and the like into products on assembly lines, but with a 2009 date code of its own, it was a safe bet that it was pitched due to a burned-out laser tube. But there were still high-quality IR optics and a precision X-Y galvanometer assembly to be harvested, so [Les] pressed on.

The laser itself ended up being built around a Synrad RF-stimulated CO2 tube. By a happy accident, [Les] found that the laser actually still works, at least most of the time. There appears to be an intermittent problem with the RF driver, but the laser works long enough to release the magic smoke from anything combustible that gets in its way. The galvos work too — [Les] was able to drive them with a Teensy and a couple of open-source libraries.

Galvos, lenses worth more than $800, and a working laser tube — not a bad haul. We’ll be following along to see what [Les] makes of this booty. Continue reading “Inside An EBay Marking Laser”

Old Printer Becomes Direct Laser Lithography Machine

What does it take to make your own integrated circuits at home? It’s a question that relatively few intrepid hackers have tried to answer, and the answer is usually something along the lines of “a lot of second-hand equipment.” But it doesn’t all have to be cast-offs from a semiconductor fab, as [Zachary Tong] shows us with his homebrew direct laser lithography setup.

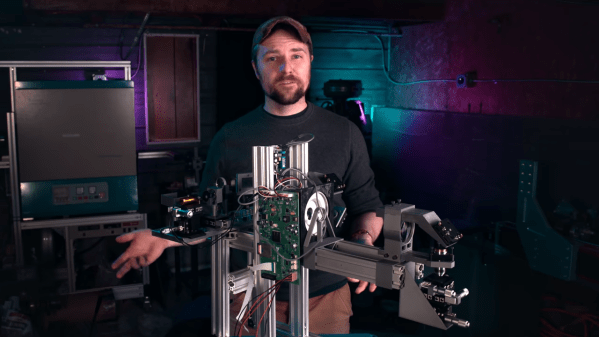
Most of us are familiar with masked photolithography thanks to the age-old process of making PCBs using photoresist — a copper-clad board is treated with a photopolymer, a mask containing the traces to be etched is applied, and the board is exposed to UV light, which selectively hardens the resist layer before etching. [Zach] explores a variation on that theme — maskless photolithography — as well as scaling it down considerably with this rig. An optical bench focuses and directs a UV laser into a galvanometer that was salvaged from an old laser printer. The galvo controls the position of the collimated laser beam very precisely before focusing it on a microscope that greatly narrows its field. The laser dances over the surface of a silicon wafer covered with photoresist, where it etches away the resist, making the silicon ready for etching and further processing.

Being made as it is from salvaged components, aluminum extrusion, and 3D-printed parts, [Zach]’s setup is far from optimal. But he was able to get some pretty impressive results, with features down to 7 microns. There’s plenty of room for optimization, of course, including better galvanometers and a less ad hoc optical setup, but we’re keen to see where this goes. [Zach] says one of his goals is homebrew microelectromechanical systems (MEMS), so we’re looking forward to that.

Continue reading “Old Printer Becomes Direct Laser Lithography Machine”

Detect Lightning Strikes With An Arduino

Lightning is a powerful and seemingly mysterious force of nature, capable of releasing huge amounts of energy over relatively short times and striking almost at random. Lightning obeys the laws of physics just like anything else, though, and with a little bit of technology some of its mysteries can be unraveled. For one, it only takes a small radio receiver to detect lightning strikes, and [mircemk] shows us exactly how to do that.

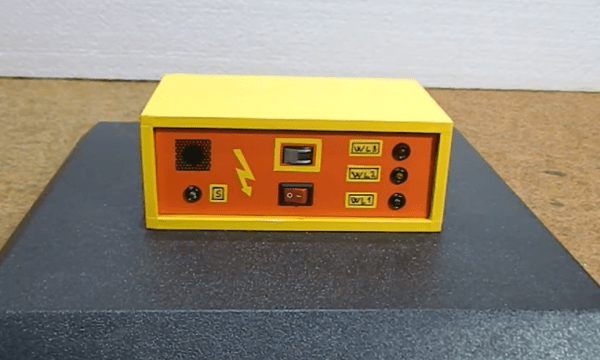
When lightning flashes, it also lights up an incredibly wide spectrum of radio spectrum as well. This build uses an AM radio built into a small integrated circuit to detect some of those radio waves. An Arduino Nano receives the signal from the TA7642 IC and lights up a series of LEDs as it detects strikes in closer and closer proximity to the detector. A white LED flashes when a strike is detected, and some analog circuitry supports an analog galvanometer which moves during lightning strikes as well.

While this project isn’t the first lightning detector we’ve ever seen, it does have significantly more sensitivity than most other homemade offerings. Something like this would be a helpful tool to have for lifeguards at a pool or for a work crew that is often outside, but we also think it’s pretty cool just to have around for its own sake, and three of them networked together would make triangulation of strikes possible too.

Continue reading “Detect Lightning Strikes With An Arduino”