RGB image from the projector, with human for scale.

RGB Laser Projector Does Colorful Asteroids And Much More

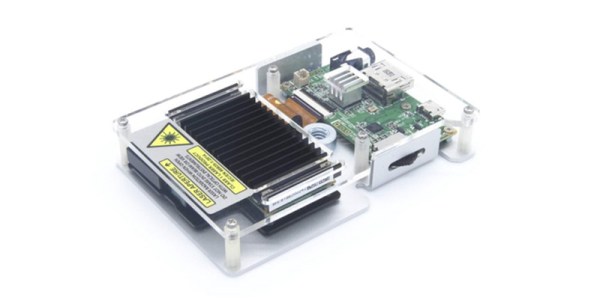
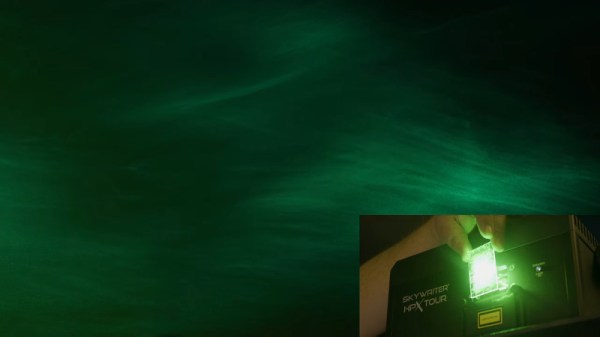
Have you thought about building a galvonometer-based laser projector, but don’t know where to start? There are a lot of resources out there, but you could do worse than to check out [Breq] and [Mia]’s laser vector project, which provides a very well-documented and low-cost starting point. They boast that the most expensive part of the project was the ANSI-certified safety glasses, which shows a dedication to safety we wish more people would show when playing with coherent light.

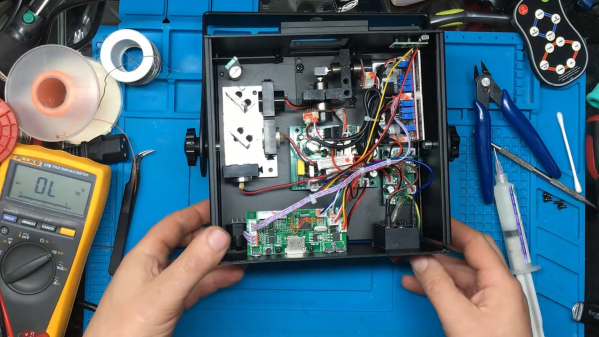
The rest of the parts — from the galvos to the RGB lasers module with dichoric mirrors to keep everything on the same beamline, to the ESP32 module driving everything — was ordered from AliExpress, and not from the most expensive vendors, either. Considering that, it works remarkably well.

If you’re not playing Asteroids on your vector display, why even bother?

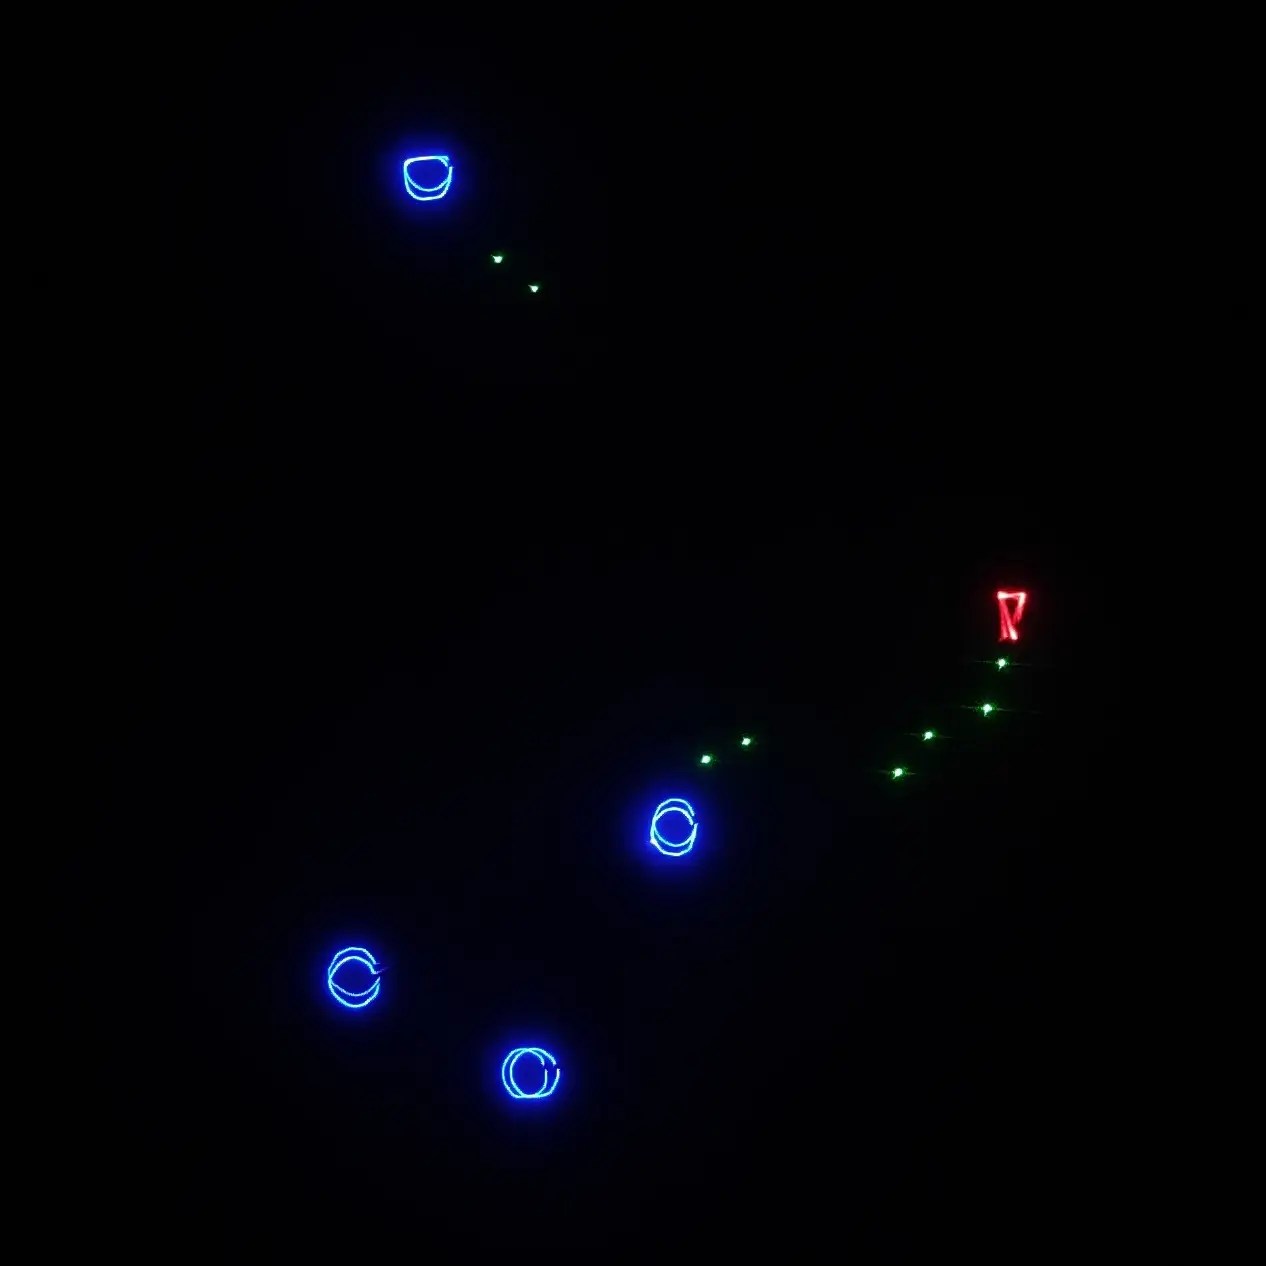
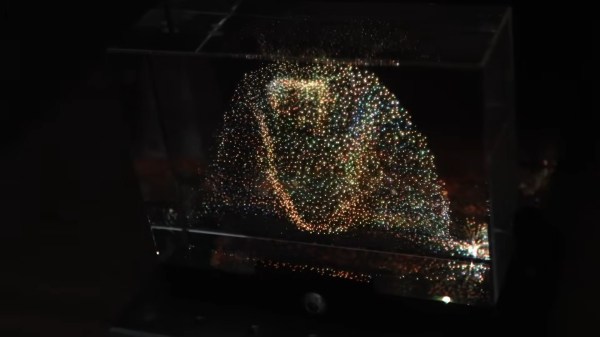
Like all DIY laser projectors, this one does vector graphics, sweeping the beam fast enough that the human eye registers crisp, clean lines. Galvonometers, or galvos for short, take analog input, so a DAC is needed — fortunately the ESP32-S2 comes with a pair built in. The custom PCB of course has audio-in for the usual Lissajous lightshow or oscilloscope music, but with an ESP32 as the brains, you can do a lot just inside the projector.

Like what? Well, play Asteroids, for instance, using Wiimote controllers. Project a lovely clock. Render text input in various single-stroke fonts. More to the point, since this is a projector, take arbitrary SVG data and project literally any image you’d like — as long as it doesn’t have too many lines, at least. The galvos in this project are rated at 20,000 points per second, which is not exceedingly fast: they were chosen to meet the budget, not the greatest-possible speed.

More to the point is that this is one of the better-documented projects of this type we’ve seen. [Breq] doesn’t just tell us how to build the projector, but why they designed it that way. We really encourage you to give it a read if you’ve been thinking of getting into this sort of display.

We’ve seen plenty of laser projectors before, most of them producing vector images like this one. If you really must have a raster display, though, that’s also an option. Don’t count out vector images, though — they could even replace your Christmas lights.

Thanks to [CapinRedBeard] for the tip! Remember to send any bright ideas you see to our tips line, coherently lit or no.

Mist, Mirrors, Laser : Multi-view 3D Projection

“Lights, camera, action!” might have been the call when recording back in the day, but for an awesome three-dimensional viewing experience, you might try yelling “Mist, Mirrors, Laser!” and following in the footsteps of [Ancient]’s latest adventure in voxel displays, which is also embedded below.

He starts with a naive demonstration: take a laser projector and toss an image into a flat cloud of mist. That demonstrates that yes, the mist does resolve an image, and that the viewing angle is very poor– that is, brightness drops off sharply when you’re out of line from the projector. In this case, that’s a good thing! It means more angles can be projected into that mist for a three-dimensional, hologram effect.

Continue reading “Mist, Mirrors, Laser : Multi-view 3D Projection”

King Tut, with less resolution than he's had since Deluxe Paint

Volumetric Display With Lasers And Bubbly Glass

There’s a type of dust-collector that’s been popular since the 1990s, where a cube of acrylic or glass is laser-etched in a three-dimensional pattern. Some people call them bubblegrams. While it could be argued that bubblegrams are a sort of 3D display, they’re more like a photograph than a TV. [Ancient] had the brainwave that since these objects work by scattering light, he could use them as a proper 3D video display by controlling the light scattered from an appropriately-designed bubblegram.

Appropriately designed, in this case, means a point cloud, which is not exactly exciting to look at on its own. It’s when [Ancient] adds the colour laser scanning projector that things get exciting. Well, after some very careful alignment. We imagine if this was to go on to become more than a demonstrator some sort of machine-vision auto-aligning would be desirable, but [Ancient] is able to conquer three-dimensional keystoning manually for this demonstration. Considering he is, in effect, projection-mapping onto the tiny bubbles in the crystal, that’s impressive work. Check out the video embedded below.

With only around 38,000 points, the resolution isn’t exactly high-def, but it is enough for a very impressive proof-of-concept. It’s also not nearly as creepy as the Selectric-inspired mouth-ball that was the last [Ancient] project we featured. It’s also a lot less likely to take your fingers off than the POV-based volumetric display [Ancient] was playing DOOM on a while back.

For the record, this one runs the same DOOM port, too– it’s using the same basic code as [Ancient]’s other displays, which you can find on GitHub under an MIT license.

Thanks to [Hari Wiguna] for the tip.

Continue reading “Volumetric Display With Lasers And Bubbly Glass”

Custom built RGB laser firing beam

Lasers, Galvos, Action: A Quest For Laser Mastery

If you’re into hacking hardware and bending light to your will, [Shoaib Mustafa]’s latest project is bound to spike your curiosity. Combining lasers to project multi-colored beams onto a screen is ambitious enough, but doing it with a galvanomirror, STM32 microcontroller, and mostly scratch-built components? That’s next-level tinkering. This project isn’t just a feast for the eyes—it’s a adventure of control algorithms, hardware hacks, and the occasional ‘oops, that didn’t work.’ You can follow [Shoaib]’s build log and join the journey here.

The nitty-gritty is where it gets fascinating. Shoaib digs into STM32 Timers, explaining how modes like Timer, Counter, and PWM are leveraged for precise control. From adjusting laser intensity to syncing galvos for projection, every component is tuned for maximum flexibility. Need lasers aligned? Enter spectrometry and optical diffusers for precision wavelength management. Want real-time tweaks? A Python-controlled GUI handles the instruments while keeping the setup minimalist. This isn’t just a DIY build—it’s a work of art in problem-solving, with successes like a working simulation and implemented algorithms along the way.

If laser projection or STM32 wizardry excites you, this build will inspire. We featured a similar project by [Ben] back in September, and if you dig deep into our archives, you can eat your heart out on decades of laser projector projects. Explore Shoaib’s complete log on Hackaday.io. It is—literally—hacking at its most brilliant.

An RGB laser projector opened up on a workbench

Laser Projector Needs Hardware Hack After Software Mod

You probably recognize that dreadful feeling when you reboot a gadget after updating its firmware, only to be greeted by a blank screen and an unresponsive device. This apparently happened to the previous owner of a bricked RGB laser projector that [Buy It Fix It] got his hands on: it briefly flashed its laser on power-up but otherwise remained completely dead.

A thorough inspection of the major components didn’t reveal any physical damage, so the issue had to be in software. [Buy It Fix It] managed to connect his Segger J-link programmer to the STM32 main processor and downloaded the contents of its firmware, only to find the remains of a PDF file which seemed to have been accidentally flashed into the chip’s program space. Fixing the device should then just be a matter of restoring the proper firmware, but [Buy It Fix It] wasn’t able to find a copy of it anywhere.

A PCB with a few mod wires on itWhat he did find was Maximus64’s GitHub repository that contained a software mod for a different projector model, as well as its original firmware. Flashing that version didn’t fix [Buy It Fix It]’s projector either, although it did now start to actuate its galvos.

A bit of reverse engineering revealed that the two projectors were very similar from a hardware point of view, but had their laser drivers hooked up to different I/O pins: simply cutting the board traces and soldering some wires to re-route the signals was enough to bring the projector back into a working state.

Having to modify hardware in order to make it fit a piece of software is unfortunate, but sometimes you just have to make do with what you’ve got. If you’ve got no firmware to begin with, then you might even have to write your own from scratch.

Continue reading “Laser Projector Needs Hardware Hack After Software Mod”

A Petite Pico Projector For Portable Pi

A few years ago, new, innovative pico projectors, influenced by one of the TI development kits, started appearing in Kickstarter projects and other various DIY endeavours. Those projects fizzled out, most likely due to the cost of the projectors, but we got a few laughs out of it: that wearable smartphone that projected a screen onto your wrist used the same technology.

But there’s a need for a small projector, a pico projector, or in this case a femto projector. It’s the Nebra Anybeam, and it’s a small projector that uses lasers, and it comes in the form of a Raspberry Pi hat. We would like to congratulate the team for shipping the ideal use case of their product first.

The key features of this pico projector address the shortcomings of existing projectors that can fit in your pocket. This uses a laser, and there’s no bulb, and the power consumption can be as low as 3 Watts. Power is provided over a micro USB cable. The resolution of this projector is 720p, which is sufficient for a quick setup for watching a movie, but the brightness is listed as equivalent to 150 ANSI lumens, about the same as small projectors from a few years ago.

But of course the big selling point isn’t the brightness or resolution, it’s all about the smallness of the projector itself. There is a developer’s kit, a Pi Hat, a fit-in-your-pocket version with an enclosure, and a ‘monster ball’ version of the Anybeam.

Experiment With Lumia, The Cheap And Easy Way

Light is a wonderful medium for art, and there’s all manner of ways to approach it. We’ve always been huge fans of all that blinks and glows, but there’s a whole wide world of other methods and techniques in the lighting arena. Lumia is one that does not always get a lot of mainstream attention, and so [Adam Raugh] has created this video, sharing both the history of the effect, and various ways to create it yourself. 

Lumia was once used to refer to a broad swathe of artistic lighting, but these days, more commonly refers to effects that create an aurora-like appearance, as one would see near the poles of our fine Earth. [Adam] first covers the history of the effect, as pioneered by Thomas Wilfred with the Clavilux in the early part of the 20th Century.

The video then covers the basics of creating lumia effects using DIY methods. The key is to combine slow rotation with an organically deformed refractive medium. [Adam]’s rig of choice is a basic laser projector, rotating at just 1/3 of a rotation per minute. This is then combined with a variety of homebrewed refractive media – torture tubes made from glass, acrylic sheets coated with muddled epoxy, and even a crumpled water bottle.

It’s an excellent primer on how to get started with lumia, and [Adam] covers a wide variety of tips and tricks as well as potential pitfalls to avoid.

We see plenty of great lighting projects around these parts – check out the Kinetic Chandelier. Video after the break.

Continue reading “Experiment With Lumia, The Cheap And Easy Way”