Every day this month and until Christmas, [vk2zay] is (has already been!) posting a simple but useful hack in his 2nd sort-of-annual “Advent Calender of Circuits” that many of you will want to be bookmarking. For those already saturated with the season of holiday hacks, don’t worry – other than being festively generous of him to tutor and demo a new hack every day, the hacks themselves have nothing to do with Christmas. Though he missed the last couple years we here at Hackaday covered his first month of hacks back in 2011 (now in playlist).
The daily hacks posted so far cover a wide variety of useful projects (leaning towards HV) for the electronics hobbyist who might not have all the fancy tools in their shop: DIY high voltage probes, a 1-hour tesla coil from junk, measuring RF power, a stud detector, how to test an unknown transformer’s saturation, and many others. We cannot predict what will be posted the rest of the calender (the author hints to be making them up as he goes), but by now it is safe to say that they will not disappoint.
We would be stealing his thunder to cover them all, so, we will just pick our favorite for now:
The 1-hour tesla coil is a delightful all-shortcuts-taken hack project. If one were to listen to aficionados, teslacoiling is a highly precise hobby to get into. It appears to require careful planning, much calculation, special-ordered or soviet-surplus parts, custom jigs, fine tuning, etc. [vk2zay] shows otherwise.
Every single component of the assembly is itself a hack.
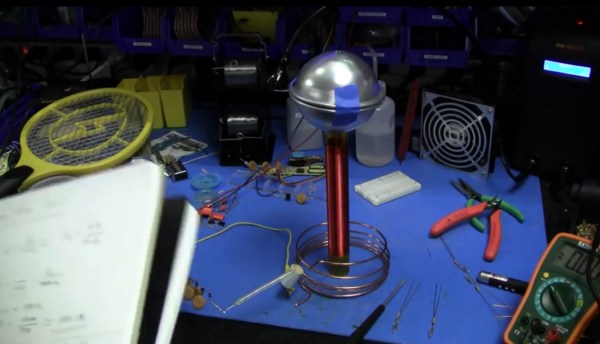
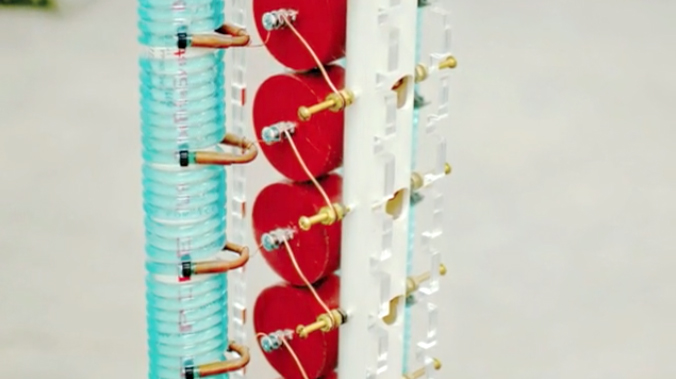
No fancy tungsten-infused grade 8 copper being water-cooled via heat pump here – the spark gap is just the bent leg of a capacitor hovering near the start of the primary winding. The power supply is a backlight inverter with a chain of Cockcroft-Walton voltage doublers. The high voltage resistor is a bunch of series-chained resistors shoved into a silicone tube. The topload is a couple cheap pie tins masking-taped together to “resemble something like a sphere.” The primary is a loose, unsupported spring of copper wire. The secondary was calculated to be whatever the height of the tube he had handy and coiled only as smoothly as a first attempt would allow. He does not even bother using wires or a switch – the circuit is completed by clipping a couple of test leads.
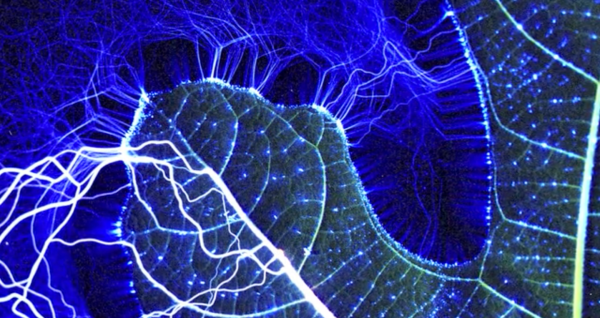
After all this hodgepodgery the circuit was then carefully tuned to optimize how little time it took to build (additional time used: zero). Since the frequencies do not match (1.7 vs. 2.6 mhz – 35% apart) the only thing this circuit resonates with is a hacker’s appeal for making do. Does not matter, still works. The streamers easily reach 2 inches and the author claims double that in dark lighting.
In the just 6 minute video he also manages to explain roughly what is going on theory-wise and suggest the time-effective things to considering upgrading. Almost a dozen hacks in the bag and over a dozen more to come before Christmas.
Continue reading “2014 Advent Calender Of Circuits” →


 A high school
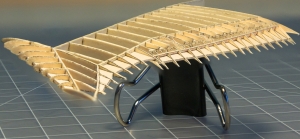
  The design is manually drawn in Illustrator from the schematics, then is printed directly onto the manilla folders. Wielding an X-acto knife like a watch-maker, [Luca] cuts all the segments out and places them with whispers of glue. Pistons. Axles. Clamps. Tie rods. Brackets. Even pneumatic hoses – fractions of a toothpick thin – are run to their proper locations. A mesh behind the engine was latticed manually from of hundreds of strands. If that was not enough, it all moves and works exactly as it does on the real thing.