DIY Vaporizer

Here’s a DIY vaporizer build. It uses a 30 watt Radio Shack soldering iron as a heat source that is regulated with a common dimmer switch. This is done by removing the soldering tip and replacing it with threaded rod attached to a brass pipe fitting assembly. This is housed inside of a Mason jar with a copper pipe for air intake and another for output. Not surprisingly the creator tipped us off anonymously, saying that this a “smoking accessory”. A bit of searching and we came across this Wikipedia article about a Volcano Vaporizer which sheds light on what one is used for.

We don’t condone using illicit substances. But even more so, we’re skeptical about breathing through this thing because of the warning that [Anon] included about noxious vapors put off by the epoxy putty when it heats up. Still, it’s an interesting build so we though we’d share.

Carbon Fiber Part Fabrication Guide

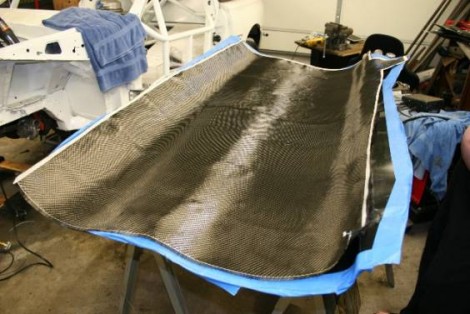
If you’re thinking of working with carbon fiber this guide should be a big help. The example is aimed at the automotive crowd but the principles transfer quite easily. Carbon fiber parts are constructed in a similar manner as fiberglass parts. A mold is covered in a release agent, the fibers are put in place and covered in epoxy. With fiberglass the fibers are often sprayed on but carbon fiber components use woven mats of the material to build up multiple layers. Vacuum bags are used to hold the layers together, removing air and impregnating the fibers with the epoxy. This guide even outlines the construction of a vacuum pump needed for that step.

The benefits of carbon fiber are many, including strength and weight reduction. This makes it a great material for adding parts to weight-sensitive hacks such as quadcopters. But the mesh also has an interesting look which is why it shows up in custom electronics cases. The one real drawback is that when this material fails it is a catastrophic failure, tending to crumble across the entire structure rather than limiting damage to a small area. That means that a rough landing might be the end of your new parts.

[Thanks MS3FGX]

Build A Confetti Cannon For Your Next Party

[Scott] built a confetti canon to spice up the party. It’s pneumatic and re-purposes a fire extinguisher as the air tank. He had a refillable extinguisher that used water instead of chemical retardant. After emptying the water and ensuring all of the pressure had been release he swapped the hose and nozzle for a sprinkler solenoid valve. Securing the extinguisher’s actuator lever with a pipe clamp holds the internal valve open, leaving the solenoid to control the pressure release. This way the canon can be fired electronically, or manually.

This type of solenoid valve is a popular choice with pneumatic canons. We suppose you could even adapt this for use as a T-shirt cannon.

[Thanks BoBeR182]

AI Via Super Mario Evolution

Can Super Mario teach you to think? That’s the idea behind using a simple version of the game to teach artificial intelligence. [Oddball] calls this The Mario Genome and wrote at program that can take on the level with just two controls, right and jump. He gave the script 1000 Marios to run through the level. It then eliminates the 500 least successful and procreates back to 1000 using the 500 most successful. In this way the program completed the level in 1935 generations and completed it in the quickest possible time in 7705 generations. He’s posted the script for download so that you can try it yourself. It’s an interesting exercise we’d love to see applied to more random games, like Ms. Pac-Man.

[via Reddit]

Making Point Contact Transistors

[youtube=http://www.youtube.com/watch?v=vmotkjMSKnI&w=470]

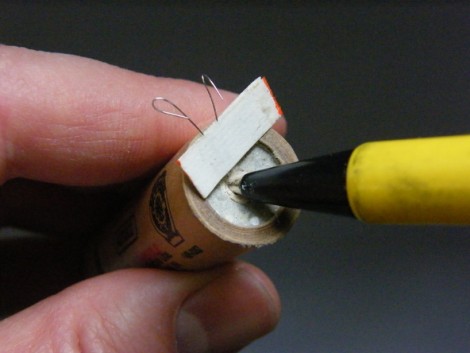
[Jeri Ellsworth] is back at it again. We seem to cover her work a lot here. Her latest video above covers how she created a point contact transistor from a 1N34 germanium cat whisker diode. After opening the glass casing on the diode, she uses sharpened phosphor bronze metal from common electrical connectors as the collector and emitter. A 330 microfarad capacitor charged to 20 volts and then discharged though a 680 ohm resistor to the base and collector leads forms the collector region. Her test jig is a simple oscillator circuit such that a properly formed transistor will start the circuit oscillating and make and audible sound. We look forward to more esoteric knowledge of electronic devices being brought to our attention.

Large Magnets Spark On Halloween, Who Knew?

This overly large magnet certainly completes the mad scientist look (for an even crazier look, take a jar of water with red food coloring and place in one large cauliflower, instant brain in a jar).

The base of the magnet is painted foam cut with a makeshift hot-knife; to get the magnet sparking [Macegr] laser etched acrylic with a fractal pattern and embedded LEDs in the ends of the acrylic. An Arduino handles the flashing LEDs and also produces a 60Hz PWM pulse for the spark’s hum. The end result is satisfyingly mad, and while practicing your evil ominous laugh catch a video of the magnet after the jump.

Continue reading “Large Magnets Spark On Halloween, Who Knew?”

Beginner Concepts: Electronics Basics From The Giz

Gizmodo University is open for business. This free educational series aims to educate about the basics of electronic theory. No prerequisite knowledge needed and they’re starting from the ground level. First lesson? Resistors! From there they’ve posted about voltage dividers, series/parallel circuits, Ohm’s law, and how to calculate a resistor value for an LED.

This is a great way to get the base knowledge that you need to start hacking like an EE. These are concepts that we assume you have already mastered if you’re following along with our AVR Programming series. We’re hard at work on part three but that’s still a little ways off. You’ve got time to do a review a GizU and reread our favorite book on electronic theory.