Fans of the AMC show Breaking Bad will remember the Original Gangsta [Hector Salamanca]. When first introduced to the story he communicates by ringing a bell. But after being moved to a nursing home he communicates by spelling out messages with the assistance of a nurse who holds up a card with columns and rows of letters. This hack automates that task, trading the human assistant for a blink-based input system.
[Bob Stone] calls the project BlinkTalk. The user wears a Neurosky Mindwave Mobile headset. This measures brainwaves using EEG. He connects the headset to an mBed microcontroller using a BlueSMiRF Bluetooth board. The microcontroller processes the EEG data to establish when the user blinks their eyes.
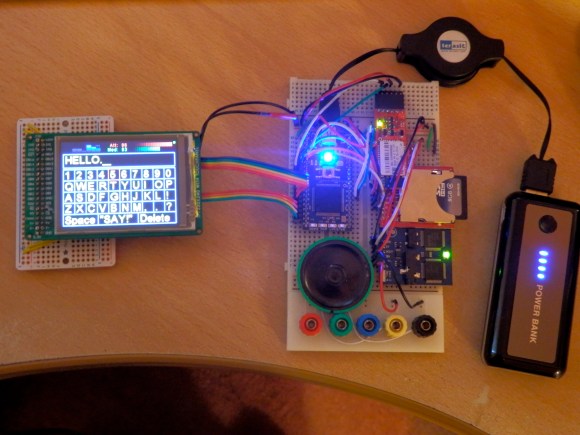
The LCD screen first scrolls down each row of the displayed letters and numbers. When the appropriate row is highlighted a blink will start scrolling through the columns until a second blink selects the appropriate character. Once the message has been spelled out the “SAY!” menu item causes the Emic2 module to turn the text into speech.
If you think you could build something like this to help the disabled, you should check out thecontrollerproject.com where builders are connected with people in need.