Spy Transceiver Makes Two Tubes Do The Work Of Five

Here at Hackaday, we love following along with projects as they progress. That’s especially true when a project makes a considerable leap in terms of functionality from one version to another, or when the original design gets more elegant. And when you get both improved function and decreased complexity at the same time? That’s the good stuff.

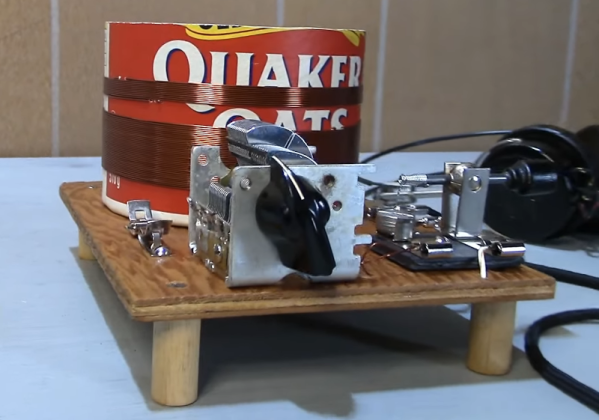
Take the recent improvements to a vacuum tube “spy radio” as an example. Previously, [Helge (LA6NCA)] built both a two-tube transmitter and a three-tube receiver, either of which would fit in the palm of your hand. A little higher math seems to indicate that combining these two circuits into a transceiver would require five tubes, but that’s not how hams like [Helge] roll. His 80-m CW-only transceiver design uses only two tubes and a lot of tricks, which we admit we’re still wrapping our heads around. On the receive side, one tube serves as a mixer/oscillator, combining the received signal with a slightly offset crystal-controlled signal to provide the needed beat frequency. The second tube serves as the amplifier, both for the RF signal when transmitting, and for audio when receiving.

The really clever part of this build is that [Helge] somehow stuffed four separate relays into the tiny Altoids tin chassis. Three of them are used to switch between receive and transmit, while the fourth is set up as a simple electromagnetic buzzer. This provides the sidetone needed to effectively transmit Morse code, and is about the simplest way we’ve ever seen to address that need. Also impressive is how [Helge] went from a relatively expansive breadboard prototype to a much more compact final design, and how the solder was barely cooled before he managed to make a contact over 200 km. The video below has all the details.

Continue reading “Spy Transceiver Makes Two Tubes Do The Work Of Five”

Cornering The Antenna Market

Sometimes antennas can seem like black magic. However, when you see things like a dish antenna, it sort of makes sense, right? Just like a mirror focuses light, the parabola of a dish focuses RF energy. But [IMSAI Guy] shows another common-sense antenna arrangement: a corner reflector dipole. He had built one years ago and decided to do a bit of research and make another one.

In a clever use of copper-clad board, he was able to make a reasonable reflector by soldering together three boards and an RF connector. A single wire makes the “driven element,” and by bending it to just the right position, you can change the characteristic impedance for matching.

The antenna, in this case, is essentially a quarter-wave antenna with a ground plane and reflector arrangement. After the obligatory chalk talk, he breaks out the vector network analyzer and shows how well it matches. He didn’t, however, measure the gain or directional selectivity due to the reflector.

Intuitively, you’d think this kind of antenna would be good for direction finding purposes. In fact, hams that use handy talkies for direction finding often use their bodies to block signals, much like these reflectors should.

The [IMSAI Guy] reflector is pretty small, but you can easily make bigger ones. Using PCB material for antennas isn’t anything new, either, but we still enjoyed this simple corner reflector build.

Continue reading “Cornering The Antenna Market”

The Peak Of Vacuum Tube Radio Design

One of the more popular trends in the ham radio community right now is operating away from the shack. Parks on the Air (POTA) is an excellent way to take a mobile radio off-grid and operate in the beauty of nature, but for those who want to take their rig to more extreme locations there’s another operating award program called Summits on the Air (SOTA) that requires the radio operator to set up a station on a mountaintop instead. This often requires lightweight, low-power radios to keep weight down for the hike, and [Dan] aka [AI6XG] has created a radio from scratch to do just that.

[Dan] is also a vacuum tube and CW (continuous wave/Morse code) operator on top of his interest in summiting various mountains, so this build incorporates all of his interests. Most vacuum tubes take a lot of energy to operate, but he dug up a circuit from 1967 that uses a single tube which can operate from a 12 volt battery instead of needing mains power, thanks to some help from a more modern switch-mode power supply (SMPS). The SMPS took a bit of research, though, in order to find one that wouldn’t interfere with the radio’s operation. That plus a few other modern tweaks like a QCX interface and a switch to toggle between receive to transmit easily allows this radio to be quite versatile when operating while maintaining its portability and durability when summiting.

For those looking to replicate a tube-based radio like this one, [Dan] has made all of the schematics available on his GitHub page. The only other limitation to keep in mind with a build like this is that it tends to only work on a very narrow range of frequencies without adding further complexity to the design, in this case within the CW portion of the 40-meter band. But that’s not really a bad thing as most radios with these design principles tend to work this way. For some other examples, take a look at these antique QRP radios for operating using an absolute minimum of power.

Exploring The Early Days Of QRP Radio

Morse code might seem obsolete but for situations with extremely limited bandwidth it’s often still the best communications option available. The code requires a fair amount of training to use effectively, though, and even proficient radio operators tend to send only around 20 words per minute. As a result of the reduced throughput, a type of language evolved around Morse code which, like any language, has evolved and changed over time. QRP initially meant something akin to “you are overloading my receiver, please reduce transmitter power” but now means “operating radios at extremely low power levels”. [MIKROWAVE1] explores some of the earlier options for QRP radios in this video.

There’s been some debate in the amateur radio community over the years over what power level constitutes a QRP operation, but it’s almost certainly somewhere below 100 watts, and while the radios in this video have varying power levels, they tend to be far below this upper threshold, with some operating on 1 watt or less. There are a few commercial offerings demonstrated here, produced from the 70s to the mid-80s, but a few are made from kits as well. Kits tended to be both accessible and easily repairable, with Heathkit being the more recognizable option among this category. To operate Morse code (or “continuous wave” as hams would call it) only requires a single transistor which is why kits were so popular, but there are a few other examples in this video with quite a few more transistors than that. In fact, there are all kinds of radios featured here with plenty of features we might even consider modern by today’s standards; at least when Morse code is concerned.

QRP radios in general are attractive because they tend to be smaller, simpler, and more affordable. Making QRP contacts over great distances also increases one’s ham radio street cred, especially when using Morse, although this benefit is more intangible. There’s a large trend going on in the radio world right now surrounding operating from parks and mountain peaks, which means QRP is often the only way to get that done especially when operating on battery power. Modern QRP radios often support digital and voice modes as well and can have surprisingly high prices, but taking some cues from this video about radios built in decades past could get you on the radio for a minimum or parts and cost, provided you can put in the time.

Continue reading “Exploring The Early Days Of QRP Radio”

LoRa Goes To The Moon

LoRa is a communications method that allows for long range radio contacts to be made using typically low-powered devices. This shouldn’t be surprising given that LoRa is short for “long range” which typically involves distances on the order of a few kilometers. However, a group of students are taking the “long range” moniker to the extreme by attempting to send and receive a signal with a total path of around 768,000 kilometers by using some specialized equipment to bounce a LoRa signal off of the moon and receive it back on Earth.

Earth-Moon-Earth (EME) communications are typically done by amateur radio operators as a hobby, since the development of communications satellites largely rendered other uses of this communication pathway obsolete. A directional antenna and a signal typically on the order of 1 kW are often used to compensate for the extremely high path losses. Using LoRa, which makes use of chirp spread spectrum modulation, they hope to reduce this power requirement significantly. The signals are being generated and received on a set of HackRF One devices fed into a series of amplifiers, and the team is also employing a set of large dish antennas, one in New Jersey and another in Alaska, to send and receive the messages.

The software used is the open-source SDRAngel which is useful for controlling the HackRF and moving the LoRa signal up to 1296 MHz. Normally LoRa is operated on an unlicensed band, but this method allows for finer control of not only frequency but also bandwidth, which helps reduce the impacts of path loss. Right now they have not yet completed their contacts with the Alaska station (partially due to that antenna being covered in snow) but we hope to hear more news in the future. In the meantime, take a look at some more traditional long-range communications using this protocol with more manageable-sized antennas.

Image courtesy of NASA, Public domain, via Wikimedia Commons

Don’t Let The Baluns Float Over Your Head

Most ham radio operators will build an antenna of some sort when they first start listening or transmitting, whether it’s a simple dipole, a beam antenna like a Yagi, or even just a random wire vertical antenna. All of these will need to be connected feedline of some sort, and in the likely event you reach for some 50-ohm coax cable you’ll also need a balun to reduce noise or unwanted radiation. Don’t be afraid of extra expenses when getting into this hobby, though, as [W6NBC] demonstrates how to construct an “ugly balun” out of the coax wire itself (PDF).

The main purpose of a balun, a contraction of “balanced-unbalanced” is to convert an unbalanced transmission line to a balanced one. However, as [W6NBC] explains, this explanation obscures much of what baluns are actually doing. In reality, they take a three-wire system (the coax) and convert it to a two-wire system (the antenna), which keeps all of the electrical noise and current on the shield wire of the coax from interfering with the desirable RF on the interior of the coax.

This might seem somewhat confusing on the surface, as coax wires only have a center conductor and a shield wire, but thanks to the skin effect which drives currents to the outside of the conductor, the shield wire effectively becomes two conductors when taking into account its inner and outer surfaces. At these high frequencies the balun is acting as a choke which keeps these two high-frequency conductors separate from one another, and keeps all the noise on the outside of the shield wire and out of the transmitter or receiver.

Granted, the world of high-frequency radio circuits can get quite complex and counter-intuitive and, as we’ve shown before, can behave quite unexpectedly when compared to DC or even mains-frequency AC. But a proper understanding of baluns and other types of transformers and the ways they interact with RF can be a powerful tool to have. We’eve even seen other hams use specialty transformers like these to make antennas out of random lengths and shapes of wire.

Continue reading “Don’t Let The Baluns Float Over Your Head”

Building A Receiver With The ProgRock2 Programmable Crystal

Crystals are key to a lot of radio designs. They act as a stable frequency source and ensure you’re listening to (or transmitting on) exactly the right bit of the radio spectrum. [Q26] decided to use the ProgRock2 “programmable crystal” to build a receiver that could tune multiple frequencies without the usual traditional tuning circuitry. 

 The ProgRock2 is designed as a tiny PCB that can be dropped into a circuit to replace a traditional crystal. The oscillators onboard are programmable from 3.5KHz to 200 MHz, and can be GPS discliplined for accuracy. It’s programmable over a micro USB pot, and can be set to output 24 different frequencies, in eight banks of three. When a bank is selected, the three frequencies will be output on the Clock0, Clock1, and Clock2 pins.There was some confusion regarding the bank selection on the ProgRock2. It’s done by binary, with eight banks selected by grounding the BANK0, BANK1, and BANK2 pins. For example, grounding BANK2 and BANK0 would activate bank 5 (as 101 in binary equals 5). Once this was figured out, [Q26] was on top of things.

In his design, [Q26] hooked up the ProgRock2 into his receiver in place of the regular crystal. Frequency selection is performed by flipping three switches to select banks 0 to 7. It’s an easy way to flip between different frequencies accurately, and is of particular use for situations where you might only listen on a limited selection of amateur channels.

For precision use, we can definitely see the value of a “programmable crystal” oscillator like this. We’ve looked at the fate of some major crystal manufacturers before, too. Video after the break.

Continue reading “Building A Receiver With The ProgRock2 Programmable Crystal”