Bringing Chromium To The Raspberry Pi

If you’re in possession of a Raspberry Pi, you may want to check out the new Chromium support for your tiny pocketable computer. With its terrifically minimal hardware requirements, the Chromium OS seems like just the thing for this $35 computer.

The new Raspberry Pi supported Chromium build comes from the fruitful desktop of [Hexxeh], a.k.a. [Liam McLaughlin]. In the world of Chromium devs, [Hexxeh] has already made a name for himself by getting Chromium working on a Macbook Air, putting it in a VirtualBox, and generally being the resident wizard of the Chromium project

The Chromium OS should provide a much faster computing experience for the Raspi compared to the current Debian and Arch Linux-based builds.   Right now, the Chromium support for the Raspberry Pi is very much a work in progress but a slimmed-down, browser-only operating system may be just what the underpowered but useful 700 MHz ARM computer with 256 MB of RAM needs.

Turning A Raspberry Pi Into A Laptop With A LapDock

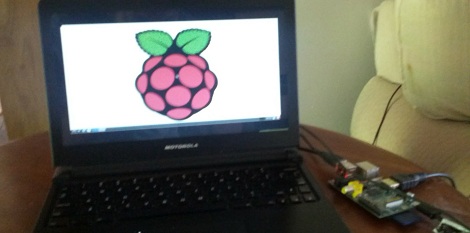
Being a $35, full-fledged Linux computer, the Raspberry Pi brings a lot to the table. There’s one problem, though: this computer doesn’t come with a keyboard, mouse, display, or even a battery. Luckily, it’s pretty easy to add these devices with the help of a Motorola LapDock and turn a RasPi into a fully portable computing platform.

The Motorola LapDock is the latest take on the dumb terminal. Consisting of only a 1366 x 768 display, keyboard, touch pad and 38Wh battery, the LapDock is meant to serve as a docking station and breakout for a few select Motorola cell phones. There are only two connections on the LapDock – a micro USB and micro HDMI port – connecting the peripherals to the cell phone. With just a few adapters, it’s possible to plug the Raspi into the LapDock, and have a Raspberry Pi-based laptop for under $100.

Interestingly, the Raspi can also be powered over the USB connection to the LapDock, meaning an external power supply isn’t required. Right now the state of a LapDock-ified Raspi is a bit inelegant, but we’ll expect someone to come up with a proper docking adapter to get rid of all the wires and add a WiFi module shortly.

via adafruit

Using The GPIO Pins On A Raspberry Pi

In addition to being a serviceable single board computer, the Raspberry Pi also has a header full of GPIO pins at your beck and call. [Tedbot] sent in a great tutorial on using these pins with Python, Bash, and C.

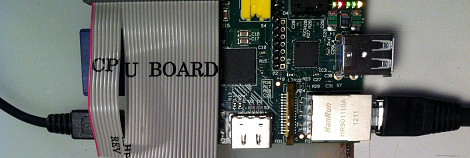
The GPIO pins on the Raspi are arranged in a 2×13 header. Until Sparkfun manages to manufacture a decent Raspi protoboard, the easiest way to break these pins out is with an old IDE ribbon cable. After plugging the other end into a breadboard, [Tedbot] had an easily accessible set of Raspi pins.

To control these pins, [Tedbot] found two libraries: the first is WiringPi that implements a C-style, Arduino-like programming environment on the Raspi. The second is the RPi.GPIO Python package. Since the Raspi runs Linux, and everything in Unix is a file, [Tedbot] used a shell script to blink a LED.

One word of warning if you’re building a board to extend the capabilities of the Raspi: these pins aren’t 5 V tolerant, so you’ll need to throw in a buffer or level converter when building a Raspi circuit.

Edit: Adafruit is releasing a Pi Plate prototyping board in a few weeks. Neat, huh?

Adding Wireless To The Raspberry Pi

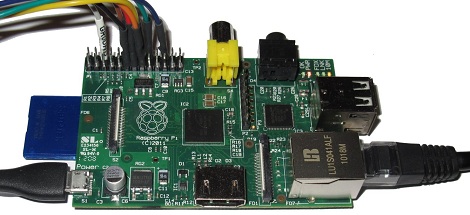
For those of us who haven’t received their Raspberry Pis yet, it may come as a bit of a shock to realize the RasPi doesn’t have an on board WiFi adapter. While the Model B RasPi has an RJ45 Ethernet plug, but the Model A must rely on USB-bound networking dongles. [Mike] over at Mitch Tech put up a great guide to using a Realtek WiFi dongle with his Raspberry Pi.

Stock, the standard Debian install recommended by the folks at Raspberry Pi has the drivers for the Realtek WiFi adapter, but no firmware. [Mike] goes over how to get the firmware for this series of WiFi adapters to keep the kernel from complaining. Interestingly, [Mike]’s instructions also work for a slew of Realtek-based wireless dongles, so the installation instructions should work for a bunch of adapters available from DealExtreme or eBay.

[Mike] also has a guide for installing Quake 3 on a RasPi. Combine these two builds and you’ve got the perfect setup for a Raspberry Pi LAN party. Anyone want to host?

Using Arduino Shields With The Raspberry Pi

Since the Arduino was launched years ago, many ‘shields’ or add-on boards providing additional functionality have been released. There are hundreds of different shields, from video capture shields to touch screen shields. Now that the Raspberry Pi is out in the wild, it was only a matter of time before a RasPi to Arduino shield bridge was created.

[Omer] calls his bridge ‘Ponte’ and it allows Arduino shields to be used with the incredible  horsepower of an embedded Linux system. While [Omer] originally expected to write the RasPi to Arduino software converter himself, but found WiringPi halfway through the build. Of course this build comes just a day after we saw a tutorial on controlling the GPIO pins on the RasPi, and we expect to see similar GPIO-hacking builds in the future.

Right now, the Ponte only supports Arduino Uno-sized shield, so the possibility of an all-in-one RepRap controller using the RAMPS motor driver is impossible for now. We expect that to change very quickly as more people get their RasPis delivered.

Controlling Raspberry Pi Expansion Pins With A Web Interface

For the lucky few who have a Raspberry Pi board in their hands, you can now use the GPIO pins as a web interface (German, google translation). [Chris] is turning this magical board is turning a small device that can play 1080p video into something that can blink LEDs via the web.

The build started with an example of driving GPIO pins under Linux. [Chris] cobbled together a bit of PHP and Javascript on the Raspberry pi. Whenever he goes to the website hosted on the Pi, he’s greeted with the status and direction of a couple of expansion IO pins.

On a semi-related note, [Tony] is building a GPIO MIDI interface for his Pi. Yes, he could just get a USB to MIDI adapter and call it a day, but this is a far more professional looking solution to all the MIDI goodness the RasPi will deliver. If you’ve got any info on other RasPi breakout boards you’ve seen, send them in on the tip line.

The First Raspberry Pi Build Is A MAME Machine

The Raspberry Pi was launched nearly a month ago, but these wonderful cheap single-board computers are still on their way from China to the workbenches of hackers and builders around the globe. Although they haven’t shipped yet, plenty of people are chomping at the bit to do something useful with the Raspi. [Nicholas] figured he should hit the ground running, so he emulated a Raspberry Pi to get everything ready for the MAME machine he’ll build when his new toy arrives.

[Nick] found a Raspi VirtualBox image on the official Raspberry Pi forums. After getting a web browser up and running with a few console keystrokes, he turned his attention to a MAME emulator. It’s a relatively simple install (although it did take six hours to compile), but we’re sure the Raspi will be featured in quite a few MAME builds so it was time well spent.

Sure, the Raspberry Pi you ordered a month ago is probably on a container ship in the middle of the ocean right now, but that doesn’t mean you can’t start planning your build. Just load up a VirtualBox image, check out a few of the tutorials, and you’re ready to go.